renovating day 1

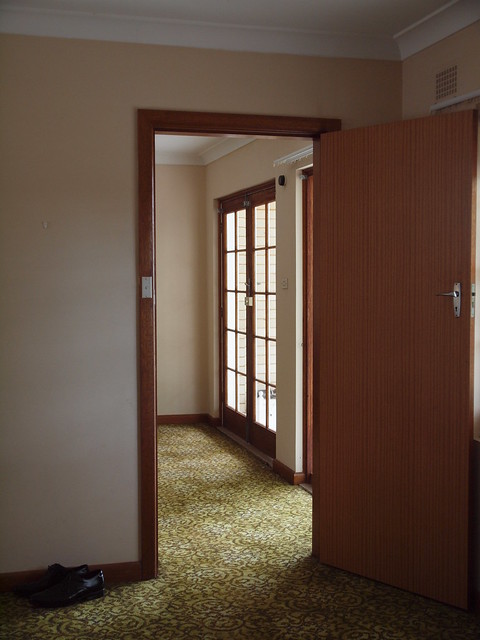
It was all happening here yesterday! And the smell of paint and dust took me right back to our last house. Yesterday was all about getting the built ins out, old picture hooks out, some doors out and holes in walls filled. That is a whole lot of brown……

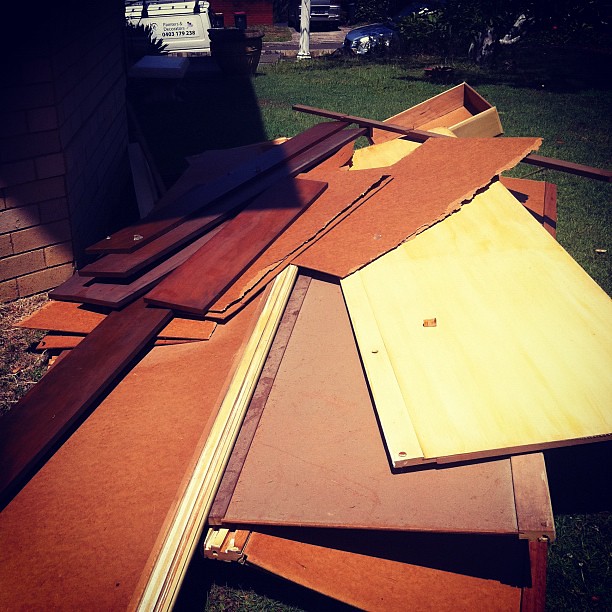
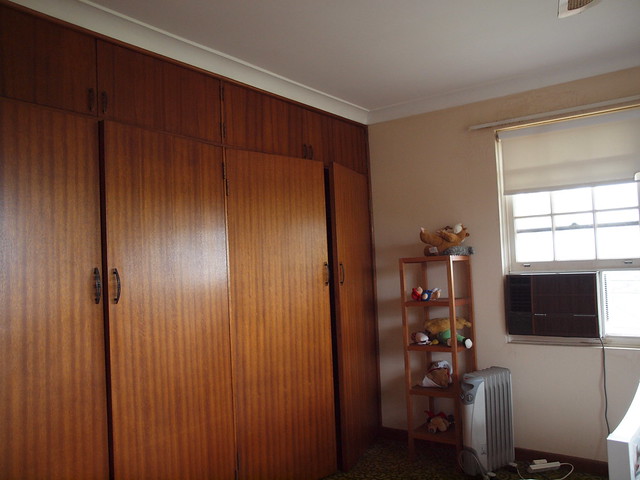
and it was great to see all it all out of the house! It had been on retro daddy’s to do list but it’s so much nicer when someone else does it for you and takes it to the tip too. Now in the twins room that window on the far left once had an air conditioner half in/half out of the window. Always a good look. It’s nice to see that gone and just have pretty windows .

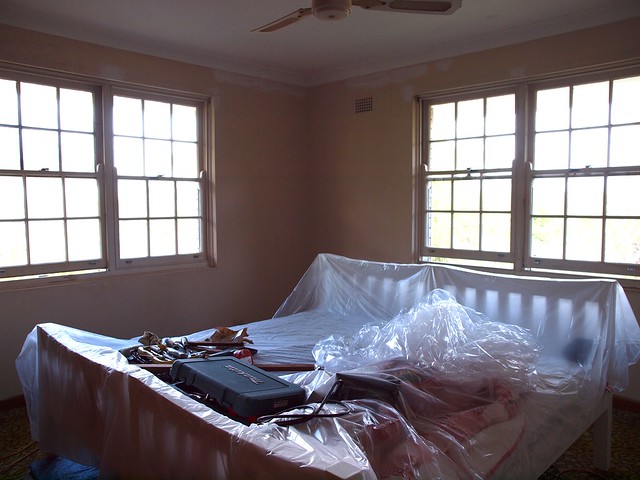
And this was once a huge brown shelving unit with desks attached to the wall. I couldn’t put the twins beds against it and it really took up a lot of space. It’s great to see it down and I can’t wait to see it painted. I know you’ve been wondering how we’ve been living in the house through this. Well the painters are starting with the twins room first upstairs and moving around upstairs before moving downstairs so that we can go and hang out upstairs while they work downstairs.  We only have to move out when the downstairs floorboards are being done and with the amount of sniffing and nose blowing (from me!) that is going on, well I can’t wait to move out for that job.

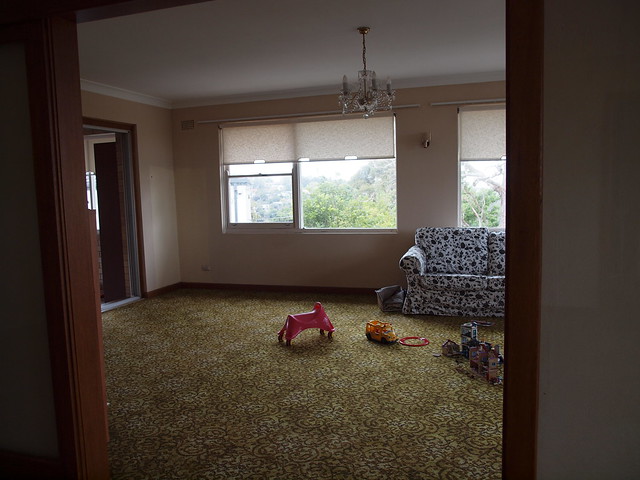
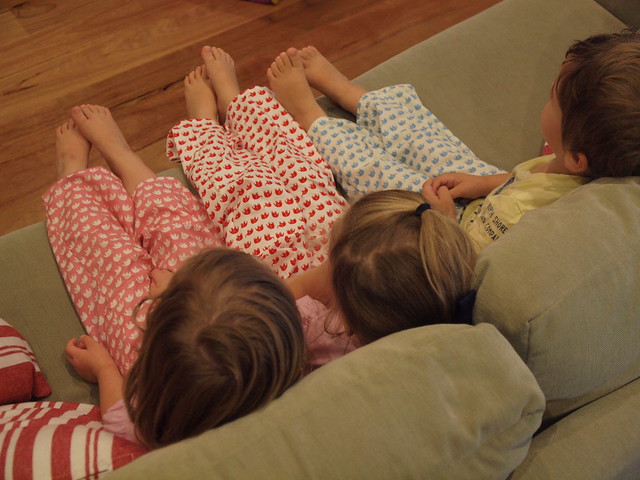
And with the twins bedroom covered in plastic it meant camping out in the loungeroom for the night. Never a complaint there.

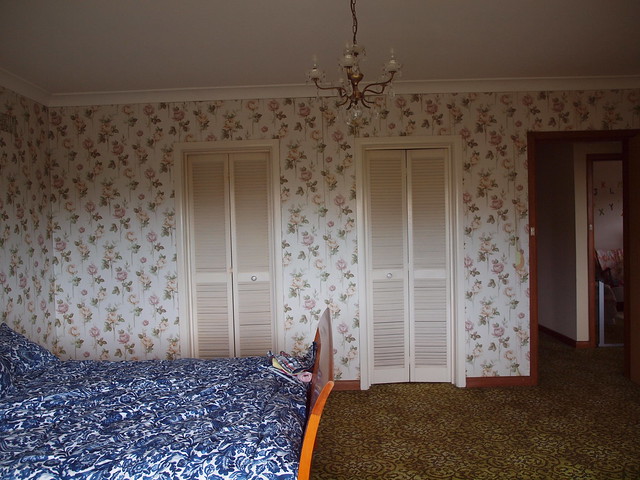
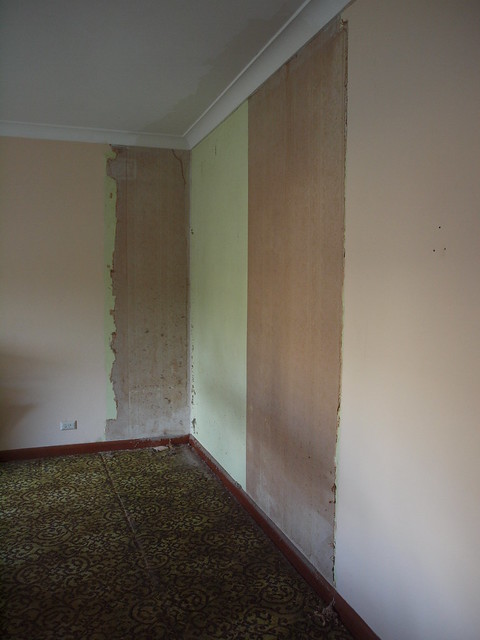
And you should always be prepared for some wallpaper in unexpected places………..like behind built ins. There was once a wardrobe here which hid a lot of my craft stuff. It was great for storage but was getting a bit old and smelly. Thankfully retro daddy took one look at the room and said I think we need to put another built in here…………..great news for me.

And that is day 1. It’s certainly a big job but it’s fun to go upstairs at the end of the day and have a peek at what has been done. Stay tuned……..

little lemon cakes

I went through all of the photos I took for this recipe but this is hands down my favourite – my little helpers in the kitchen. I love that I take photos of everything that goes on here and while I don’t share all of my family photos on here, I had to share this one. Keira always wants to help out with my baking and had a ball this afternoon. And if Elodie isn’t following me around the house then she’s following her big sister Keira. This is the kind of photo that I hope my little ones will love when they’re all grown up and want to know what life was like in our house growing up.

Now lemon and sugar is one of my favourite combinations. It’s right up there with chocolate and peanut butter for me. And so I found a recipe for Lemon Yoghurt muffins in a cute little book called Home Bake by Eric Lanlard. But the thing is that these are definitely more of a cake than a muffin and you get this little burst of lemon curd in the centre. Amazing. But if you’re a piggy like me and can’t wait to taste the cakes hot out of oven – well don’t with this one. Or you’ll get a burnt roof of your mouth like I did. Ouchee! I should have seen that coming.

I hope you enjoy this little recipe. I’ve adapted it from Home Bake by Eric Lanlard and converted it to the Thermomix. If I was making them for a breakfast or morning tea treat I’d add an extra 1/2 cup plain flour and 1tsp baking powder and the poppy seeds while leaving out the lemon curd. For a dessert or little adult treat then definitely pop the curd in the centre and stick to the recipe card. These would be delicious warm served with ice cream.

5.0 from 2 reviews
little lemon cakes
 
Prep time
Cook time
Total time
 
I've adapted this recipe from Lemon Yoghurt mufins in Home Bake by Eric Lanlard
Recipe type: Baking
Serves: 10
What you'll need
  • 150g unsalted butter, room temperature
  • zest of ½ lemon
  • 100g caster sugar
  • 2 eggs
  • 200g natural yoghurt
  • juice of 1 lemon
  • 200g plain flour
  • 1tsp baking powder
  • 1 tsp poppyseeds (optional)
  • a few Tbsp lemon curd
Instructions
  1. If you have a Thermomix then place strips of lemon zest in TM bowl with sugar. Process for 10 seconds on speed 9. Add in cubed butter and cream for 1 minute on speed 4.
  2. Add in eggs one at a time while machine is running at speed 4. Process 30 seconds.
  3. Add in yoghurt and juice and combine 10 seconds speed 4.
  4. Add in sifted flour, baking powder and poppyseeds and process on speed 2 for 30 seconds
  5. **Half fill a muffin tray or cupcake liner with batter (about a Tablespoon full) and place a tsp of lemon curd in the centre. Top with another Tbsp of batter and repeat with entire mixture. You'll get about 10-12 little cakes
  6. Bake in a preheated oven of 180C/350F for at least 25 minutes. You want a nice golden colour to the little cake.
  7. If you don't have a Thermomix then cream your butter, sugar and lemon zest. Add in eggs one at a time and mix well after each addition. Add in yoghurt and lemon juice and mix well. Sift in flour and baking powder and poppyseeds if you are using them. Follow from **.


the painter is coming

I always love watching those home shows when they bring in a couple of fresh faced, first time home buyers, they have a small budget but high expectations.  And they turn up their nose at everything. The decor – the paint or the wallpaper is old fashioned, the carpet is old and the kitchen isn’t to their taste. I want to scream out- paint it princess, get over it, this is what you can afford, it’s a start, go for it!

Yes. Elodie is photo bombing! Now when we first saw this house I totally saw past the decor. This is the 4th property that we’ve bought since we got married and I always see past paint colours or carpet or the style and see the potential. I also see what we can afford. And generally it’s of the renovators delight variety.

And so it’s been almost 9 months in our house but we are finally getting the painters in. From the moment we moved in, I have said we will need to get the professionals in to do this job. Occasionally retro daddy would say that he would do it. But he is one busy daddy and so we’ve saved and put a bit away until I got the OK to go and get a quote for painting.

The painters will be with us for about 2 weeks. In that time he is painting all the walls and windows and replacing the doors throughout the house. The only rooms we aren’t painting are the kitchens and bathrooms. The colour scheme will be similar to our old house. Dulux Vanilla Quake half strength on walls in living areas, entrances and hallways. Dulux Vivid White for trims. In bedrooms we’re going to go use the old faithful Antique White USA.

Floors downstairs will be stained a lovely dark colour in February and once the downstairs floors are done we are hoping we have enough left in the kitty to do the carpets upstairs.

What am I most excited about? Seeing the staircase painted, removing the very Laura Ashley in the 80’s wallpaper in our bedroom. And you’ve wondered why I’ve never shown you pics of my bedroom before. Well this is why. It’s just wrong in the decor department. Peeling wallpaper, green carpet, plastic chandellier and a total clash of colours with our bedding colours. Yes, they really did wallpaper over the wall vents.

After the paint, floors and carpet we’ll be saving again to do window coverings (then light fittings). I’m thinking roman blinds which I love. These blinds are so old that when I’ve started to pull them down they’ve just cracked and ripped like paper.

The painter is also painting all of the built ins and I’m going to replace the handles with something in a chrome finish. They are going to look amazing once they are done. That airconditioner stuck in the window will also be going. I really won’t be missing that feature of the twins room.

 And that is just a sneak peek of the before shots. We are very excited about having a house that matches our furniture and I can’t wait to share the progress with you……………………as well as take photos that don’t have green carpet or brown doors as the background.


quilt measurements for babies and toddlers

Oops one question I’ve been asked a few times since this blog post is ‘how big should I make my quilts?’.What a great and obvious question because not everyone has cots and bassinets in their house like I do. So I’ve grabbed the measuring tape and done a quick run around he house measuring and have the following numbers to give you…….and it’s a great excuse for a baby photo. I can’t believe this is my big baby almost 6 months ago.

a bassinet (well Emerson’s) measures 30 inches (length) x 17 inches (wide)

1 charm square sewn up makes a quilt with a finished size about 25 x 29inches without borders. I like to use this on bassinets and prams

2 charm square packs make a quilt 44 inches (length)  x 33 inches but of course this changes depending on how many square you have running down and across

Emerson’s cot measures 49 inches (length) x 28 inches (wide)

I hope this helps and if you have any more questions please ask. Now I’ve been asked if there are any Melbourne quilters who’d like to get together to make quilts so if you would like to then drop me a message in these comments and I’ll get you in touch with each other.

summer pasta

This recipe goes out to all the mummies and home cooks out there who say ‘enough with the macaroni cheese, stop asking me to make it every night….. I am a serious cook who needs some variety and I am over macaroni cheese. I know you all love it but I need a break’.  Now I know I’m not the only one who gets a little sick and tired of the same dinner request and just this morning Keira asked for macaroni cheese for dinner.

And since my Thermomix is back from the Thermomix hospital there was no better time to try something a little different.  Now a word about the Thermomix. I am often asked on Facebook what I think of it for large families. And I think it’s perfect. People often look at the bowl and think well that’s not going to feed my family. Now I’ll admit my guys are all little and don’t have big appetites – except for finn- so cooking any pasta or risotto dish in the thermomix always means leftovers.

But a large family with big eaters can easily do everything in the Thermomix. Sauces, steaming, pasta dishes, cookie and bread dough, cake batter and more. In fact you’ll find it more economical because you are making things from scratch. If you wanted to cook your pasta in the sauce like some of the pasta dishes are then you might want to do 2 batches but I do 2 adult serves and 4 childrens serves from 1 batch of pasta dishes in the Thermomix and have leftovers.

Anyway why I went off on that tangent is because for this recipe I did the sauce in the Thermomix and the pasta on the stove. Which is what I do when I want a cook a large quantity or don’t want to cook the pasta in the bowl. Whole dish is done in 20 minutes. This dish serves 4 adults and you can easily double the sauce quantities to serve more people


5.0 from 1 reviews
summer pasta
 
Prep time
Cook time
Total time
 
Author:
Recipe type: Vegetarian
Serves: 4
What you'll need
  • 2 shallots
  • 2 cloves garlic
  • 400g penne pasta
  • 1 bunch asparagus (woody part removed, rest cut into pieces)
  • ½ punnet cherry tomatoes (halved)
  • 4 heaped Tbsp light sour cream
  • 1Tbsp french mustard (I like a grainy mustard)
  • salt, pepper to season
  • 3 - 4 Tbsp pinenuts
Instructions
  1. Boil water and cook your pasta until al dente
  2. Meanwhile peel shallots and garlic cloves and pop in your TM bowl. Process on speed 5 for 5 seconds. I actually used 3 garlic cloves but I love garlic
  3. add in olive oil and saute for 2 mins, 90 degrees, speed 3.
  4. add in asparagus and cook for 2 mins, 90 degrees, speed soft and reverse. If you like your cherry tomatoes to be cooked then put in at this time with the asparagus.
  5. Add in sour cream and mustard and stir for 30 seconds, speed soft and reverse.
  6. In a frypan toss in the pinenuts and shake around a few times over a medium heat. Never turn your back on them but in a minute or two you will have some toasted pinenuts with a lovely bit of colour.
  7. Drain pasta and tip in sauce, season really well and serve with pinenuts over the top.
  8. This is also delicious cold. If you don't like cooked tomatoes just add them to the pasta and asparagus sauce as you are combining the two. I love hot cooked tomatoes but not everyone does.
  9. If you don't have a Thermomix, chop and saute your shallot and garlic in olive oil until soft. Add in asparagus and saute for a minute or so. Add in the tomatoes now or later. Remove from heat. Add in sour cream and mustard. Season well and combine with cooked pasta and top with pinenuts.


how I do wonky log cabin blocks

The very first quilting block I ever did was a wonky log cabin. It’s easy. And as I’ve pulled out all my fabrics in preparation for moving everything (and I mean everything) out of the downstairs of the house, I went through my fabric stash. I made a pile of boy fabric scraps and decided to make a few blocks for my little charity project here. Since my camera was also in the room I decided I’d photograph it too.

All you need to make one of these babies are some fabric scraps or strips of all different sizes and your sewing machine. You can use your scissors to cut pieces to size too. Or just grab out a pile of fabrics you’d like to use, no need just to use scraps.

First of all I like to make a rough block just laying out the fabrics I’m going to use. Don’t trim them or anything unless you’ve pulled out like a whole fat quarter and you want just a bit of a strip. As I’m getting ready to do the next strip I will grab scissors and trim down a scrap to the size I want.

Start with a little square. The beauty of this project is that no measuring is required. Say a couple of inches wide, it’s up to you! I used a green linen Echino fabric for my centre piece. You could fussy cut your centre piece so that the little design is perfectly centred in the middle of your block but the beauty of using scraps is that you can use what you’ve got and once the block is finished it’s going to look  great.

Now a log cabin works around clockwise from the centre and your 2nd piece is going to go above your square. And the 3rd piece will go to the right, the 4th underneath, the 5th piece will go the left. Now to get our block started, you are going to find a 2nd fabric, go for some contrast. This is where you have some fun digging around your stash or your scrap pile for contrasting fabrics.

Using a 1/4 inch seam you are going to sew with right sides together, the centre piece and 2nd piece together. Now you can go to the iron and press each seam as you go but I just open it out and press back with my fingers and keep it all very simple. I’ll press later. I like to keep this a quick project and learnt that little trick at a quilting group.

Now you’re going to take your 3rd piece and remembering that we are working clockwise, we are going to the right of the work we’ve done. the length of the fabric needs to be just as long or longer than the work we’ve done. Again, I just trim it roughly down to the size I want using my scissors. You can use a rotary cutter too but I like to keep these quick and easy and it’s more forgiving than a regular log cabin block.

Now can you see how my 3rd piece of fabric is on an angle. To make it wonky you can put the fabric on an angle rather than matching your edges together. You don’t have to do this and you don’t have to do it on every piece of fabric but it is fun.

Now we’re going to go to our 4th piece. This will be as wide as our completed block so far. I just grabbed a charm square from my pile and using my scissors cut in half. Remember we are sewing right sides together.

and once we’ve added that piece we’re going to the left of our block and adding a strip of fabric as long as our completed block so far. Right sides together and sew it. Press back with your finger or an iron and we can see the block taking shape.

And then it’s time to go above work with another strip. And this will be as wide as our block so far is. I love this Amy Butler fabric and it was a perfect match because it had green and blue but offered a real contrast.

Now you’ve got a good idea of what we’re doing. Going around and around. So you could keep the block as it is or go around some more. I was aiming for finished blocks of 10 inch blocks so knew I had another round to go.

And this is where I like to give my block a really good press. And now I’m going to trim it down to size. If you’re making a whole quilt it’s up to you what size you want. You could do 10 inch or 12 inch or have little 5 or 6 inch blocks. I was aiming for a finished size of 10 inches so I trimmed them down to 11 inches. But there is nothing stopping you making a few or all of your blocks and then trimming down all in one go.

And then I was done. One wonky log cabin block.

Here is a quilt I made when the twins were babies. I backed it in pink minkee and it is one of the little ones favourite quilts. It’s big, was fairly easy to put together (a beginnger could do it) and when the quilt top is finished you just match it with an easy backing fabric, right sides together you pin it all around and then sew it together leaving a little gap. Turn it out the right way through the gap you left, close up your stitches, top stitch all around if you like and you are done! You can use polar fleece too and it means no batting is required or binding and makes it a quick and fun quilt. Plus little people love the soft side to snuggle up in.

You could do as many blocks as you like, add borders to make it a bigger finished quilt, just do a couple of blocks and turn them into cushions..it’s up to you. This is a fun project and I guarantee you’ll enjoy it and it’s a great way to get started with quilting.

chocolate peanut butter brownies

I’ve been on a huge mission to declutter around here while I have an extra pair of hands (and eyes) to watch the little ones. I found one of my cookbooks which had a peanut butter brownie recipe. The thing is I never make any other brownie than my own recipe.

It’s a recipe I started making before I got married and over the years added more chocolate and reduced other things until I got it just right. And I mean just right so that it’s perfect!

So yesterday I decided just to add peanut butter to my best ever brownie recipe…………………….and it’s a winner! There is only one row of it left in a container and I’m not expecting it to last long today.

definitely give this a go and no better time than school holidays when little people are always hungry or looking for something to do. They were very popular here…………even elodie loves a bit of chocolate brownie.

I know it’s a bit obvious to most of you, but if you are making these for a kids party, school or church then make sure you leave out the peanut butter. No other change is needed just don’t add peanut butter to the mix.

5.0 from 2 reviews
chocolate peanut butter brownies
 
Prep time
Cook time
Total time
 
Delicious and so easy to make
Recipe type: Baking
Serves: 16
What you'll need
  • 200g block dark cooking chocolate (go for a good quality one if you can)
  • 100g unsalted butter
  • 2 eggs
  • 1 cup caster sugar
  • ⅔ cup plain flour
  • 1 tsp baking powder
  • 2 huge scoops of chunky peanut butter (so technical, I know!)
Instructions
  1. Break up chocolate pieces and cube the butter. Place in glass/microwave safe bowl and melt for 2 minutes 30 seconds on medium/medium high. Stir a few times.
  2. Add in eggs and mix in well.
  3. Add in sugar and stir.
  4. Add in sifted flour and baking powder (or just use self raising flour instead) and mix well.
  5. Add in peanut butter and stir well. You kind of have to break it up as you mix it in and make sure its evenly ditributed throughout the chocolate
  6. Spread into a lined square cake tin and spread towards the edges. Ask everyone to leave the kitchen to make sure that you get to lick the spatula yourself.
  7. Bake in preheated 180C/350F oven for about 20 minutes. A knife or skewer will come out clean but this is a moist brownie.
  8. leave to cool in the tin (only if you can!) or sneak out a row for yourself and then remove from the tin by lifting the paper. Cut with a sharp or serrated knife and enjoy
  9. this would keep for a couple of days in an air tight container but trust me we're lucky if this lasts 24 hours in this house

making quilts for dandelion support network

This morning I was up on the balcony in my nightie photographing a quilt that I’d finished last night. The very first quilt that we’ll donate to the Dandelion Support Network (read here if you need to catch up!). And I know that you have questions so here is what you need to know, all in the one place. And of course if I’ve missed something just ask me and I’ll add it here.

What are we doing

Let’s make cot quilts for babies/toddlers that can be given by Dandelion Support Network when they give a cot package. Bassinets are also given so if you don’t think you can tackle cot size then try bassinet size which is smaller.

What will you accept

Quilt tops that are of a suitable size for bassinet/cot

Quilt blocks that can be used to make baby quilts (say 5 or 10 inch blocks are a good rule of thumb and make it easier to join together rather than random block sizes)

Finished quilts that are bassinet to cot size.

Backing fabrics that are suitable for babies/toddlers and at least 1m in length and width.

Bias binding (you can make this yourself if you’d like something small to donate)

Flanelete and polar fleece in pastel or primary colours that are at least 1m in length as they make great quilt backings too

What shouldn’t we send you? 

Let’s make sure that what we receive can be used to make beautiful quilts. Please use fabrics that are suitable for babies and toddlers. That means it might be best to keep those skull and cross bone fabrics to yourself or any heavy brown florals for another project. Let’s make these bright and happy quilts to give some happiness to families who need a bit of a helping hand. Think whites, pastels, bright and fun, modern fabrics and use things you’d be proud to have your name associated with.

No money thanks, this is just about the quilts and they will be delivered by car so we don’t have any postage costs.

I have a quilt how do I get it to you?

In March we will do our first call out for quilts and blocks. I will provide you with my PO box or you might prefer to drop it in at our quilting day which will be held on a sunday in March or April on the northern beaches. Please don’t send me anything before then as I just can’t get to the Post Office everyday to collect parcels and the painter arrives in a week which means my house will be moved around everywhere.

What will happen at your quilting day

I’ll hire a community hall, we’ll sort through all of the parcels, work out what is finished and what needs work. We’ll piece quilts together, make up sandwiches, quilt them, add binding, make binding and finish them. We had a great time doing our Quilts for Queensland day last year and everyone was given a job and it was a great day of craft and friendship. Beginners learnt a few things and everyone is welcome. If you can sew, then we’ll have you. You’ll do. Details of the day will be announced in February but I promise you a fun day.

I’m a beginner can I still help?

You bet! What a great place to start. We’d love to have your help

I live in Melbourne and want to make a quilt for St Kilda Mums

A few of you said that you’d like to help  St Kilda Mums. Because I want to keep the donation of the quilts local and this project manageable, I am just focusing on Dandelion Support Network this year. The idea being that I can deliver them and get some sydney ladies to help me. If you live in Melbourne and want to help St Kilda Mums then please make a quilt yourself, get a group of ladies together and donate some quilts directly to them.  Now you’ll find their details on their Facebook page. I’m so sorry that at this time it would just be too big a job to incorporate both but I know some of you love a challenge and will help out. Maybe that’s the project for 2014!

Do you have any patterns you’d recommend for a beginner?

There are so many great patterns out there. You could just grab a pack of charm squares, join some strips together, make applique or whatever you like. A few good tutorials if you’re after them.

Diary of a quilter baby quilt

Moda Bakeshop

pinterest

strip quilt tutorial

easy pinwheels

self binding baby quilt

Got a question, just ask!

looking back on 2012 – the sewing and quilting

I’m not just a knitter. I’m so lucky to have a more expensive hobby like quilting up my sleeve. Quilting is so addictive but it’s not the cheapest of crafts. I was recently trying to explain the costs in putting a quilt together – the fabrics for the top, fabric for the backing and then batting. You go through lots of thread and once you get addicted to new sewing machines and having bigger and better……….well you have yourself an expensive hobby. But gosh I love making quilts for my house and to give away as presents. They are so special.  Unfortunately 2012 was not the year of the quilt!

appliquing the little ones on

I didn’t really get many quilts out this year. Oops! I started well and then it was all downhill after that. I finished this one on the 2nd January………………………this was just 196 squares that I cut using my Go Baby and joined together. I love it because it’s girly without being too pink and girly. It goes beautifully in the twins room now as finn has blue and red. Blogged here.

she loves it

And then while I was on a roll in January I put my Grandmothers Flower Garden together. It took me forever to do the hexagons but  I just took my time with it. These hexagons were all hand pieced, machine appliqued to white squares and all the squares were joined together before the smaller flowers were appliqued on. For machine applique I am a huge fan of the blanket stitch. I think getting a machine with blanket stitch is one of the best things you can do. It looks like a comb on your machine and just makes applique look beautiful. I’m often asked if I’ve done it by hand. Um that would be a no. I blogged this quilt top here.

one of my favourites

holding it up the wrong way around

And the finished quilt should look something like this……..I’m actually holding the quilt on it’s side in the pic above. Took me a while to work that one out but you get the picture.

working towards

I also made these quilt blocks – but they are now in a pile in my sewing room. Love the excitement of a new project then I get busy…..

Making Baby's First Quilt

And the only other quilt I made start to finish was for Keira’s teacher. Oh dear, 2012 was definitely NOT year of the quilt, was it? I love the colours in this quilt and everything about it. So does keira’s teacher. Hope keira loves her new teacher for 2013 because I’ll probably do it all over again!

And although my quilting output was down, there was some sewing to share! Emerson got 2 pairs of quick change trousers made for him. Blogged here. Love this pattern, if you can get your hands on it these are well worth making. They last a while in terms of sizing, are fun to make and look at and are so lovely to wear. Well I’ll take the little babies word on that one

There were also pj’s for little people…..this fabric was a cute find up at Spotlight and I loved making these up. Blogged here. My guys still love these pj’s but we tend to mix it up and often keira is wearing someone else’s.

3 pairs pj pants

all in a row

And then I made more pj’s! These really are easy, I find it hard to buy pyjama sets when it’s so easy to whip up a pair of pants for your little ones. I blogged these here and used the great pattern from the Make it Perfect book. What I tend to do is make a size 4 or 5 for the twins and then add a bit of extra length when I’m cutting them out and sew them for keira. Saves lots of time and you’d never know as pj pants are meant to be roomy. I must make myself a pair soon.

sewing

When the weather got warmer I did a couple of dresses……………..this was the first one. I wasn’t too impressed with the instructions but it turned out to be a cute little dress that Tillie adored. Blogged here.

And I made a dress for elodie that turned out huge so that went to tillie. I love this japanese fabric so much. It’s simple and pretty and this is another of tillie’s favourite dresses. Blogged here.

Elodie has a new dress! There were lots of breaks to feed Emerson, make lunch, change nappies, keep elodie entertained!

And by this stage keira was insisting that the next dress was for her. And I obliged with this cute little number from a modkid pattern. This really is a pretty dress. Although I made a boo boo with my overlocker it all turned out fine in the end and is one of keira’s favourite dresses. I blogged it here.

Ta da!

Oh and I almost forgot, one of my favourite things to sew when I’m rushed for time but dying to use new fabric – quick skirts. Love these. Blogged here. Just a rectangle, sew a side seam, hem it, make a waistband, thread some elastic in and you are done! Blogged here and here.

quick outfit

dusted off the machine

love this little waistband

And that’s that. I can’t beat myself up too much about the lack of sewing and quilting because I had a baby but I’m definitely hoping to get lots more sewing time next year with the twins at preschool for 3 days and my two babies loving their big afternoon naps. Well that’s the plan anyway.


looking back on 2012 – the knitting

One of the hardest things for me is finding time for my craft. It’s such a fun and essential part of my life but so hard to sit down and do when people need to get dressed or be fed or the house needs to be cleaned. But for my own sanity I need to have knitting nearby or be sitting at my machine. Some people run, some people eat chocolate………………I craft. Ok I eat chocolate too. Knitting, sewing, quilting, crocheting, stitching. It all gives me huge satisfaction, lets me destress and gives me something that is mine. Oh and saps my bank account dry because I love to shop craft.  Here is baby emerson modelling the puerperium – blogged here and ravelry details here.

And while I’m not crafting as much as I’d like,  a quick look back through flickr and my blog reveals it wasn’t all that bad. I did finish things………….and start things. I’m always starting a new project and whether I finish it or not is another matter. And I knit 2 baby kina’s this year. My nana was telling me that when she googled the kina pattern it kept coming to my blog. Oh yes, that would be addiction to the kina. I’m surprised I haven’t cast one on over the holidays. Ravelry details for my kina’s this year are here and here.

and I knitted my first Milo and tackled my first cable. It was easy. What was I worried about? And when I look at this photo I realise I’m not over having babies. Uh oh. Blogged here.

I crocheted emerson a little blanket since we were swimming in girly girl pink blankets. Blogged here.

 modelling it

I also made emerson some super quick and easy baby facewashers. The kids adore these and I really think they are the perfect project when you don’t want to tackle a big project. But you won’t just make one. You’ll make a pile of them. Blogged here and ravelry details here.

facecloths

I also made elodie a super cute little coat. I adore this coat and will get another winter out of it. Great little pattern and I’ll be making emerson a little boy version before winter is here. Blogged here and ravelry details here.

ear muffs

 I made a cardigan for another little elodie which was so adorably cute and kept me busy while we were living in the serviced apartment waiting for this house to settle. This is a lovely project. Blogged here and ravelry here.

love the neckline

I whipped up a super quick baby cardigan which really is a favourite of mine from Last Minute Knitted Gifts. I’ve made this a couple of times and it never disappoints. Blogged here and ravelry here.

all ready for baby

And the last thing off my needles for the year was a cute little cardy for elodie. Called In threes this was easy and fun. Blogged here.

and my top tips to get more craft into your life. Have a few projects ready to go so that if you’re going somewhere with time to spare (dr’s surgeries are my favourite) then you can quickly pop it in your bag and go. Always have your machine out and a pattern or fabric nearby. Set aside time on a weekend when your other half minds the little ones and you get some time to yourself. And my best ever secret – learn to love night times and stay up late in peace and quiet!

merry christmas!

Wow, it’s 12.41am on Christmas morning! So I can officially wish you a very Merry Christmas………..from my family to yours. I hope you have a wonderful day and enjoy the Christmas spirit. Wherever you are and whoever you’re with. Eat more than you think you can and at the end of the day make sure you put your feet up and be proud of the day. I know all too well that it’s the mummies that do a lot of the hard work at Christmas. to make it the special day that it is

And my Christmas Eve was no exception. First one up in the house and last one to bed – oh no wait, it’s early morning and I haven’t gone to bed yet. My day started at 6am when I woke up, made coffee and headed down to the shops to do a grocery shop, buy fresh flowers and a new hydrangea plant (that was not on my list) and a couple of last minute things. Back home, up to the cemetary to make sure there were flowers for Christmas eve, home and baking when I realised that my Thermomix had well and truly decided it was sick.

It’s being collected on Thursday to go for a service and I’ll have to write another post about the absolutely amazing service from Thermomix today. My KitchenAid has been working overtime in the meantime and I had to rummage around for a lemon zester because I usually do my sugar and lemon together.

Christmas Eve mass was lovely……………except every family needs a runner who loves to explore the alter. Elodie is the only one who loves to get up there and it was made worse by the boyfriend she picked up in the seat behind us. They became little buddies following each other everywhere.

I’ve never seen anything cuter………….until I had to get up on the alter myself and get her off it

And it wouldn’t be Christmas eve mass if the priest didn’t do a bit of gangnam style with the little ones. What? Oh yes, at the end of the mass our lovely young priest got all the little ones up for a final blessing……………….and groove.

And you thought I was joking!

And with that I will leave you. Have a simply wonderful day. Christmas is so special when little ones are around and magic is in the air so enjoy it all. For those of you missing loved ones I’m sending you a big virtual hug that you keep them in your heart and with you today. And I hope that the true meaning of Christmas is alive everywhere today.

All my love,

Corrie and family

my pet project for 2013

Earlier this year I discovered through facebook a lovely charity called St Kilda Mums. They take baby equipment, clothes and toys and deliver them to mums in need. Some of their requests are so urgent. Women who are living in refuges, have no family, no money, none of the necessities that we mums take for granted. I wanted to help but felt so far away. I then discovered that they had a sister agency called Dandelion Support Network in Sydney. I liked the facebook page and just reading some of the stories make me get a little teary. Things that we take for granted like a place for a baby to sleep, nappies, a nursing bra or a pram.  To me they are the basics but to some people in difficult situations these are big items.

Requests will come in from agencies or social workers and often are urgent requests for a mum coming out of hospital or who is homeless or leaving a refuge. Or it could be someone doing it really tough. I sent a few Christmas gifts to them to give to children but I knew I wanted to do more. It’s been sitting at the back of mind for a few weeks and I was trying to think of a way that we could do something else. ‘We’ being me and my amazing readers. And then it occured to me………………….QUILTS!

I asked if they had someone making quilts for them and they did have a local quilting group make them up so that when they gave away a cot they gave a quilt in the bedding pack too. But they are all out and the group doesn’t make them anymore. It was a sign. I had a job. A pet project to organise.

So next year I’ll be calling on you my lovely readers and quilters to get sewing and quilting. But I’m going to be a little bit smart about it all. I don’t want the avalanche of quilt blocks on my doorstep like Quilts for Queensland. As wonderful as that experience was I’d be trotting up to the post office every few days and I can’t get my pram into the post office these days without taking out a whole card display or a person. Last week a total stranger offered to sit and mind my pram while I went in.

So I’ll only ask for things to be sent during one month (say we do it 3 or 4  times a year) and at the end of that month we’ll have a working bee here in Sydney and work like busy bees to make and finish quilts. I figure we could run 3 quilting days next year and really make a difference. Plus it’s a great way for mums to get together to help other mums. But you don’t need to be a mum to help. Obviously.

So that’s that then. I’m going to think about some specifics and measurements but just wanted to put it out there as I was so happy to hear that they needed our help. Giving is better than receiving and on this Christmas Eve I wanted you to get excited about it too. Because I’ll need all the help I can get.

it’s beginning to look like Christmas

As I started writing this post I thought to myself this is a keeping it real post. Because this is one last minute rush to Christmas at our house. And some things are not going to plan. Like having to go to the dr’s today to get emerson’s immunisations as we’re behind schedule. Instead of him sleeping all day like my other babies have he’s been crying all day and very upset. But thankfully has just woken up smiling. Phew. We’ve dubbed him Australia’s happiest baby…..

Thankfully all presents have been bought and almost wrapped except for Santa’s of course because we are waiting for him. But the tree is definitely not styled by me – we decided to put it upstairs in the kids loungeroom and I think they’ve been redecorating every night. And putting 2 decorations on each branch.

Half of the food shopping is done because I love to get up early on Christmas eve and get all my fresh stuff and seafood. It’s a tradition I used to do with my mum and it’s a bit lonely now but something I can’t give up. Tomorrow we’ll go up to the cemetary with some flowers. The hardest time of the year for me is Christmas. She’d normally arrive on my doorstep with so much food, special Christmas plates, champagne and presents.


The Christmas menu has been finalised. Nothing too fancy and lots of old favourites. Everyone loves ice cream pudding on Christmas day and one year I made it from scratch but when I made it the cheats way no one said anything different so now I always do it the cheats way which is to mix fruit mince into ice cream and refreeze. Retro daddy is JUST going to love that I’ve shared my handwriting with you. If I have to write a card I use my best writing, if I write a list or a shopping list I use my super fast writing that he can’t read. I’m used to the occasional call from the supermarket asking what I meant to write.

The tinsel on the stairs is missing a lot of leaves and tinsel. Finn and tillie love to go up and down taking tinsel bits with them as they go. Next year I won’t be doing the tinsel on the stairs so they might as well make the most of it this year. And this may be the last time you see my brown staircase because the painter arrives the 2nd week of January to paint every wall and every window in our house! It’s exciting stuff and I know it’s going to make a huge difference to the house.

I managed a trip up to Spotlight today as I wanted some white homespun to get quilting over the holidays. 75% of Christmas fabrics was too good to say no to and so I came home with 4metres of a red glittery organza kind of fabric that has brightened up the Christmas table and received lots off oohs and ahhs from the little ones.

The nativity scene is waiting for Jesus and the manger…………I will probably have to fish them out from the bottom of a toy basket since elodie has worked out how to climb onto the piano stool and play with them. I bought an extra set of the nativity scene this year and we’ve still managed to lose Jesus!

And now I’m trying to clean the house for our visitors on Christmas day, make a bed for Grandma Betty, keep emerson from crying, keep little ones busy (we cracked open a jigsaw and a packet of jatz) and hopefully get a batch or two of cookies in the oven. Tomorrow night I’ll be back with photos of Christmas Eve mass – one of my all time favourite things about Christmas. I look forward to it so much and can’t wait to see 2 angels up on the alter. We did have a shepherd but he’s got a serious case of stage fright and pulled out.

 Please tell me some of you are last minute too……………..

retro mummy’s favourite Christmas recipes

I can’t believe how close we are to Christmas and that I still have presents to buy for and haven’t made 50 million batches of rocky road this month. Thankfully I planned out my Christmas menu here which is one less thing to worry about when you’re hosting Christmas lunch. Anyway, if you feel like you haven’t really gotten into your Christmas baking yet then relax……….here are my favourite recipes that are quick and easy and that you still have time to shop for ingredients and make.

Pineapple fruit cake is my new go to fruit cake recipe. This is quick and easy and you can make it the night before and enjoy it on Christmas day. The kids love this one too and if you’re not a fan of a super dense fruit cake then you’ll love it. You’ll find my recipe card here.

The best salad has to be my pumpkin, spinach and feta which never fails me. I’ll be taking it along to our family Christmas on boxing day as it’s always a crowd pleaser. Recipe card here. I really hope Aunty Kim is making her changs noodle salad – is that not the best salad ever too?

For the perfect Christmas breakfast why not start with some Orange and Maple scrolls. These are easy and tasty and don’t have all the butter of Cinnamon rolls. My recipe is here.

But if you’re all about the butter and indulgence then you have to do PW’s Cinnamon Rolls. That lady does the best cinnamon rolls. I’ve put some hints and tips and link to the recipe here. But don’t come back and complain to me how many you ate………..I take no responsibility for that!

And here is a little list of recipes to keep you busy

artichoke tartlets

White chocolate rocky road

Milk or dark chocolate rocky road

Retro Mummy’s rum balls

Little Christmas puddings

Snowballs

Cranberry & Pistachio Shortbread

Gingerbread Cupcakes

Fruit & Nut Biscotti

Honey, orange & cinnamon madeleines

Mini fruit cakes

Sweet potato and feta frittata

 after the 2nd baking

 If you have a favourite Christmas recipe you’d love to share with my readers just let me know………….we’ve still got time!

out past my bed time

Last night I snuck in the door at almost midnight and tried not to wake anyone up. Oh no wait, I went straight to our bedroom and told retro daddy that I was home and checked in on my babies. I never really go out late. Certainly not on  a Tuesday. I’m kind of jealous of people that get to go to this and that and leave their little ones so easily. For me it’s a really big deal because I have so many.

I had a fabulous day with some fabulous ladies (and men!) and even though I had my doubts on how on earth I’d last until dinner at 8.30…. I had a ball. This was my dessert which I ate at about 10.30! Once I was out I stopped worrying that something was going to happen at home. But getting out the door and into the taxi I was running through things with retro daddy and he was like ‘go go’ and I was like ‘ok wait but I didn’t tell you what to do’……….It’s a hard juggle no matter how many children you have. The best comments I got last night were ‘wow you have 5 children, I thought you were 21!’ Why thank you!

This morning I smothered my babies Emerson and Elodie in kisses and cuddles. I missed them so much. The big kids were happy to see me but more interested in the last day of school and what keira was going to wear for mufti day in her house colours. The mail man had 3 parcels at the door and thankfully they weren’t to be hidden away until Christmas because I think there are only so many times I can tell Finn it’s more fabric. He’s taken to shaking parcels and then I heard a big ‘ohhhh what came from Jigsaws Delivered’! Uh oh, busted!

Retro daddy’s work outdid themselves with this lovely present for me………………………..the red box is hiding a bottle of Veuve which will be lovely for Christmas day and those Lindt balls have my name on them……every SINGLE one! I hope no one wants to share. Elodie has a bit of a thing for them too.

And the super lovely and talented Kate from Uberkate made me this stunning necklace for Christmas. I’m not sure how many ways I can say thank you for this. It has all my babies on it and is just stunning. If I think people are looking down my top I’ll remind myself it’s the necklace I’m wearing and not my lack of cleavage that they are taken with.

My day gets better though…..so long as I keep up the coffee drinking……..I’m delivering a red Kitchen Aid to a very lucky lady and then I’m getting my hair done. It might be crazy busy here but I’m definitely starting to get excited about things winding up and a little break here at our house. Quilting and cooking are on my agenda…………..retro daddy has suggested that decluttering and cleaning be on my agenda. We’ll see. What are your plans?