you still have time to start a quilt for Christmas

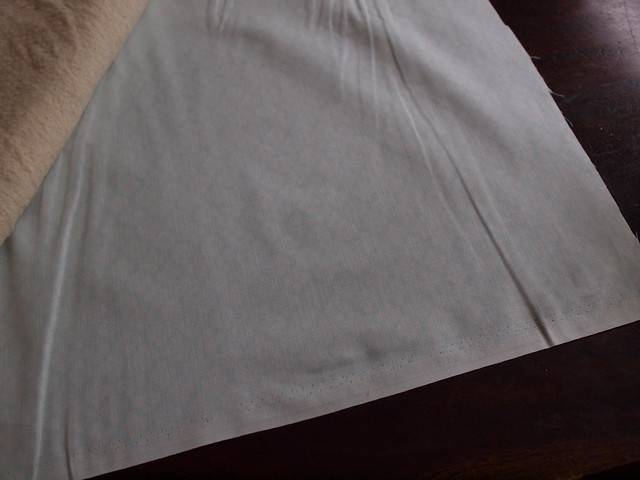
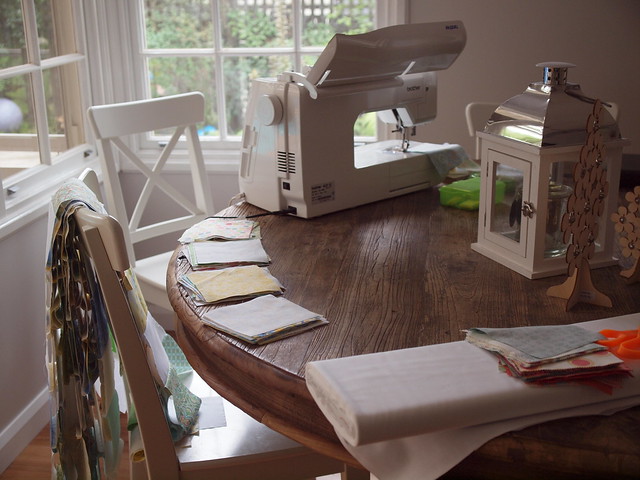
As I was sitting at my computer (in my craft room) this morning, I was thinking to myself……..I still have time to whip up a quick bed quilt for Christmas this year. Tillie would love one for Christmas. It’s not impossible. Let’s go back to 2011 when I said I’d make my dear grandma betty a quilt for Christmas. I started on the 20th December, you can read about it here.

quilt in progress

making a single bed quilt for grandma

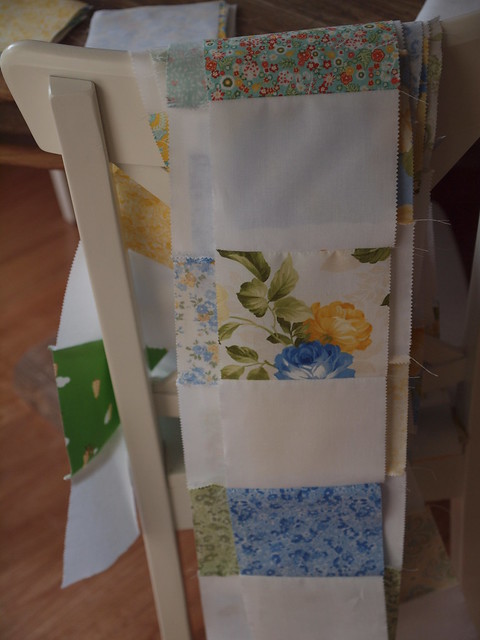
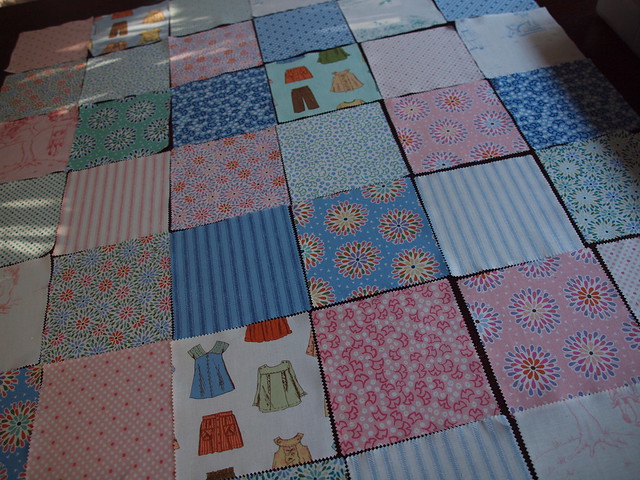
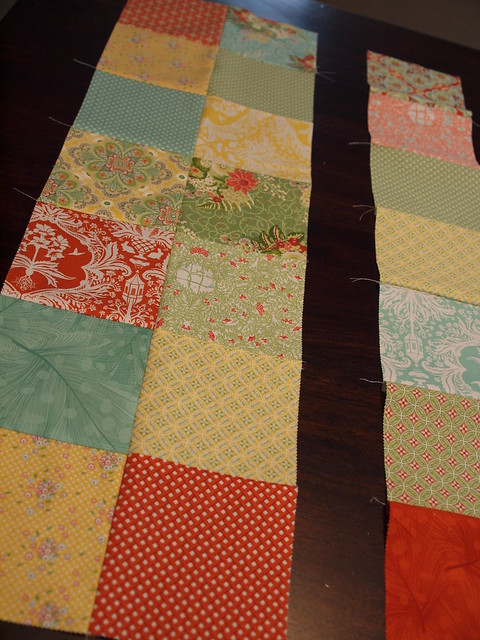
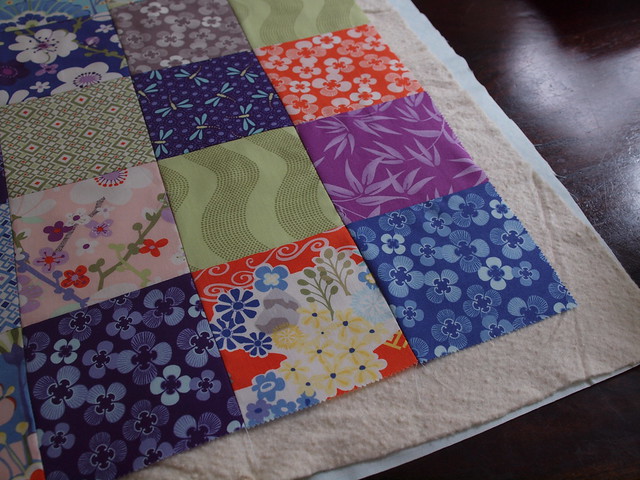
had the quilt top finished on the 23rd

Me And The Quilt Top

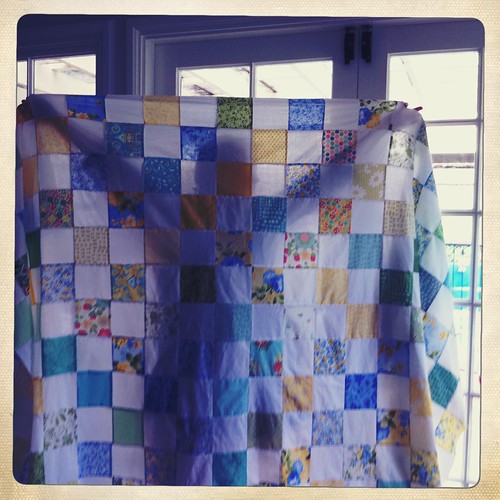
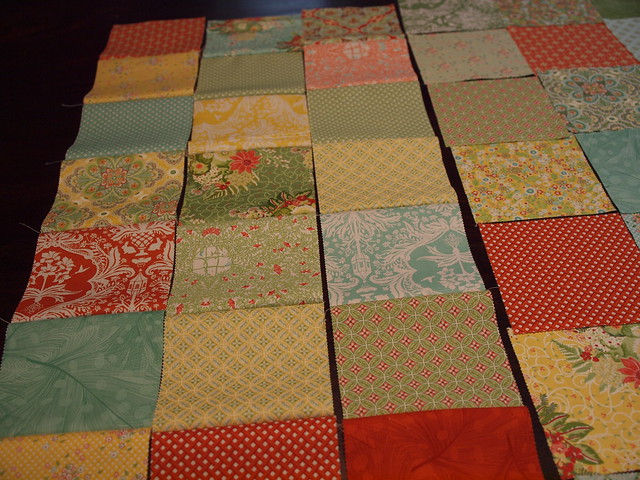
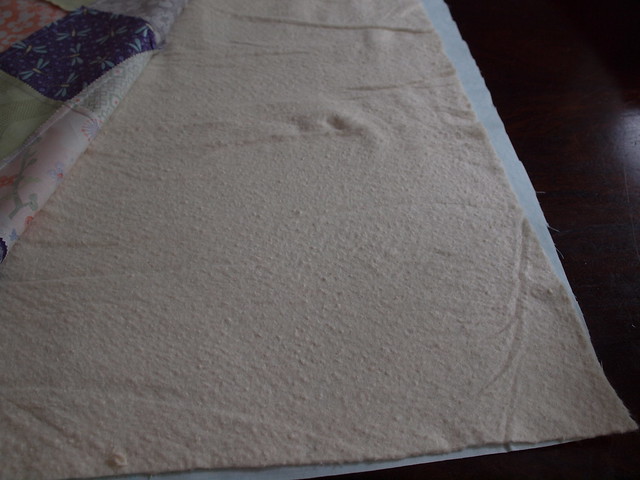
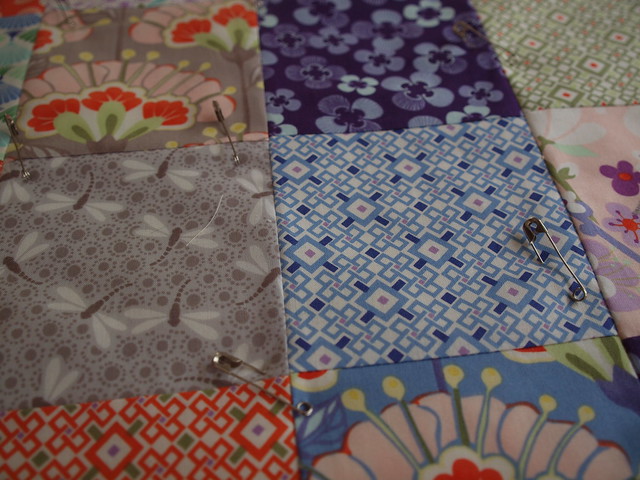
And it was finished in the early hours of Christmas Eve here.

one finished quilt for grandma betty

big quilting

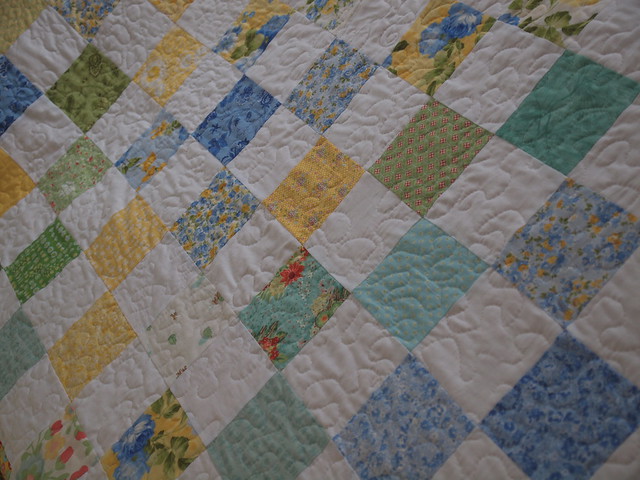
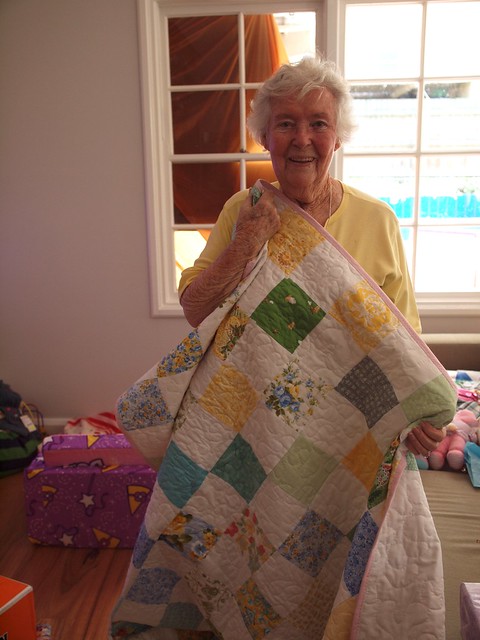
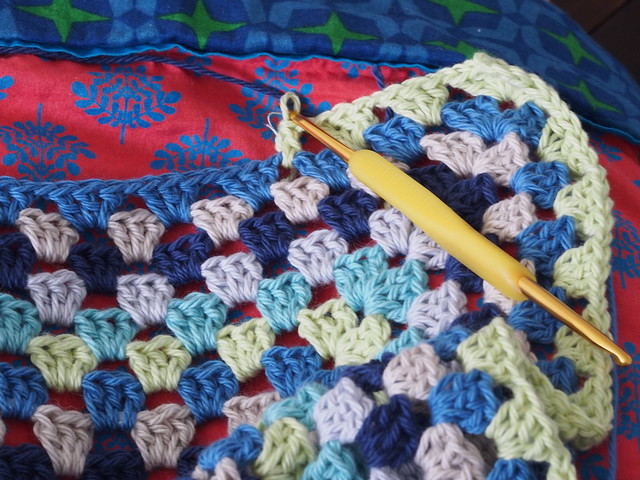
and loved by grandma betty on the 25th December! So what are you waiting for…..get a head start and get quilting. And watch this space to see if I can get my own butt into gear and get a quilt done by Christmas.

a week of emotions

Phew…….emotions are running high with me at the moment. And it’s like a rollercoaster. Last thursday I had a great night out with retro daddy………..dumplings and shopping. Two of my favourite things to do. In the early hours of Friday it was a serious low point and as the day progressed I had my very first moment where I thought I could walk away from this. Just switch off the blog and walk away. I’ve never had a moment like that before but it was awful. I felt sick about it all day, didn’t eat (until dinner when I realised how hungry I was) and had to seriously think why. Why do people have so much hate for me and what I do. I mean it is unbelievable the lengths that people will go to and they see no wrong in it, there is no accountability, no name or photo to what they say, what they google and share in their free time. The things written about my beautiful baby girl, the suburb where I live, my weight according to photos (am I underweight or overweight or pregnant) and so on….they just keep going…nothing is off limits to these people.

I don’t know what the direction of my blog is or what it will look like next year. Elodie is off limits. You don’t just say things like I knew from the moment I saw a photo of her as a baby that something was wrong and I made my husband come and look at the computer to confirm it for me. Why did it take her 3 years. I mean who writes that stuff. But then it just got worse.

At the end of the day there are tens of thousands of good readers. So many beautiful people out there. And at the end of the day I have a beautiful family and life and I live for them. I am 100% devoted to my family from the moment I get up to the moment I go to bed….and get woken by a little person and get them back to sleep. That is my life. And I share it because it inspires others and because people relate. I’m not perfect but I’m a good person. I prayed about what I could do or say about this and everything came back to turn the other cheek. To love your enemy. That wasn’t working for me last Friday. Or Sunday. Or today.  Trust me….I’m working on it.

And my mind can’t get around the fact that our kids today have a problem with cyber bullying and yet mothers are doing it to other mothers. How on earth can we protect and teach our kids about how to deal with it when mothers are doing it. If it is hard for an adult to be on the receiving end then imagine someone who doesn’t have the same maturity or perspective trying to deal with this kind of hate. I don’t understand. I can’t even comment on the facebook posts where there is hate for a woman posing after a baby in her swimsuit. Who cares. Don’t leave your insults about her. It doesn’t concern you. We are turning into nasty people because we have no face on the internet.

I threw myself into family life this week. Bursting with pride over preschool reports, helping with the school concert and dressing the kids and seeing my gorgeous girl perform, seeing my big boy go up a level in swimming after a short time and just hanging out at home with a bit of craft and the kids. Whatever happens I’ve got a great life and if that upsets you or makes you want to spew out your hate then I think the something that is wrong is with you. Not me. Life is too short to spend your time on the internet concerning yourself with me…..you worry about your own life and your own kids and you leave the rest to me. What is that saying about watering the grass on your own lawn…….something like that.

Oh and the universe is funny…..this week I was contacted by a popular magazine for an interview and I went up a tier with my agency. Life really is about the highs and lows………….and my week has been all about that.

how to make a charm square quilt – part 1

GREAT NEWS! YOU CAN FIND THE FULL TUTORIAL HERE

If there is one thing I get asked at markets, it’s how do I make a little quilt from charm squares. And I would always send people off to other people’s tutorials. But here it is. Finally. At last. How I make my quick charm square quilts. No nonsense. Just basic steps. I’m no quilt expert but this is how I do it and it works well for me.

What you’ll need
1 pack charm squares (each pack contains 42 x 5 inch squares)
cotton thead for your machine (I just use regular Gutterman poly/cotton in white or neutral)
1m of 100% cotton fabric for backing (at least 110cm wide)
1m batting (I use cotton batting but whatever you have or is in your budget)
pins ( I like to use quilting pins with little flower at the end. They are cute, long and easy to find)
quilters safety pins
about 4m bias binding (I use premade 100% cotton binding available at Spotlight/patchwork stores but you can make your own. I’ll talk about that later)

What to do

1. Open up your charm squares and lay them out on a flat surface. You can choose a random pattern with colours and patterns all over the place. Or go in diagonals with all of the same print in one diagonal and another design next to it. It’s up to you. I like 7 squares down by 6 across and that is what I’ve assumed for this tutorial but it’s up to you. For a table runner you might like 3 or 4 across and more squares down. You choose. If you’re really getting stuck then take a picture and decide if you are happy with the layout.

cape ann

laying out the charm squares

2. now we are going to join our squares together. We are going to go down vertically joining each square to the square above us so we will have a row of 7 (if you’ve chosen a 7 down by 6 across quilt). Then you’ll do the next row and you’ll keep going until you have 6 rows of strips. I use a 1/4 inch seam on my squares and have a 1/4 inch foot for my machine. You can pick them up easily if your machine doesn’t come with it. It’s up to you .

1/4 inch foot on my brother sewing machine

 If you are starting out and don’t have a 1/4 inch foot or are confused use your regular seam allowance that you would use sewing (say 1/2 inch) and be consistent the whole way through. If you can get a 1/4 inch foot it’s a great investment and the seam allowance used in quilting. Alternatively you can measure 1/4 inch out from the centre needle position on the machine and place some tape down on the needle plate and use that as your guide.

getting ready to sew the first seam

3. So pin your first 2 squares together, make sure all edges are matching up, pin carefully down the sides you are joining together. And starting from top to bottom sew down in an even line. Make sure the edge of your fabric is in line with the edge of your 1/4 inch foot or the guide you are using. This will ensure you have neat stitches and matching seams when it all comes together.

finished 1/4 inch seam

4.  Now press your seams to one side or open flat. You can press your seams all in the one direction or press darker fabric seams away from the lighter fabric. It’s up to you. I like to go darker or patterned fabric pressed over to the darker fabric side or which ever way the seam wants to go. Repeat for all of your rows and be consistent with whether you’re pressing open or to a side.

sewing the rows first

5. Now we are going to join our rows together. We are going to join our first row to the second row and press. Then we will join the next row (our 3rd row) to the two we have already joined and so on. So with right sides together and starting with your first square you want to pin down the seam ensuring the seams are aligned in each corner. So where you have joined 2 squares together will match where you have joined 2 squares together on the other row. This means your corners will match on the finished quilt.

matching up those seams

Pin well (I like to pin a few cm’s in from the edge of the fabric so I can leave my needles in. Some people like to pin either side of the seams and sew over the pins. It’s up to you and what you’re comfortable with.

pinning 2 rows together

6. Now with your first 2 rows pinned together (right sides together) you are going to sew down from top to bottom in a straight line. I use a 1/4 inch seam allowance but remember to use the same seam allowance you did joining your squares together. Just be consistent.

ready to join the 3rd row to the 1st and 2nd

Now take your 3rd row and pin it to the 2nd row. Sew again from top to bottom. Then take your 4th row and pin to the 3rd row (which now has 3 rows joined together). Press your seams. some people like to press seams open but I prefer to press to one side. You choose. There are no rules. You can also press your seams after each row which I have done in the above picture.

one finished quilt top

7. Ta da you have a finished quilt top. Now it’s ready to quilt it. You will need batting about an inch bigger than your quilt top all the way around. I like 100% cotton batting. You can pick up batting at any large craft store or patchwork store. Sometimes you’ll find the patchwork stores have better pricing on batting as they use Australian batting whereas Spotlight stocks batting from the US which costs more (about $19-$24 a metre). If you’re just starting out you can find polyester batting but I really like natural batting when it comes to making quilts. It’s washes and dries well and your quilt becomes softer over time.

backing then batting

8. You’ll need the same amount of backing fabric as your batting or just a smidge larger. Check out the bargain tables at your nearest patchwork store, Spotlight or Lincraft (in the quilting sections) Or look for quilters muslin or homespun. Just remember to use 100% cotton which your quilt top is made from. I use clearance fabrics from my wholesaler as I go through a lot of quilt backings. Try to pick up a colour in the quilt top/fabric range and find it in your backing fabrics. If you get stuck or want to use the range then just buy a metre or so in the fabric range you’ve used for the charm square.

making the sandwich

9. Iron your quilt backing fabric and lay design side down (wrong side facing up) on a table/clean floor. Tape down the corners and sides with some sticky tape. You can also do this on a clean carpet (I say clean because nothing worse than getting some crumbs, a strand of hair or bits on your lovely quilt or in between the layers. Ewwww. If you do it on carpet you can pin down your fabric using dress pins to the carpet. Smooth it out so there are no wrinkles.

backing fabric right side down

10. Next up laying the batting down on top of the fabric. Smooth out any wrinkles and tape/pin through both layers (batting and fabric). You are making what is called your quilt sandwich. Now lay your nicely pressed quilt top over your batting. Smooth it out and leave about an inch or more all the way around of batting and fabric.

sandwich

11. Now it’s time to pin. If you want to machine quilt your quilt then pinning is the best and easiest way. You can use a basting spray but I am wary of using them with little people around or when I’m pregnant. Which seems to be most of the time.  They are pretty toxic and I don’t have a garage or suitable space outdoors to spray in. So I like to use large quilting safety pins and pin every few inches.

pinning

 Pin through all layers to keep your sandwich (the layers of baking, batting and quilt top) together. I like to do a pin in each square. If you were going to hand quilt then you would baste your quilt sandwich together using big long stitches all over your quilt.

the quilt sandwich

And now it’s time to quilt…………….come back for that soon in Part 2. Any questions, please just ask in the comments and I’ll get back to you! I want this to be as helpful as possible and if I’ve missed something then let me know.

crocheting a baby blanket

I’m loving our weeknights at the moment, no homework, everything winding down for the end of the year and I’m crocheting on the couch surrounded by the little ones. They love to read their stories, write another santa list, play with lego, watch a Christmas movie (Mickey’s twice upon a Christmas is the most popular at the moment) and we are just taking it easy.

And I forgot how addictive granny squaring can be! I’ll think about going to bed and then I think well I’ll just do one more round or finish this colour. And it’s growing rather quickly.

I’m determined to shrink my stash so will be making this as large as I can for a baby size and using up some Bendigo cotton at the same time. I’m using 8 ply cotton with a 3mm hook and loving the result. Often the Bendigo cotton can lose its shape easily so by using a smaller hook it’s not doing that. And there is something nice about making crochet blankets in cotton which is a nice natural fibre over acrylic but it still washes and wears really well. You could pop this in a dryer and it would be great. All new mums need things that go in the washer and dryer so I think I’m on a winner with this one.

It is for a boy and I thought I could get away with the lilac but then decided perhaps not so I’ve kept the first lilac in and moved on to grey instead for the subsequent rounds. The pattern is very simple and I’ve shared it here. Bendigo 8 ply cotton from here and I have a set of Hamanaka hooks which are great to use and worth the investment. Just keep them in the one place and away from the kids who think the bright colours are lots of fun. Speaking from experience of course…….my hooks are all together now with my needles. Safe and sound. Oh and I’m also admiring the hooks over at Tangled Yarns…buying a set of hooks is just a great way to always have the right size hook at home when you want to start a new project………..

Happy crafting if you’re enjoying some craft before Christmas……………..and may the force be with you if you’re madly trying to get craft done for presents, decorating or markets at this time of year!

pumpkin pie after thanksgiving

Well thanksgiving has been and gone but I just couldn’t get over that delicious pumpkin pie that I learnt how to make at Williams-Sonoma back here. So I set aside an afternoon to make my first ever pumpkin pie and it did not disappoint. Everyone loved it…..OK almost everyone loved it and the best thing is that it tastes even better the next day. Wow it was good after a night in the fridge. So please try to save half your pie for the next day…..if you can.

It does take some effort but is worth every step including the roasting of the pumpkin to make pumpkin puree.Unless you are one of the kids who desperately wanted to start cracking eggs and mixing as soon as I was getting the ingredients out of the pantry. There are a few steps before we get to that bit. And you’ll notice that you need a few ingredients to make this recipe but it’s so worth it and serves at least 10-12 people.

The pie base is a mixture of crushed almond biscotti, butter and sugar.

And the pie filling is a delicious mix of roasted pumpkin puree, cream, milk, eggs, sugar and some delicious spices. You bake the pie for about an hour or so, leave it to cool then enjoy. But actually I enjoyed the pie best when it was warm and also the next day when it was out of the fridge so however you prefer to eat it. Why not have a slice at different temperatures and then decide……………………..great excuse to eat pie.

I’ve converted the quantities and directions for the thermomix and I think if you haven’t tasted pumpkin pie before then just give it a go. If you were after a gluten free crust I think the LEDA gingernut biscuits crushed would be fabulous. And a lovely reader Sarah has just told me that Orgran do a gluten free/vegan biscotti so that sounds pretty perfect too. The filling is gluten free if you use a gluten free flour so it’s just a matter of using a different biscuit for the crust.

And that was my very first pumpkin pie………………have you tasted pumpkin pie before or made one. Thoughts?

pumpkin pie after thanksgiving
 
Prep time
Cook time
Total time
 
This recipe comes from the Williams-Sonoma Cooking School at Bondi Junction. I've converted it to the thermomix.
Serves: 10-12
What you'll need
  • 170g almond biscotti
  • 30g sugar (I used raw)
  • 55g unsalted butter, melted
  • 580g-600g pumpkin (jap or a round pumpkin rather than butternut)
  • a few Tbsp maple syrup
  • 200g firmly packed light brown sugar
  • 60g caster/raw/rapadura sugar
  • 2Tbsp plain flour (I used gluten free)
  • ½ tsp salt
  • 2tsp cinnamon
  • ½ tsp ground ginger
  • ½ tsp nutmeg (I didn't have nutmeg so used mixed spice)
  • ¼tsp ground cloves
  • 3 eggs and 2 egg yolks
  • 200g/1 cup thickened cream
  • 80g milk
  • 1½ tsp vanilla extract
  • 1 Tbsp brandy
Instructions
  1. Place biscotti into your TM bowl and on closed lid setting press turbo a few times until the biscotti are finely crushed.
  2. Add melted butter and sugar and process 10 -20 seconds on speed 4. The mixture will look like wet sand
  3. Tip out the biscuit mixture to a very well greased tart tin or spring form cake tin about 20-25cm in diameter.
  4. Press the biscuit mixture into the bottom of the tin and slightly up the sides of the tin.
  5. Bake in a 200C oven for about 10-13 minutes or until slightly golden. Now the recipe says to leave to cool then wrap the outside of the pan with a large sheet of foil. Oops I missed that step but I'm sure it helps prevent the sides of the pie cooking too quickly.
  6. Now to the filling
  7. Slice pumpkin into wedges and place on a lined baking sheet. Drizzle with some maple syrup and bake in a 200 degrees oven for around 40 minutes until the pumpkin is really soft. Keep an eye on your pumpkin in the oven as you don't want it to burn.
  8. Remove the skin from the cooked pumpkin and you want about 2½ cups of cooked pumpkin for your filling.
  9. Place the pumpkin in a big bowl, food processor or thermomix. And process for 20 seconds speed 4 until pureed.
  10. Add in brown sugar, white/rapadura sugar, salt, cinnamon, ginger, nutmeg and cloves and process for another 10 seconds speed 4.
  11. Add in flour and process 10 seconds speed 4.
  12. Add in eggs and egg yolks and process 10 seconds speed 4 and finally add in the cream, milk, vanilla and brandy and process for 10 seconds speed 4. Scrape down the sides of the bowl and give it another 10 seconds.
  13. You could do all of that in a big large bowl with a whisk or in your kitchen aid or food processor. Just take care to ensure that you don't go crazy with those spices and overpower the dish and that the ingredients are well combined together so that your pie filling bakes evenly.
  14. Place your cooled piecrust onto a baking sheet/tray and now pour your delicious pie filling into the crust. Carefully place baking tray into the oven and bake at about 160 degrees for 1 hour and 15 minutes.
  15. Now the temperature for baking the pie wasn't included in the recipe and I know that 200 degrees would be too hot. So I did my pie in a 180 degrees oven and it cooked quickly but my sides were a little on the overcooked side.
  16. So go for 160C in a fan forced and around 170C in non fan forced and keep an eye on it. If you want to turn up the temperature a bit then do that but keep an eye on it as the edges can cook faster than the centre.
  17. Now carefully remove from the oven when your pie is cooked (a quick skewer in the centre if necessary but mine wasn't wobbling which was a good sign).
  18. The recipes says to leave the pie to cool completely before serving. I can never wait so I ran a knife around the edge of the pie a few times...carefully.
  19. Placed the tart tin on an upturned mug for the tart tin to fall away from the base and then carefully placed the pumpkin pie on a cooking rack, still on the tart tin base and served.
  20. After the pie had cooled and we'd eaten enough, just pop it into an airtight container and store in the fridge. It was so delicious cold the next day and I tried it out on a few people/guinea pigs and they loved it.
  21. Serve the pie with a dusting of icing sugar and some cream or ice cream on the side.


Debbie Bliss Baby Cashmerino 5 & Celebrating Family

It is no secret that I love books, I love knitting and I love debbie bliss. They were the first knitting patterns that I started with when I rediscovered knitting. I was at John Lewis on Oxford street in London and discovered their knitting section. I was in love. So many modern patterns and gorgeous wool. I love her patterns and although I do a lot more top down and seamless knitting these days, I love the simplicity of her designs. And of course she does baby and kids wear so well.

Baby Cashmerino 5 has just been released and I really fell for this tunic for Elodie. And what is really nice about this book is that some of the patterns are for babies/toddlers and some start at size 1 and go up to a 4/5 which covers the twins nicely.

and this sweet cardigan for tillie

And the other book to go under the tree this Christmas is Debbie Bliss Celebrating with Family. I know there are a few older patterns in this book but it’s been beautifully styled and photographed.

Any good knitting book recommendations or patterns I must try? I have stopped buying baby knitting books for a while as I have the biggest collection but realised that there aren’t that many great knitting books with patterns for kids. I do love Essential Knits for Kids also published as Essential Kids (the book which had elodie’s doll pattern)…that’s a good one. And a little tip before you buy a knitting book if you’re wondering whether you should buy it or not. Jump onto ravelry, put the book title into the pattern search and see how many of the patterns are up on ravelry and people who have knitted them. It’s a great way to see if the book is for you and what you’ll make from it.

orange (or lemon) slice

Ever since the twins came along I’ve learnt to use what I’ve got in the pantry….because it is hard work to pack everyone up into the car and head off to the shops for one or two ingredients. I would dream about the drive through store for milk, bread, toilet paper and a block of chocolate!!!! Anyway, it still doesn’t happen that I would get everyone in the car for an ingredient or two. And really it just makes sense to use what you have.

And so I had some sweetened condensed milk and I thought I had lemons so I decided I could rework a favourite of mine…lemon slice. Oh but then once I had all of the ingredients out I realised I had no lemons so it would be oranges. Anyway this is sweet and delicious. The girls went nuts for it (sweet tooth’s that they are) and it’s best cut when it’s been in the fridge for at least one hour. We didn’t last that long so the final photos were taken the next day.

this would be the ‘we couldn’t wait until it had been in the fridge’ photo…………… or as I’m going to call it ‘rustic slice’.


5.0 from 1 reviews
orange (or lemon) slice (gluten free)
 
Author:
Recipe type: Gluten Free, Baking
What you'll need
  • 1½ cups desiccated coconut
  • 1 cup plain gluten free flour (am loving white wings or macro)
  • 100g unsalted butter
  • ¾ can sweetened condensed milk
  • 2 cups icing sugar ( I made mine from raw sugar)
  • 40g softened butter or margarine
  • 1 orange or 1 large (2 small) lemon/s, juiced
Instructions
  1. In a saucepan melt the butter and sweetened condensed milk until the butter has just melted.
  2. Pour into the 1¼ cups coconut and flour and mix together.
  3. If your mixture feels very wet then add in the last ¼ cup of coconut. I found I needed that extra ¼ cup but everyone is different so see how you go.
  4. Press into a silicone lamington tin or a lamington tin lined with baking paper which makes it easier to lift out of the tin.
  5. Bake in a 180 degrees oven for about 10 minutes until golden on top. If your oven tends to be hotter then reduce heat slightly but you basically want the mixture to be cooked and lightly (ever so lightly golden).
  6. Remove from the oven and leave to cool.
  7. Make your icing sugar - I do this by placing 2 cups of raw sugar into my thermomix and processing on speed 9 for 30 seconds. Add in juice or a big lemon or an orange and softened butter (or margarine) and process for about 20 seconds speed 4. Scrape down and process for another 10 -20 seconds.
  8. You can do this in a food processor or just with a good old wooden spoon. Whatever you have.
  9. Spread onto the cooled base and sprinkle with more coconut
  10. Refrigerate for at least 1 hour, slice and enjoy.
  11. This can be made the day before and taken out to an event and will keep everyone happy.


Christmas cooking at Williams-Sonoma

Before I really got into my craft I was really into my cooking. I loved going to cooking demonstrations and classes and loved learning new techniques, ingredients and coming away with new recipes to try out at home………..back when it was just the two of us.

And so the invitation to a cooking class at Williams-Sonoma had my name all over it. It is just a lovely space to sit….with a little glass of white wine on a wednesday and swap the usual toast or salad for a delicious hot turkey lunch and some pumpkin pie….ok now we’re talking thanksgiving. We got some goodies to take home too including personalised aprons…..you can guess what I’ll be wearing on Christmas day to greet everyone.

We don’t celebrate Thanksgiving at our house but I have some great memories of celebrating with retro daddy’s colleagues when he worked at Price Waterhouse and they had lots of americans in the team. They just know how to do thanksgiving….I was just glad for my pregnancy stretchy pants. Mmmmmm stuffing…..I just love the concept of a whole dish of stuffing. And see the butter to the right of the dish, that was all put on the top of the stuffing before it went into the oven. Mmmmmm.

Today’s menu was turkey stuffed with a pancetta and sage stuffing served with creamy mashed potatoes (wow the amount of cream and butter that went into them), an apple orange cranberry sauce, some maple glazed pumpkin and the baked stuffing (so making this at Christmas for the family). All followed up with pumpkin pie. And not pumpkin from a can but deliciously sweet baked pumpkin. Apparently the secret is using pumpkin like jap and roasting for at least 1 hour before pureeing. I’m onto it. Expect the recipe done in the thermomix some time soon.

we learnt lots of tips and techniques

and would you check out the size of that le creuset….looks like it would feed our family pretty nicely!

You will have to use your imagination with the pumpkin pie as I had to duck out to a taxi for school pick up, was very kindly given some take home containers but demolished the pumpkin pie before a photo…then realised I didn’t have a pic on my phone. But I’m going to make it at home as it was so delicious.

Oh and this is what it looks like when bloggers get together for a cooking class….

a big thank you to Tracy, Candace and Arabella at Baker Brand as well as the team at Williams-Sonoma for having us today! It’s great when you come away from an event inspired and motivated to get into the kitchen and try some fancier things out on the family. It was a delicious way to spend my Wednesday and I just made it back in time at school pick up too. Just…like with 2 minutes to spare.

Oh and I learnt a few things for my Sydney friends….apparently the best bread comes from Iggy’s in Bronte and the best meat comes from Feather & Bone and butter is good. Well I already knew that….love butter. Thanks to the chefs  for the hot tips.

p.s you can find all of the cooking classes on offer at Williams-Sonoma here and just go to the left of the screen for  the monthly classes on offer! Some great ones in December.

one finished knitted doll

Well I was lucky enough to get the doll back off elodie and finish her off. I made the mistake of letting her take it off my lap before hair was finished and a face was stitched on. It was a good 36 hours before I was allowed access to the doll and could finish it off.

this was a week from start to finish and I didn’t really go hard at it just my usual pick it up when I had the time. You need to devote a whole session to seaming and stuffing her and then at least 1-2 sessions for the hair which takes some time but is totally worth it. Would you look at her ravishing black hair that was stitched on one long strand of black cotton yarn at a time. Totally worth it.

You won’t even make a dent in whatever yarn you choose. I was using scraps and huge 200g balls of Bendigo Cotton and you’d never known I’d used any.

So I used 100% cotton yarn for the doll, hair and clothes and then 100% natural wool for the filling (you can buy it here or your nearest Steiner craft supply place or even craft store if you’re lucky). If you can’t access any then just use a poly stuffing that you can find at Spotlight/Lincraft/craft stores but pack more in as it does flatten out over time.

This really is a great pattern. You can find it here for free and I really recommend it and since we’re still in November why not whip up one or a few before Christmas is here. I promise you they will be treasured.

Ravelry details are here, Bendigo Cotton available here, free pattern link is here……………and you’ll find the doll with it’s new owner.

prawn + pasta salad for Christmas (gluten free option)

I’ve probably mentioned it before but I am just absolutely hopeless with Christmas magazines. I buy them all even if they aren’t my favourites because I don’t want to miss out on any great recipes or ideas. And then Christmas Eve comes up and I’m doing my groceries and I just keep it simple as I figure I won’t have lots of time and the list of ingredients on my list is already long. I do try a few new things but not nearly as many as I probably had in my mind………

Well not this year. No this year I will try all new salads and desserts for my Christmas menu. And this recipe is so easy and delicious. While your pasta is cooking (I used a delicious gluten free rice pasta but you can you use your favourite pasta) you peel the prawns and get the salad ready then add your cooled pasta and you are done. Done.

mind you the prawns were popular this year………………………they are a bit of a luxury around here so I was quietly peeling in the kitchen (and popping a couple in my mouth) and then word got out and I had 3 little kids wanting prawns. I like to eat seafood when we go out but at home it’s pretty much tinned tuna or smoked salmon if we’re going to eat it at home. Maybe I need to do prawns more often with the reaction I got today.

But let’s talk salad…………………….leave out the prawns for a vegetarian salad and add in some feta or grilled halloumi. If you don’t like prawns then what about some smoked chicken, cooked chicken breast or ham off the bone for something different.

and you can see I get very fancy with my method of mixing the salad dressing………


prawn + pasta salad for Christmas (gluten free)
 
Prep time
Cook time
Total time
 
This is light and delicious and was great for sunday night dinner....no need to keep it for a special occasion.
Author:
Recipe type: Salad
Serves: 6
What you'll need
  • 750g cooked prawns, peeled
  • 250g - 350g pasta, I used gluten free
  • 1 avocado
  • punnet cherry tomatoes
  • handful basil leaves
  • 1 red onion. sliced thinly
  • a few large handfuls rocket leaves
  • 1 Tbsp seeded mustard
  • a few Tbsp's vinegar (I used white wine)
  • ⅓ cup extra virgin olive oil
  • salt, pepper
  • 1 Tbsp honey or maple syrup or caster sugar
  • capers (optional - not everyone shares my love of the caper) but a tsp is great sprinkled over the salad
Instructions
  1. Cook your pasta according to the directions.
  2. While your pasta is cooking peel the prawns and set aside
  3. Now prepare the salad by slicing tomatoes in half, avocado thinly sliced
  4. In a large bowl assemble basil, rocket, tomato and onion
  5. Rinse pasta under cold water until the pasta is cold.
  6. Tip pasta into bowl, add in prawns and top with avocado. Don't add the prawns or avocado too early, just before you dress the salad is best for freshness.
  7. Make up the dressing by mixing together the vinegar, olive oil, mustard, honey and then season. I do mine in a plastic cup with a lid, a jar is great too and shake it well.
  8. Pour the dressing all over the salad and serve straight away.
  9. I would recommend that if you want to take this to a party or BBQ that you assemble minus the dressing, avocado and prawns. Take them in separate containers and assemble just before eating.
  10. For a crowd add more pasta and greens and an extra avocado and stretch out those prawns.


knitting a doll for elodie

Edited to add that I’ve just found the pattern for free online, just go here for a copy of the pattern. It’s a great one! 

It’s been 5 years since I’ve knitted a doll but with Christmas coming I decided it was the perfect project…………..I must have forgotten how many ends need to be seamed in and the art of stuffing and getting your doll to look just right.

But she’s coming along nicely. Emerson woke me up at 5am this morning and I’ve been on the couch since 6 seaming in ends, making the doll and making a start on the hair which is sewn on two strands at a time. Yes that will take some time. Elodie has already tried to nab the doll from me so I think she’s going to be a popular present………………………..

The pattern I’m using is the rag doll pattern by Debbie Bliss, ravelry details are here and it’s a great one for beginners or any level as there is nothing complicated just knit, purl and a few slipped stitches here and there………………come back soon for a finished doll.

cherry almond cookies (gluten free)

There has been some serious baking going on around here. I know there has been because my jeans are a little snug and we’ve gone through a few sticks of butter this week. I started off with 3 on monday………………

I’m still a bit trial and error with the gluten free flour but these turned out nicely. I’m using either White Wings gluten free or the Macro brand so far. If you feel your mixture is really soft you could add a bit more flour to your cookie dough but by freezing the dough in a round, it does a good job of making them easy to cut and bake. And you get nice round cookies.

This was very popular in our house, leave out the nuts if they are going in lunchboxes and if anyone has any issues with food additives then swap out the cherries for a dried fruit free of additives. Look at me, I’m getting a whole new lesson in reading labels and what to give to children as I try to work out what suits elodie and what foods set off bad behaviour. And it’s not just for the benefit of elodie as everyone is feeling great with the gluten free and less processed food in the house. Well maybe the big kids wouldn’t agree with me 100% but simple things like only buying plain rice crackers is a small change that can make a big difference when it comes to flavourings, colours and the like. Retro daddy had a bad habit of buying bbq or cheese or different flavoured rice crackers but really the kids gobble up plain crackers with some cheese or hummus so just keep it simple.

Anyway long story short these are great little cookies……..and keep the 2nd roll of cookie dough in your freezer as it comes in so handy when you think the pantry is bare and there is nothing to eat…….hot cookies out of the oven with hardly any effort always goes down a treat.


cherry almond cookies (gluten free)
 
Prep time
Cook time
Total time
 
Recipe type: Baking, Gluten Free
Serves: 24
What you'll need
  • 150g slivered almonds
  • 250g raw sugar
  • 250g unsalted butter, cubed
  • 1 egg
  • dash vanilla extract/essence/paste
  • 320g plain gluten free flour (or plain flour is fine)
  • 100g red glace cherries, finely chopped (or use a dried fruit)
Instructions
  1. Place almonds in food processor or thermomix and process for 1 second. I do this on closed lid setting and one press of the turbo button. Set aside
  2. Place raw sugar into you thermomix and process for 10 seconds on speed 9. Alternatively just use caster sugar.
  3. Add in butter and vanilla to your sugar and process until creamy. I do this in the thermomix for about 1 minute on speed 4. Scrape down sides of bowl.
  4. Add in egg and combine well. 20 seconds on speed 4 in the thermomix.
  5. Add in the flour and combine well. 1 minute, closed lid setting and knead function.
  6. Now remove the cookie dough from your thermomix and place in a large bowl. Tip in almonds and finely chopped cherries and mix until they are evenly distributed. You can do this in the thermomix on reverse and speed soft or the knead function for about 30 seconds.
  7. Or using your kitchen aid/food processor/mixer just add in the nuts and cherries and gently combine. You don't want to further process the cherries or nuts as it's nice to have a bit of bite to the nut and some larger bits of cherries in your cookies. But the mixture will turn pink either way so don't worry.
  8. Now divide the mixture into 2 and place one lot of mixture onto some baking paper.
  9. You are going to make a log and pop in the freezer so I make a kind of sausage out of my mixture, pick up the long sides of the baking paper, fold over each other and twist the ends which tightens the roll.
  10. Make sure it's a roll and not flat and then pop in the freezer until you need the dough. At least 1 hour is good.
  11. Slice with a serrated or sharp knife and bake in a 180C degrees oven for about 8 to 10 minutes.
  12. Leave to cool on the tray. Really important so they can finish cooking on the tray then transfer to a plate and enjoy. Or eat them hot from the tray which is my usual trick.
  13. Enjoy.

I made a Christmas bunting

I’ve been really productive lately….I’m not sure what is going on but I do know that spending less time online and more time doing things and having family time is really paying off. Did you know I have Friday’s blog post, a cookie recipe, all written up, photographed and ready to publish. I know. Crazy. Something good is happening with all of this output.

Anyway, last week I pulled out all of my Christmas fabrics……..I decided that at least if they were out and easily accessible that I might actually make a few things. Like the bunting panels that I bought last year from Spotlight with good intentions. But I just didnt get there…………………..you know how it goes. You just get caught up and say to yourself oh well there is always next year. But not this year.

Panels are such an easy way to get a bunting finished. All you need to do is cut out the triangles and go. The instructions talked about ironing on some adhesive and sticking them together or with a plain backing fabric but I just put 2 triangles right sides together, sewed down the long edges, trimmed the tip, turned them right side out, ironed, trimmed the top to make sure they were even, pinned them inside my binding so that the top edge of each triangle was completely covered by the binding and sewed from one end to the other, tied it up and let the kids admire it.

check out the fluff…………might be time for a clean

the kids just loved it when it was hung up……..retro daddy not so much as he is tall to walk under it but the rest of us are loving it!

I did have some pretty cute helpers come in at various times.

And how is YOUR Christmas craft coming along………………………..

p.s. each week before Christmas I’m running a little facebook giveaway, just go here or the Giveaway tab on my facebook page to enter. This week’s prize is some festive fabric and next week is a reindeer Cake Pop Kit! Just helping some of you get crafty this Christmas. 

tomato and caramelised onion tart for Christmas (gluten free + vegetarian)

I’ve had a few vegetarian Christmases in my time and when I saw this recipe in a magazine recently I knew that I had to make it gluten free and convert it to the thermomix. It ticked so many boxes – festive, vegetarian, healthy and looked easy and delicious. A winner before I even made it….in fact before it even went into the oven it was looking gorgeous.

I haven’t tried making gluten free pastry before so this was my first time. Not bad. Not perfect but it tasted fabulous. And please do as I say and not as I do and don’t decide that lemon olive oil all over the top before it goes in the oven is a good idea. It’s not. Save that for later. And I took a few photos of the fresh thyme before I was happy with the photo and then as I was making room on my camera I accidentally deleted it. Ahhhhhhhhhhhh. Here is another picture of thyme I’ve taken earlier in the year and let’s pretend it was the pretty picture I took today.

This recipe and the pastry are pretty forgiving because the electrician decided to come and instal the circuit breaker about 10 minutes into cooking time so then the oven was off for 10 minutes, oil was going everywhere on the baking tray and I thought it was all going to end up being a big flop. But lo and behold, I left it in a little longer than necessary and got one absolutely delicious tart that everyone ate up. That’s right, 4 kids and myself demolished this for lunch. That really does make it a winner doesn’t it.

This recipe has been adapted from the Tomato & Onion Pie Recipe in the New Idea Christmas & Holiday Essentials magazine. 

tomato and caramelised onion tart for Christmas (gluten free + vegetarian)
 
Prep time
Cook time
Total time
 
Author:
Recipe type: Gluten Free, Vegetarian
Serves: 6
What you'll need
  • 2 red onions
  • thyme leaves
  • 2 Tbsp balsamic vinegar
  • 2Tbsp sugar
  • olive oil
  • salt
  • 180g gluten free or regular plain flour
  • 100g butter
  • 100g cream cheese
  • salt
  • 4 roma tomatoes, sliced
Instructions
  1. Thinly slice the red onions, place in a frypan with some thyme leaves, olive oil and salt. Heat over a medium heat for about 10 minutes until they are really soft.
  2. Add in vinegar and sugar, stir and reduce heat and let the onions reduce for a few minutes.
  3. When the liquid has reduced and they are looking soft and delicious, take them off the heat, transfer to a bowl and set aside.
  4. Now let's make your pastry. Place flour, butter, cream cheese and a dash of salt into your thermomix bowl or a food processor. Process until it resembles breadcrumbs. I do this on closed lid setting and knead button (the wheat picture) for 1 minute.
  5. Add in a few tablespoons of ice cold water. You can use water from the fridge or place some water in the freezer while you are making your onions and use that water.
  6. Process until it just comes together, remove from your thermomix or food processor and place on glad wrap/plastic wrap. Form into a ball, flatten into a round disc, coat lightly in some gluten free or regular plain flour as your dough is a bit sticky.
  7. Pop your pastry into the fridge for at least ½ hour. If you're rushed for time just pop it in the freezer for about 15-20 minutes
  8. When your pastry is ready place it in between 2 pieces of baking paper and roll it out into a circle.
  9. Remove the top layer of baking paper, spread out the onions onto the pastry leaving a border that we can fold over and start laying the tomatoes in 2 circles. It's easiest to start from the outside and then do an inner circle.
  10. Top with more thyme leaves, some salt and pepper and fold over the edges of your pastry towards the centre of your tart. Don't worry if they break or crumble, it all comes together in the end.
  11. Bake in a preheated 180-190C degrees oven for about 30-40 minutes until pastry is cooked, tomatoes are looking cooked and it's ready to eat.
  12. Remove from the oven, slice and serve with salad or vegetables. This is absolutely delicious hot, warm or cold.
  13. Enjoy.......................................


freckle sundae rocky road

Or retro daddy’s rocky road! Last Christmas retro daddy started dropping hints that he had the best idea for rocky road………….I was stuck in my own way of doing it (maybe I wasn’t convinced on his idea) but this year I said why not! He even named the recipe himself.

So he bought everything…………you’ll notice the homebrand, he loves homebrand and does the groceries each week with a very keen eye on the prices.

You’ll notice that the bananas were opened before we actually made the recipe and that was me looking for something sweet last night………………OK, and this morning too. I’ll admit it. I don’t usually have lollies in the house so when I do they don’t last long.

Now this is one for the sweet tooth’s out there and will be lots of fun for Christmas, giving away as presents and kids parties. And if you stock up on chocolate then you’ll also be able to get 2 – 3 batches out of the lollies shown in the picture so go crazy

What’s your rocky road secret? Care to share…………

5.0 from 1 reviews
freckle sundae rocky road
 
Prep time
Cook time
Total time
 
Author:
Recipe type: chocolate
: chocolate
Serves: 16
What you'll need
  • 1 bag white chocolate melts
  • 1 handful raspberry lollies
  • 2 handfuls banana lollies
  • 2 handfuls marshmallows
  • 100's and 1000's to sprinkle over the top
Instructions
  1. Melt the chocolate stirring as you go. I like to do mine in a microwave safe jug or bowl in the microwave for 2 minutes 30 seconds on medium high and stirring a few times.
  2. Tip in the lollies, stir well so they are all coated in white chocolate, spread into a silicone lamington tray or a tray lined with baking paper.
  3. Use a spatula to get all of the chocolate out of the bowl and spread or drizzle over the top of the rocky road.
  4. Sprinkle with 100's and 1000's and refrigerate for at least 30 minutes or until set.
  5. Slice with a big sharp knife and enjoy or wrap up to give away.
  6. During summer I keep this in the fridge and then take it out about 10-30 minutes before serving.