Devil of a Cookbook

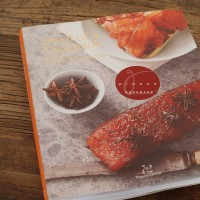
I don’t know about you but every now and then I feel myself slipping into a rut with my cooking. And that means it’s time for a new cookbook. I know you can print recipes off the internet but I’m a total book person. I’d been eyeing off a few Thermomix cookbooks last year but decided to bite the bullet and buy a few of them to review here. And to cook from at home of course. First cab off the rank is Devil of a Cookbook.

With an introduction and a few recipes by Tetsuya it has to be a good book, doesn’t it. But the real surprise for me was the gorgeous photos of Tassie. Retro daddy declared we need to buy a house in Tasmania after flicking through the book and finding a few recipes he wanted me to make over the weekend.

The food is modern australian but comfortable enough to serve up to the family. I know that mums love recipes that we can whip up on a weeknight and perhaps put in a bit more time on a weekend and this book has that all covered. There are some fancy recipes in the book for when we might have special guests over or a date night at home but I think the real appeal of the book will be the every day recipes that you can make.

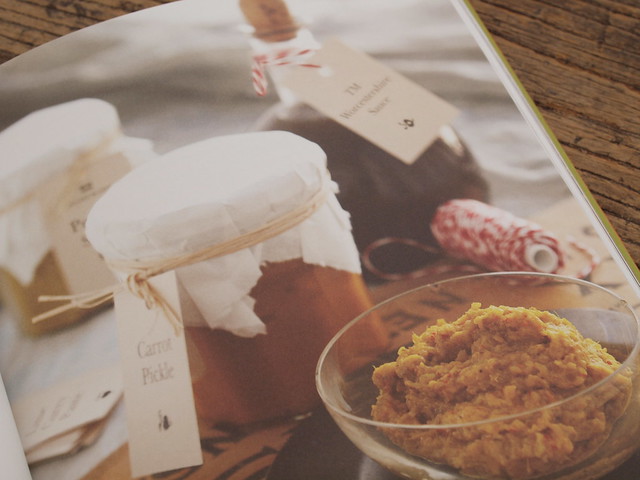
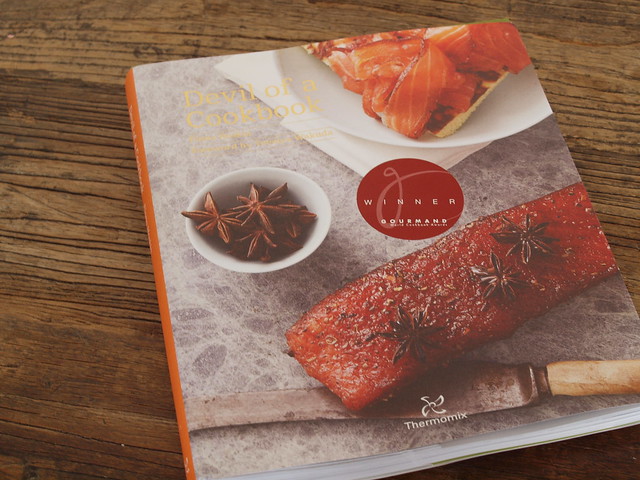
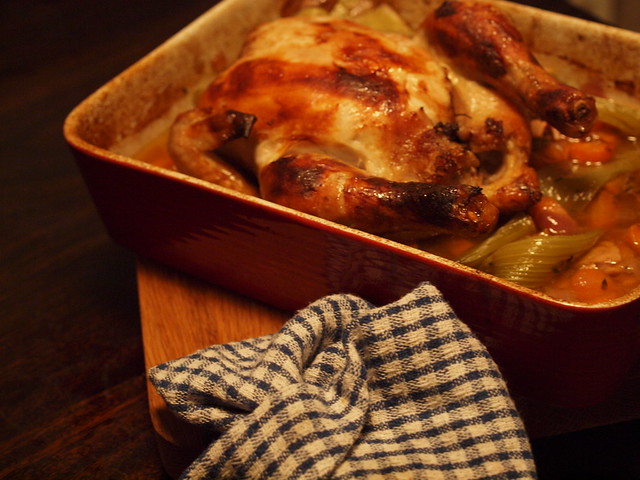
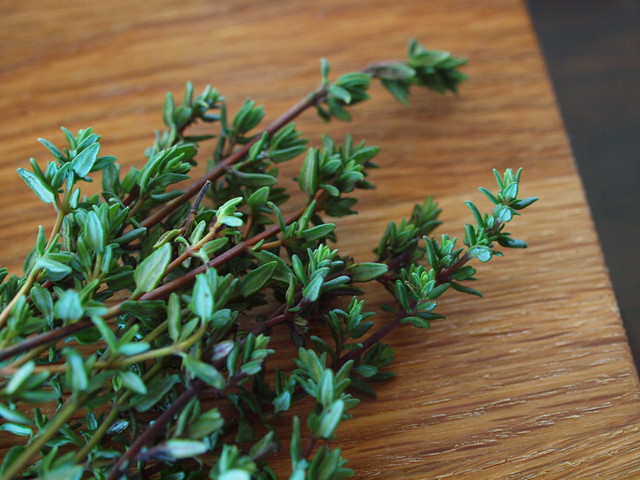
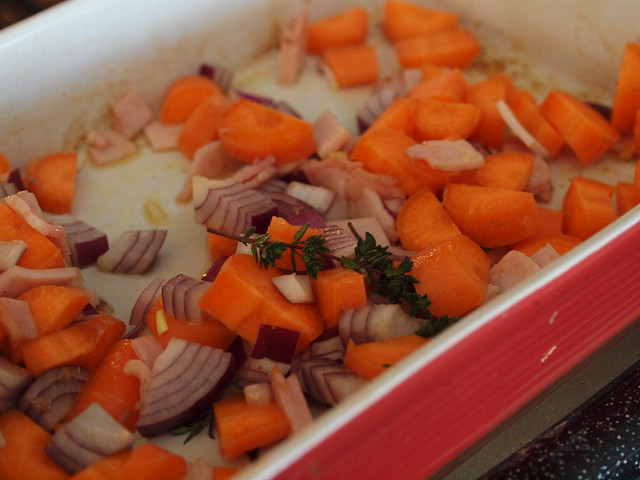
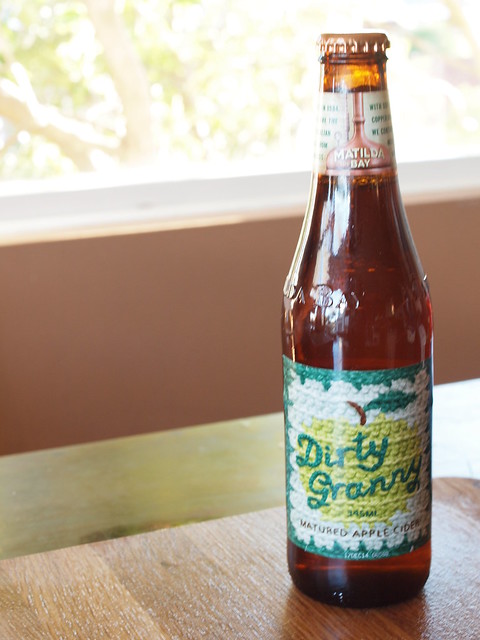
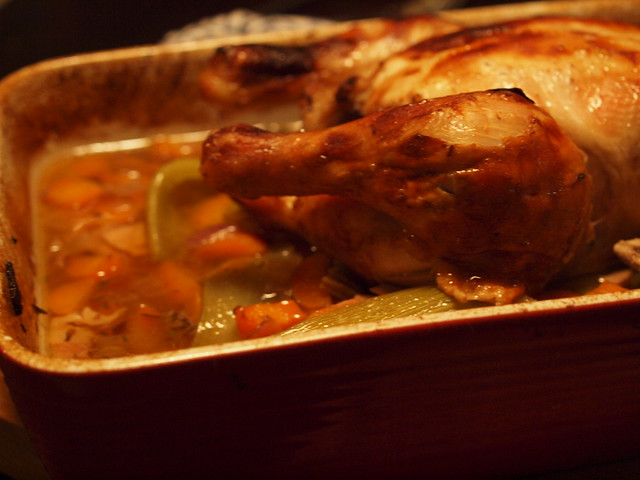
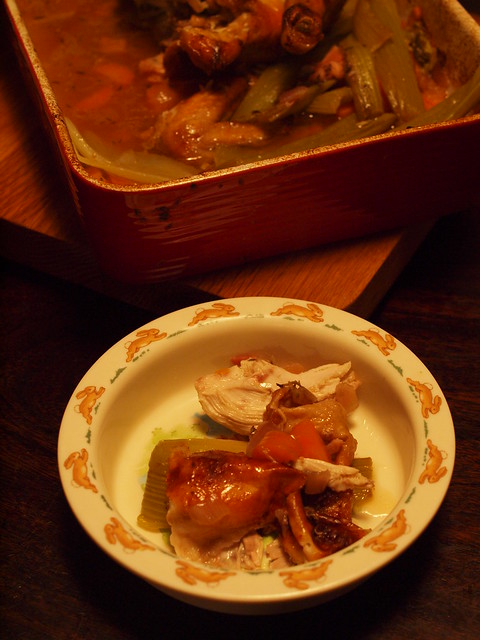
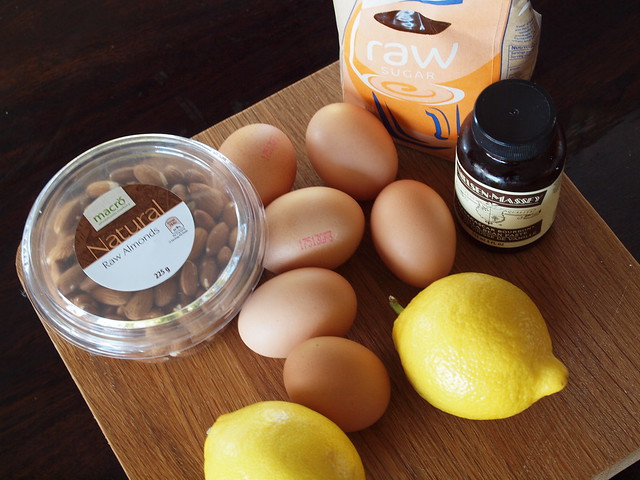
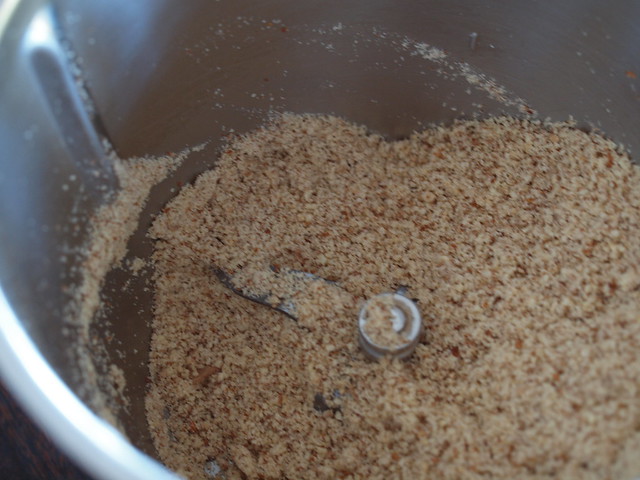
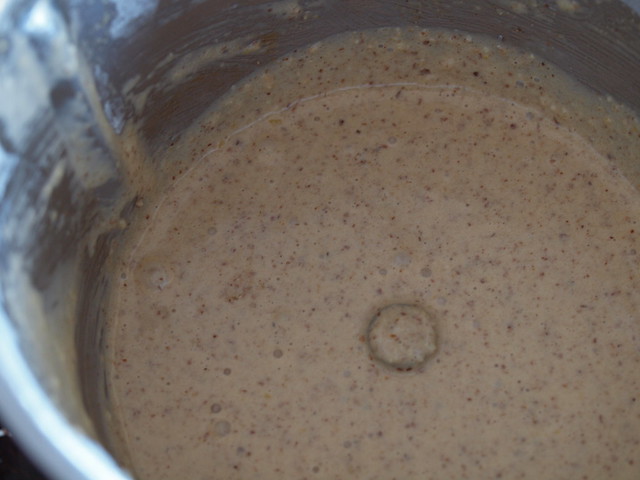
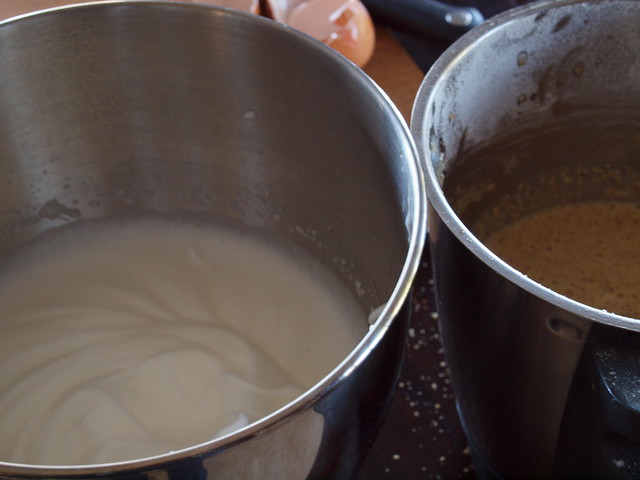
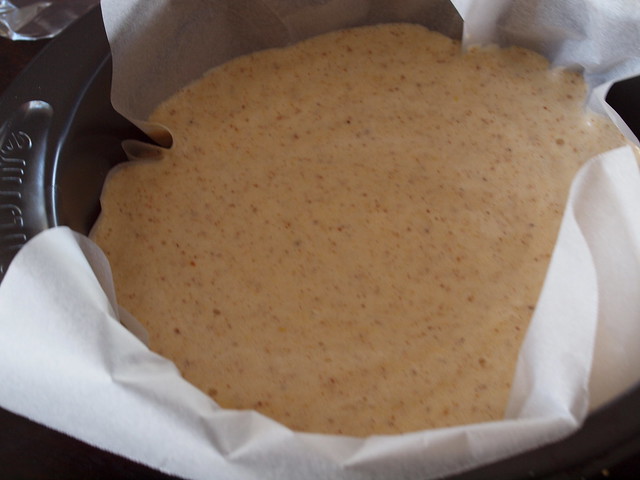
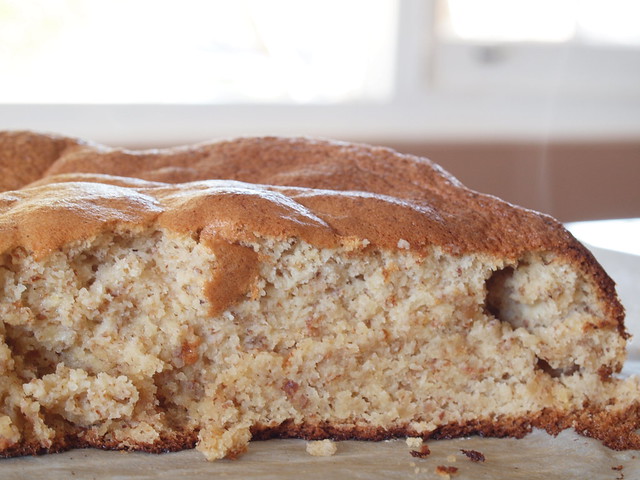
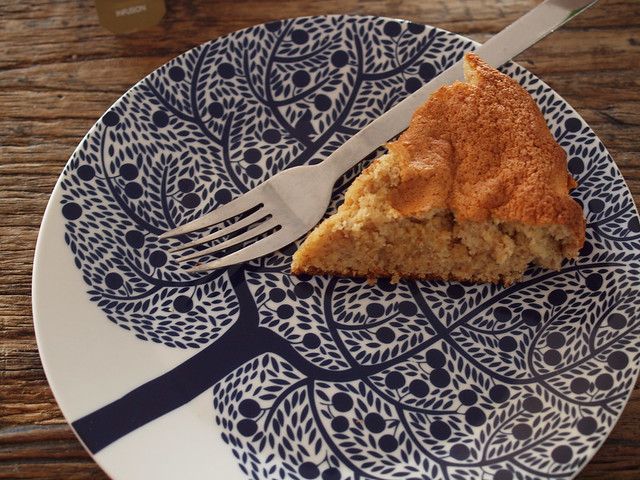
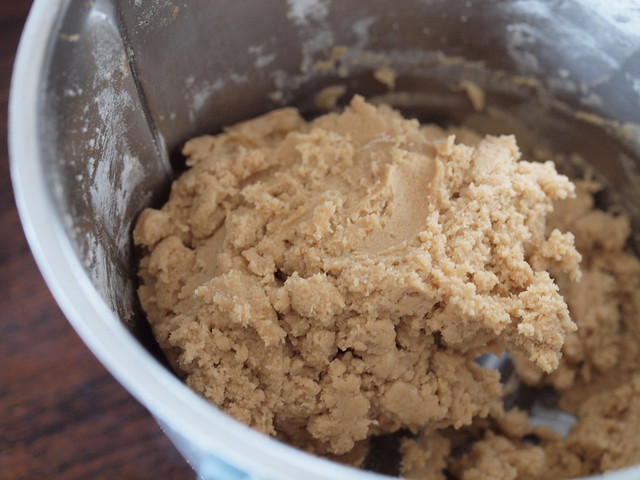
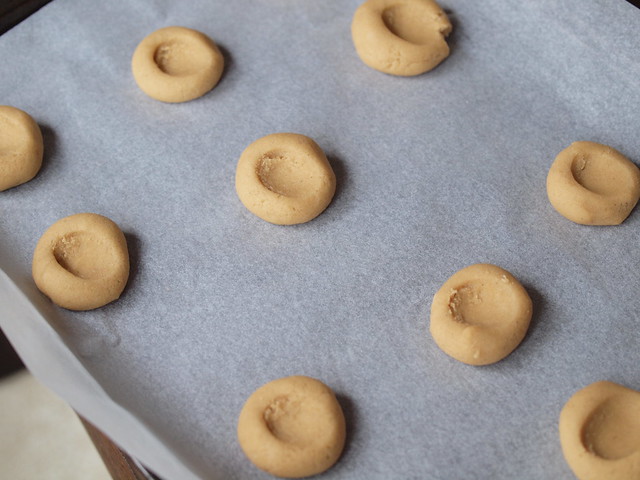
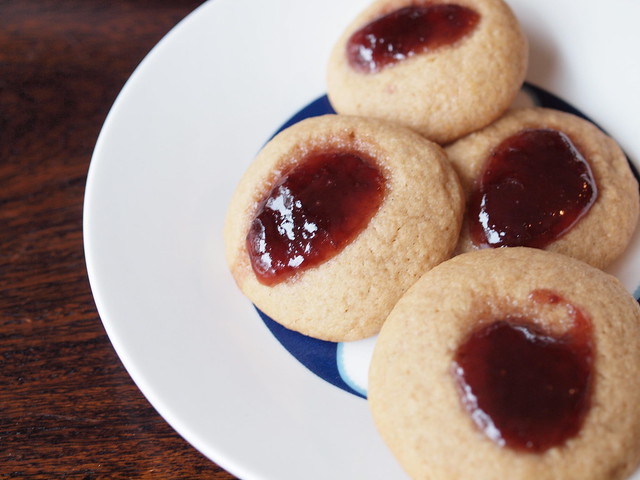
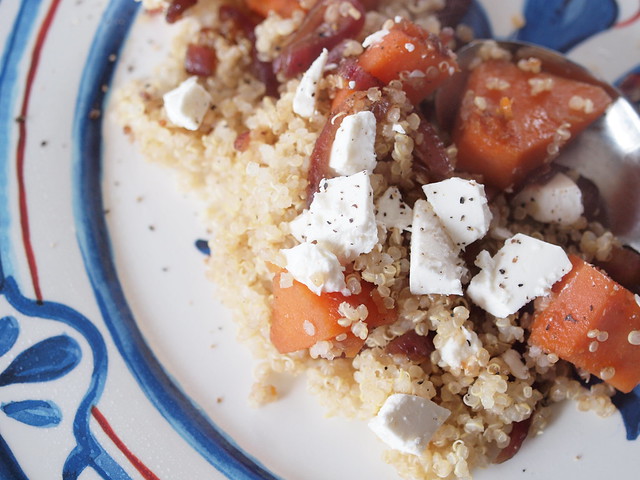
There are lots of recipes (always a plus) and a few of my favourites are Worcestershire sauce, Peanut Satay Sauce, Carrot Pickle, Hearty Seafood Chowder, Gruyere Fritters with Microgreen and Warm Asparagus Salad, Greek Style Sausages in tomato sauce, Chickpea Salad (we made this last night and it was fabulous), Tasmanian Salmon with Yoghurt Dressing, Barley Risotto with Asparagus, Healthy Roast Chicken, Chocolate Hot Cross Buns, Sweet German Christmas Bread, Raspberry and White Chocolate Cheesecake, German Apple Cake, Chocolate Walnut Fudge and I’ll definitely be trying the Danish Champagne Cocktail.

And one of the nicest features of the book is that all proceeds go to the Devil Island Project to save the Tasmanian Devil. You can buy the book from your Thermomix demonstrator or Thermomix online (which is what I did!).  I know you’ll love this one and I think it’s my favourite of the three I bought last week.

the blanket is growing

Now I must admit that I thought it was a bit ambitious starting a baby blanket. I thought I might get a bit bored of it but I’m happy to report that so far so good. The blanket is growing………….slowly…………and it’s been lovely to knit.

So I’m knitting the blanket from this book here. It is very straightforward and I have been able to watch the big kids in swimvac or playing outside or watching tv while doing stocking stitch. My aunty taught me to knit and watch tv at the same time and stocking stitch is the perfect way to start. You just let your fingers feel the first stitch that you are doing and they move the stitch off to the next needle. You just do a few stitches at a time looking up from your knitting and before you know it you’re doing the whole row without looking. You’ll get to the point where you are spending more time looking up at something else than down and you’re on fire.

Now the wool for this project (Bendigo Rustic 12 ply in Spruce from here) is just gorgeous and I would definitely knit this pattern on a circular needle as it takes the bulk of the project into your lap rather than keep it on the needles which is much nicer for your wrists. It’s super soft and I’ve just chucked it in my handbag each day as we’ve been heading out the door to things and knitting a few rows here and there.

And in some big news I have a knitting machine coming my way today. I had been quietly bidding on it on eBay and hoping no one else was going to bid and they didn’t it. And as luck would have it my brother in law was travelling up via Wollongong to pick it up and saving me a trip down. Meant to be or what. So expect a few posts on knitting machines coming up. I have absolutely NO idea what I’m doing but plan on using youtube to get myself set up.

My reason for a knitting machine was really to get a few more knits on the kids. I’ll always love hand knitting, always, but there are always so many things I want to make for the kids and not have to buy and I just thought I’d give it a go. And with a basic machine and not very much of an outlay I thought I can’t go wrong.

Do you have a knitting machine or story to tell me? Love to hear about it. We had a great chat on facebook about knitting machines last week……………….

a family roast recipe

Now today it’s emerson’s birthday and we have some visitors coming up to stay tomorrow and the house looks like a bomb site! I’ve perfected the lived in look a little bit too well lately. So I’ll be collecting all the photos of emerson’s first year into a blog post, baking him a cake, madly cleaning the house before tomorrow and just enjoying the last few days of school holidays. In the meantime I’m going to share with you a delicious roast I made on the weekend. Can you believe this guy is now 1? I can’t!

Now I still have my L plates on when it comes to roasting chicken. And chicken is the only meat that I’m roasting. So recipes that spell everything out to me are my best friend. I was flicking through some really old BBC Good Food magazines and found their chicken in cider with celery. Looked good, looked easy and I thought I could do that AND I know everyone would eat it because they love chicken. And they loved it. This recipe is from the November 2006 issue of BBC Good Food.

You could easily leave out the cider as it’s only 150mls of it, just replace it with stock or you could increase the cider if you want more of a cider taste. Up to you. But if you’re looking to work on your chicken skills then this might be the one for you.

I’ll just say that it was a delicious chicken, it was easy, the vegetables were just gorgeous, no potatoes are great if you’re watching your carbs and there were no leftovers. I still don’t know how long it will be before I need to roast 2 chickens for family dinners.


5.0 from 3 reviews
moving forward + a family roast recipe
 
I hope you enjoy this one, we did.
Recipe type: Dinners
What you'll need
  • 25g butter
  • 1 medium sized chicken
  • 4 rashers bacon
  • 1 red onion
  • 3 carrots
  • ½ celery
  • a few sprigs of fresh thyme
  • 200mls cider
  • 300mls vegetable/chicken stock
Instructions
  1. Preheat your oven to 190C (350F) and place the butter in a large casserole dish. Place in your chicken and brown on all sides. This takes about 10-15 minutes and I just carefully turned the chicken a few times and coating it in butter. You just want a light brown colour.
  2. Remove the chicken and set aside. Place the bacon in your dish and place back in the oven for a few minutes until the bacon is lightly cooked.
  3. Now add in the onion, carrots, thyme and place dish back in the oven and cook for about 5 minutes.
  4. Add in the celery and stir all the vegetables around and place the chicken on top. Now you want the breast side of the chicken down (you're going to turn it over later on) and pour the cider and the stock over your chicken.
  5. Roast for about 1 hour. It will look nice and golden and everything will be bubbling away beautifully.
  6. Turn the chicken over and roast for another 30 minutes. Your chicken should (everything going well) be beautifully checked. Do a quick check that the chicken legs and thighs are cooked (that's where I can come unstuck) and remove from the oven
  7. Season the vegetables if needed and serve. We just had it as it was but if you have a big family or big eaters you could add some mashed potato to the plate or add sliced potatoes to your dish.
  8. Either way this is a delicious family roast, you'll only be washing up the one dish and the timing was spot on for me.

I hope you enjoy this one, we did. 

gluten free lemon cake

One of the reasons that I love my thermomix so much is the way it cuts out the need for some baking ingredients. Let’s take almond meal. You don’t need it when you have a thermomix because chuck some raw almonds in the thermomix and after about 5 or 6 seconds  you have almond meal. For this cake I also did my caster sugar from raw sugar so I really felt like I was giving my thermomix a good workout and cutting down my shopping bill at the same time.

I know I don’t do as many gluten free recipes for my readers but I think you’ll like this one. And it’s dairy free too which might also suit a few people but it does have eggs. And this cake is also a winner if you’re like me and have a Thermomix AND a Kitchen Aid as you’ll be using both of them.

Everyone loved it here and it made for a delicious afternoon tea with a good strong cup of peppermint tea. Now the texture is different to a cake with flour and there is probably an art to cutting it properly and not taking some of the top of the cake with you. But I found that after leaving the cake for half an hour and using a larger knife that I could slice a little easier.


5.0 from 3 reviews
gluten free lemon cake
 
Prep time
Cook time
Total time
 
A delicious gluten free cake that is easy to make and just delicious to eat.
Author:
Recipe type: baking
Serves: 10
What you'll need
  • 6 eggs
  • 1 cup raw caster sugar
  • 1 lemon, juiced and rind grated (if lemons are small use 2)
  • 200g raw almonds (or almond meal)
  • 1 tsp vanilla essence
Instructions
  1. If you have a thermomix then place the almonds in the bowl. Process for 5-6 seconds on speed 9. Set aside.
  2. Place raw sugar and lemon rind pieces in bowl and process on speed 9 for 10 seconds.
  3. Separate the eggs carefully and add the eggs to your bowl and process for 20 seconds on speed 4. Add in the juice, almonds and the vanilla essence/extract and process for another 10 seconds on speed 5.
  4. **Now you're going to whisk your egg whites until soft peaks form. I do this in the kitchen aid for a couple of minutes. Don't have stiff peaks, keep it nice and soft.
  5. Place the cake mixture in a large bowl and with a spatula or wooden spoon fold in the egg whites in about 3 goes (that's very technical isn't it, if you like technical then you might say additions) but basically you want to gently put the egg whites in gradually.
  6. Pour the cake mix into a lined baking tin and bake in a 160 degree oven for about 45 minutes.
  7. Peel back the paper, don't worry if it's stuck a little and leave to cool. Slice carefully and enjoy. Delicious on it's own or with some ice cream or cream.
  8. If you don't have a thermomix then make sure you have almond meal and caster sugar. Lightly whisk the egg yolks, lemon rind and sugar in a bowl until the mixture is pale and creamy. Then add in the juice, almonds and vanilla essence/extract and combine. Follow from **.


my little cath kidston bag

I picked up a few things for myself at the Cath Kidston sale (online of course because I don’t live near a store) and I thought it would be nice to pick up a few things for you too. And here they are. A little giveaway just for my readers.

This bag is gorgeous. It’s one of the most classic and famous designs by Cath Kidston and the fabric has been coated so if your bag gets dirty you can just wipe it down. Oh so important when little people are about. As in I ask one of them to take my bag inside and to them that means drag it along the driveaway.

Now the bag isn’t empty. Oh no, we’re not just giving the bag away. A few little things to keep you busy are inside the bag. Of course.

How about a cute little Cath Kidston quilting book called Patch.

Some fabric covered buttons, some pins in a cute little tin and a measuring tape in a little cath kidston cover. Perfect for crafters or wannabe crafters or just for having at home for mending jobs.

COMPETITION CLOSED. WELL DONE TO LEISA WHO WON THIS BAG. MORE GIVEAWAYS COMING SOON

how I substitute yarn into my knitting projects

If you’re new to knitting or you’re coming back to knitting then you  might be wondering how to substitute yarn for a knitting pattern. You might pick up an American pattern or find one on ravelry and they recommend a particular yarn but the cost or availability isn’t working for you. Well it’s time to substitute. Now in the early days I’d get out my Bendigo shade card  or go to the knitting shop with pattern in one hand looking at balls of wool. Or ask a friendly shop assistant for some help. These days I go to the stash which has definitely grown from those early days.

And the easiest thing you can do and if you’re online this will be easy is to go to Ravelry. You will see along the top the word ‘patterns’. So you’re going to click on it, then you’re going to type in the pattern you want to make. Let’s say we’re going to make Grannys Favourite by Tikki so I type in the pattern name.

And then along the top we see Yarn Ideas…this will tell you what yarns people have used for the project

and if you click on where it says how many times it has been used it will bring up the projects with that yarn. Too easy.

You can also work the other way and let’s say you have a particular yarn and you don’t know what to make with it so instead of selecting patterns you’re going to select Yarns from the top row and then type in the yarn, then you can see projects that people have made with it and narrow it down to baby, child, cardigan or whatever you have in mind.

I’m making this sweet baby blanket in the first photo above. Instead of using the worsted cotton from the US that is recommended, I’m using Bendigo 12 ply – Rustic in Spruce which is a gorgeous turquoise/teal colour and Luxury in Aran. The blanket will be super warm and a fraction of the price of the recommended yarn.

And just a warning this photo may offend some readers………………baby playing with brand new balls of wool…….I was so worried about putting my camera out of his reach, turned my back and he was straight into it. But not for long.

Any tips you want to share with my readers or perhaps you need some help substituting for a particular project? Hit me with it………………

loving the holidays

I think there is a little part of me that could quite happily homeschool this family of mine…..mind you, maybe you should ask me that question in 2 weeks time. We are just having the loveliest break from routine. Waking up whenever we want (well not me, emerson likes to head butt me from about 5am letting me know he is awake – and if that doesn’t work he pulls my hair………….and hard!). We have no school run and no activities or places we have to be. Painting our toenails crazy colours, colouring in, playing outside, going to the movies and the shops and baking.

and tonight after making a delicious veggie soup and then a zucchini and bacon slice, we popped a chocolate cake in the oven and served it up with icecream for dessert. During school time I would be hard pressed to churn out that much food from my kitchen AND still have time to do a chocolate cake and ice-cream. Long live the holidays.

p.s of course we have the usual fighting/noise/and carry on that goes with the territory of 5 kids in the one house. Just keeping it real for you all.

losing sleep over oven choices

Choosing the oven for our last kitchen was pretty straight forward. I went to Harvey Norman (that’s a whole other story here), looked at fridges, looked at 900mm stainless steel ovens and bought the last Glem 900mm gas oven in stock at a special price. Done and dusted in one trip.

Now this kitchen we have just electric to work with, so I’ve been to look at ovens and wasn’t wowed with the electric top of the Glem which is what I was going to go with. So then I saw a Belling and liked it in black but didn’t like the price tag. And then when you look at the price of them in the UK you wonder why you are paying 2.5x the price here AND still have a 16 week on the oven.

image source

Then 2 different people told me about importing the oven myself. John Lewis even have an export team (thanks a beach cottage for that hot tip) and they can arrange everything for you. Well that just opened a floodgate because of course the range of traditional cookers over there is huge. Thanks to one of my lovely readers Julie for letting me know about their range here………I love this one, just love it. With an electric top of course because I can’t do gas.

image source

And then I decided well I might as well look at AGAs and another gorgeous blogger told me about where I could get one. But that’s starting to get a bit complicated because I would have to organise an agent and have it picked up from their warehouse (which is overseas) and there are lots of models and choices and I’m thinking I just want the look of a country cooker but modern electric oven.

image source

So then I’m back at the electric ESSE model which I discovered on the weekend and which I love because it looks like a big old traditional oven but you have an electric or induction cooktop with those gorgeous stainless steel hob covers. Love those. And I can buy one of these in Australia but they aren’t cheap but they look fabulous.

Image source

And then of course more googling revealed a brand new electric model in funky colours that just looked gorgeous here and just arrived in the ESSE range but not in Australia. And then I just come back to the realisation that maybe I should just save my money and go with the stainless steel 900mm. Which of course is a whole lot better than the 1972 Whirlpool oven that I’m cooking with at the moment.

Decisions, decisions………………………..I’ll report back to you with my final choice as I’ve paid the deposit on the kitchen and can’t leave it too long to decide. And lets not forget that any oven choice needs to go past the boss. Well I’m the boss but you know what I mean………………..the Chief Financial Officer of the house.

knitting for a new baby

No, don’t worry, you haven’t missed anything. Not my baby but I’m going to be an aunty soon and I wanted to have a few little things gifted before baby arrives.

I figure with a younger brother and sister and my cousins just starting to get married that I can keep knitting for babies for a long time to come.

The dishcloth pattern is from the new book I bought (reviewed here) and took 2 nights and is just sooooo soft. The yarn is debbie bliss cotton dk and it’s knit on 5mm needles so it’s knit a little looser and is really soft. It’s just perfect. So perfect in fact that I just cast on another one in green. Same pattern, same yarn. This one is now on ravelry here.

and the cardigan is from an old favourite pattern that I love, the easy baby cardigan from More Last Minute Knitted Gifts. This is so quick and easy, knit up in 10 ply and I think this is my 3rd from the same pattern. I do that. It’s like my kina addiction. You can see on ravelry I’ve knit it here and here. This little number is now on ravelry here. I’m just going to block it this week to stretch it out a little and pop a few little buttons on when I can go up to spotlight. Not something I really want to do with 5 kids in the school holidays but my usual trick of hot chips just before or just afterwards usually gets the job done. That and a little pep talk before we enter the store.

and while we’re talking knitting here is my new ball winder. I picked up a vintage one from eBay for $22 and I’m pretty impressed with it. I did have 2 balls of wool that got a bit tangly but a quick check of youtube and I realised I was going way too fast. So I’ve sorted out the speed and I’m all good.

One warning if you want one of these babies…………..the kids. Because I’ve set mine up on my sewing table next to my computer the kids come to ask me something or walk in and just wind it and keep winding it.

with school holidays here I hope to get a few more things off the needles……………………….

‘escape to the country’ tragics

If you’ve read this blog for a while or you’ve seen a few of my facebook updates then you know I have a bit of a dream to move to the country. The southern highlands would do. Some peace and quiet, 5 acres would be nice, a cosy home with enough space for all of us, some good schools nearby, close enough to Sydney to still see friends and family and just a bit more space and a quieter lifestyle.

We go through stages of trying to make it work but it would require lots of commuting for retro daddy and it always comes unstuck. So I live out my country dream through ‘escape to the country’ episodes. I’m rather addicted. I have fallen asleep a couple of times as it’s on at 10.30 each night.

So I’ve just started taping the episodes. I don’t mind what part of the UK they are investigating, the bigger the budget the better, if there’s an AGA I’ll yell out to retro daddy to check it out and I’ve made it my number one tv show lately.

And I know I’ve got some fellow tragics on facebook who have to watch it every night. Some of them have made the tree change themselves………………….have you?

And while we’re confessing my other great love is the real estate website and I love looking for country kitchens like this one. Image source here. Now I’m just being picky but I probably would have kept the floorboards running through the kitchen.

OK enough confessions from me, over to you………………dream of the country, living the dream, made the tree change, have no desire……..

image source here

someone is turning 1 soon

I needed a little reminder that someone is about to turn 1 in this house. Surely not. Surely not the little bundle I brought home last July is about to turn 1. It was daddy and Keira who reminded me that in just over 2 weeks this little guy will turn 1.

And I’m so sorry Emerson that I sometimes muddle up the date in july you were born with elodie. 11th and 13th just gets a bit confusing when you have a few birth dates to remember.

He is still Australia’s happiest baby……………………………he comes along everywhere with me and always smiles at everyone, loves elodie’s speech therapy visits, hates it when elodie tries to steal his toast every single morning and fights for it and is just an all round happy boy who goes with the flow.

And I must say that trying to buy a present for the 5th baby is tricky but I’ve managed to pick up a few things for him that won’t overload the already full playroom and toy baskets.

you can’t beat old favourites like jam drops

I know you can make macarons (well, not that I’ve ever made them) and lots of fancy biscuits and cakes these days. And I have so many cookbooks with fancy recipes. But what I love to make and love to eat is the simple stuff. Recipes that have the basics that you always have in your fridge and pantry, that don’t take too long and that always get eaten. And jam drops are always a winner in this house.

Mind you we always have a few where the jam is sliding off the biscuit onto that tray and sometimes under the biscuit. But that just adds to the homemade appeal and trust me…hungry little people don’t care. This recipe made 3 trays of biscuits and there were 2 or 3 left by dinner time.

enjoy……………….we certainly did!

5.0 from 3 reviews
you can't beat old favourites like jam drops
 
Prep time
Cook time
Total time
 
quick, easy and no fancy ingredients required
Author:
Recipe type: baking
Serves: 24
What you'll need
  • 125g unsalted butter, softened
  • 1 cup brown sugar
  • 1 egg
  • 1 tsp vanilla essence/extract
  • 1½ cups plain flour
  • 1 tsp baking powder
  • Jam of your choice
Instructions
  1. Cream together the butter, sugar and vanilla. Add in the egg and mix until well combined. Gradually add sifted flour and baking powder and mix until a dough forms.
  2. If you have a thermomix then process the butter, sugar and vanilla on speed 5 for 20-30 seconds and scrape down the bowl. Add the egg and process 20 seconds speed 4. Add in flour and baking powder and process for about 30-40 seconds on speed 3 until a dough forms.
  3. Place small teaspoonfuls of mixture in round balls on lined baking trays.
  4. Press down gently with a thumbprint and place a small amount of jam in that indent.
  5. Don't go crazy with the jam.
  6. Bake in a preheated 160 degree oven for about 15 minutes and don't overcook the biscuit or the jam will change appearance.
  7. Remove from oven, leave to cool a couple of minutes on the tray before moving to a cooling rack. I like to add in a dash more jam to each biscuit at this point and it makes them look a bit prettier.
  8. Eat and enjoy.


quinoa with sweet potato, feta and caramelised onion

I wonder what quinoa camp you fall into? Never had it, sometimes have it, had it once and didn’t like it or you’re a regular quinoa person. I must admit that it’s been a while since I’ve had quinoa but the thermomix does a super job of cooking it just right. And as much as I love my thermomix I’m not so good at using the steamer (AKA the varoma). But then I’ll use it and think wow that was fab, I need to use it more often.  For this recipe your quinoa will cook within the basket and then your sweet potato will be steaming up above at the same time.

Now these ingredients were in my fridge because I planned on doing a quiche or frittata. But then I thought I better use up the quinoa at the back of the pantry. Next time I make it I am totally going to add some toasted pinenuts at the end. You can also use whatever dressing or herbs you have to hand and another delicious option if you had a bit more time would be to roast your sweet potato. And if you’re really short on time just skip the red onions and use some caramelised onion relish in a jar.

This didn’t last long at our house and a big surprise was that elodie loved it….except for the caramelised red onion! That was taken out and left on the table or chucked over her shoulder onto the floor…………………….piece by piece.


quinoa with sweet potato, feta and caramelised onion
 
Prep time
Cook time
Total time
 
delicious and light. Eat it hot or cold
Author:
Recipe type: vegetarian
Serves: 6
What you'll need
  • about 250g quinoa, rinsed
  • 1 sweet potato, peeled and cubed
  • 2 red onions, thinly sliced
  • 200g danish style feta, roughly chopped
  • balsamic vinegar
  • 2Tbsp sugar
  • olive oil
  • 1Tbsp grain mustard
  • honey or apple juice concentrate
  • salt, pepper
Instructions
  1. Rinse quinoa and place in TM basket and put lid on without the measuring cup. Place sweet potato in the bottom of the varoma (spread it out nicely) and place on top of your thermomix.
  2. Fill TM bowl with 1- 1.5L of cold water and cook for 20 minutes, speed 4, Varoma Temperature.
  3. Remove the basket from your TM bowl carefully and fluff up the quinoa and place in Thermoserve or a large serving bowl.
  4. Test sweet potato and cook for a further 10 minutes, speed 1 and Varoma temperature if needed (using the water that was in your thermomix bowl).
  5. Meanwhile peel and finely slice the red onions. Place in a heavy based frypan (or any old frypan will do) and add in a tablespoon or two of oil and a good bit of salt. Saute onions until soft.
  6. I like to add some more salt as the onions soften and cook them for at least 5-7 minutes until really soft.
  7. Add in a good splash of balsamic vinegar and a tablespoon of sugar. Keep stirring and reduce the heat. Cook for a few minutes or two until the onions have a delicious taste and are caramelised.
  8. **Combine the quinoa, sweet potato, feta and caramelised onions and give a good stir.
  9. Make a simple dressing of 1 part balsamic vinegar, 2 -3 parts olive oil, 1 Tbsp honey (or apple juice concentrate - I used maple syrup as I was out of everything), about a Tablespoon of mustard, salt and pepper and season to taste and add a little more oil or sweetness or mustard till you have the taste you like. Stir through the quinoa and serve.
  10. You can eat this hot or cold, we thought it was delicious either way.
  11. If you don't have a thermomix then follow the instructions for boiling about 250g quinoa. Steam the sweet potato in the microwave or boil until tender. Follow the instructions for the caramelised onion and follow from **.


top tips for designing your kitchen

Well next week my lovely kitchen guy Michael is coming over to measure up and design the new kitchen. I’m just a little bit exciiiiiiiiiiiiiiiiiiited!  And I have a few things to do before he comes over. So I thought I would share what it’s important to think about when you start designing your own kitchen. You’ll find my kitchen pinterest board here.

Above is the kitchen I’m living with…I do love my windows. No window changing required. And below is the kitchen we left………..which had been 2 rooms and an ensuite bathroom before we changed it all. And sold. And moved house. As you do when your 5th baby is on the way. I know some people couldn’t believe we were selling up and moving but a new project (or two) is always exciting.

1. have your style and design in mind and in front of you

Thank goodness for pinterest. There are lots of magazines out there but there is no point me picking up a magazine on the latest trends in kitchens because my taste is classic and I would need a more traditional kitchen magazine. The latest issue of home beautiful had a couple of great ideas in there but really pinterest is my best friend. Oh and if you love classic kitchens then take a look at some US and UK country magazines for inspiration.

2. know your kitchen layout and find designs that will work with your layout

Even when we had a builder involved and moved the last kitchen from the front to the back of the house, you still need to work with what you’ve got or what you’re creating. Windows, doors and walls will determine where things go and how long your island, cupboards will be and where you want appliances to go. Just put lots of terms into pinterest and see how you go. I found the exact same layout as I’m working towards on pinterest here.

3. pick out your appliances

Now you might just need a rough idea of what you want. When you meet the designer he’ll ask what fridge and oven are you going with. Because they need to know how wide the fridge space will be, do you want a dish drawer dishwasher or a freestanding. What kind of oven did you have in mind? I’ve learnt from last time and will be picking out the fridge size and having those dimensions on hand. It saves time and makes things easy. Plus there can a lot of decisions when it comes to cupboard finish, colour, handles, tap and sink so get the stuff out of the way like oven and fridge and dishwasher first.

I’ll be going for an electric freestanding oven. We don’t have gas in the house and as much as I’d love a gas oven I’m not going to connect up from the street just for the kitchen. I never know how long we’ll be in a house and cough cough since this is our 4th home that we’ve purchased I’m just keeping it simple and within budget. Dishwasher will be a freestanding one but tucked into a space next to the sink and fridge will be a double door french door. Now that I’ve been up to look at fridges and fell in love with this Samsung number.

4. Know your budget

Now sometimes it’s a bit chicken and the egg. When we started this process at our last house we didn’t even have a ballpark for the renovation or the cost. So sometimes you need the quote to set your budget. I think we initially thought it would cost half of what the last kitchen cost us. We underestimated building costs and also flooring. So have a rough idea in your head which might be determined by your savings, loan amount or what the quotes are coming in by or what people are saying. I remember a friend saying how much she thought it would cost and she was right. that amount was always at the back of my mind.

5. Don’t be swayed

There is no point me being talked into a modern kitchen or a dark cupboard choice or an $8k freestanding cream oven. I know my budget, taste and I know how I want my kitchen to look. It’s easy to be tempted by flash and fancy but I do think stick to what you want and what your budget is. I actually keep things pretty simple. Buy an oven on sale rather than be stuck on a brand, I don’t need fancy cupboards or lots of fancy fittings inside them. I need basic white cabinetry, a big island, caesarstone benchtops, room for all my appliances and platters and stuff (I have a lot of kitchen stuff) and I will get the hamptons look and a luxurious feel with a good sink, tap and cabinet handles.

6. It’s ok to stress over the little things

I seriously lost sleep over the finish of the tap. Not the exact tap, I knew that but did I want chrome, stainless steel, pewter or so on. It was ridiculous. In the end I loved the tap. Loved it and it was a great decision. I found it a huge help to go back to my inspiration pictures and pinterest and think about the overall look I was going for. This time around I’m already stressing over the oven as I’m not loving the cooktops on the electric freestanding ovens. But we don’t have gas.

7. Ask your other half

I did our last kitchen pretty much on my own as retro daddy gave me free reign. This time I asked what he wanted – turns out he wants a white butlers sink instead of a stainless steel one, doesn’t want a wine fridge, wants lots of storage for me, wants me to have a big clearout before I move back into the new kitchen and the rest is up to me. If your other half has big ideas on the kitchen make sure they have a big plan/ idea of how they want it to look. Talk a bit of sense if they are going off on a tangent, remind them of budget (I actually don’t need to be reminded of budgets in kitchen renovation land because I rule the spreadsheet and know it’s a tight one). And sit him down on pinterest or with home magazines. Hopefully you’ll be on the same page.

8. Don’t forget lots of power points

I didn’t put enough power points into my last kitchen. Put one on either side of your oven if you’re going for a freestanding. Put one in your pantry to hide your microwave. Put one or two at each end of your island. I was so worried about the design and look of the kitchen that I had to swap over my kitchen aid anytime I wanted to use it. So don’t skimp on them!

9. Have a good think about flooring

Some flooring like hardwood or a floating floor will go in first and the kitchen cabinets will go on top. Other types of flooring can go down after your kitchen is put in. Have a good idea of the flooring you will be using and pricing and ask your kitchen person for advice and timing. They will tell you whether you need to put the flooring in first or the other way around. It’s also a good time to ask about timing. For our last kitchen we got a fabulous timeline and everything ran smoothly and everyone was co-ordinated by the kitchen company.

10. HAVE FUN!!!!!!!!!!!!!!

The designing is the fun bit! There is no dust or noise or old kitchens being thrown out of your windows………..yet. So enjoy this part. Take as long as you need. If you have a tight budget but expensive taste then visit a few showrooms, check out the realestate section and just gather your inspiration and make the internet your best friend to find the best options.

I will tell you what isn’t fun…………..looking at kitchen appliances with 5 kids! We all needed 2 big plates of hot chips afterwards to recover.

what to knit when you’re expecting

I am totally in knitting mode at the moment. Cold days, even colder nights, flannelette jammies and ugg boots on, sick babies here, new babies being born and a real need for knits to be flying off my needles and onto my little ones at the moment. Now I love finding patterns off the internet but I hate printouts and losing the patterns. I just love books. Sure, I know you can put it on your ipad but I’m just a book person. And I found a new knitting book at Dymocks yesterday that had to come home with me. What to knit when you’re expecting by Nikki Van De Car.

I do have quite the collection of baby knitting books because there is no better gift to give a new mum than a little knitted number (that and a cleaner or a cooked dinner). And this one has a lovely mix of patterns AND the cardigans and knits are seamless. Quite often baby books have patterns knit on 2 needles and involve lots of stitching pieces together. Like the little cardy I’m knitting at the moment.

Plus my lovely aunty Debbie had knitted the maile cardigan for elodie and I just had to knit it and keep the pattern. We got a lot of wear out of this little cardigan which is now tucked away for a teddy bear to wear or to hang in elodie’s room when I get around to decorating her room. This is my sweet elodie at 2 weeks old. Awwwwwww.

The patterns in the book are divided into 3 trimesters and what I love is that the 3rd trimester section of the book is devoted to little projects. Because mummy to be is getting tired. There are burp clothes, bibs, hats and booties. Blankets, cardies and clothes are reserved for the first 2 trimesters. This is Autumn Leaves which some of you might have found on Ravelry as it’s a popular one.

I’ve put photos of a few favourites and I am just loving this book.  There are 8 pages with terms, photos of how to knit and a few instructions which beginners will find helpful and I always think having a bigger reference book is helpful for beginners (I shared a few of my favourite how to knitting books here) or be sitting near YouTube when you get stuck. Nothing like watching a tutorial to help you with a new technique.

It’s so nice to see patterns that I love on ravelry in the one book and a nice range of patterns from beginner to more intermediate which keeps everyone happy. Lately I’ve seen a few baby books that just have the same old same old but I was pleasantly surprised with this book and give it a big 5 stars. It might just be my go to book.

I picked up this book for $28 at Dymocks as it just had to come home with me. If you buy your books online you can find it here, here and here. And I’ve just found Nikki’s blog here.