quick + easy sushi

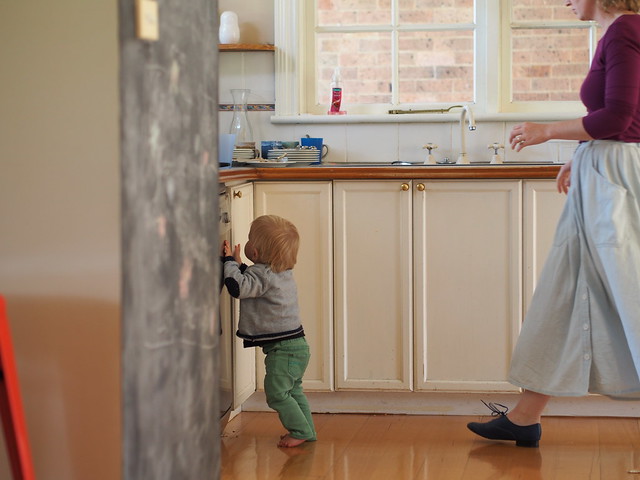
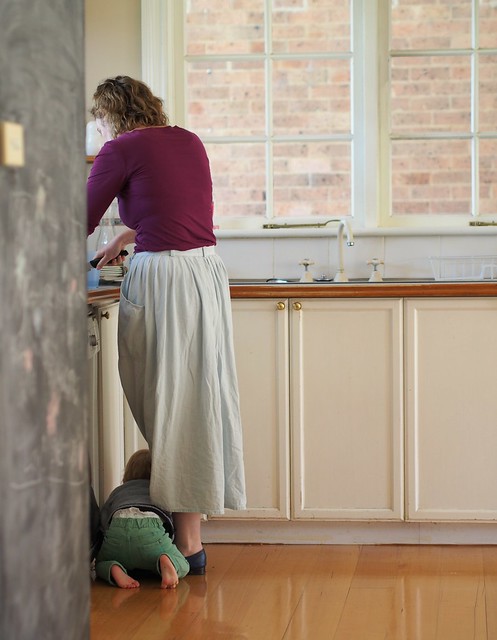
I’m still adjusting to my new weekly routine which involves lots of activities for elodie and less time at home. We’re all adjusting. So we’ve had a few quick dinners the last week or so and one of the favourites is sushi. Once you’ve made sushi at home you’ll be making more of it. I don’t even use a mat anymore………probably because I can’t find the mats in my crazy disorganised kitchen. But that’s for another post.

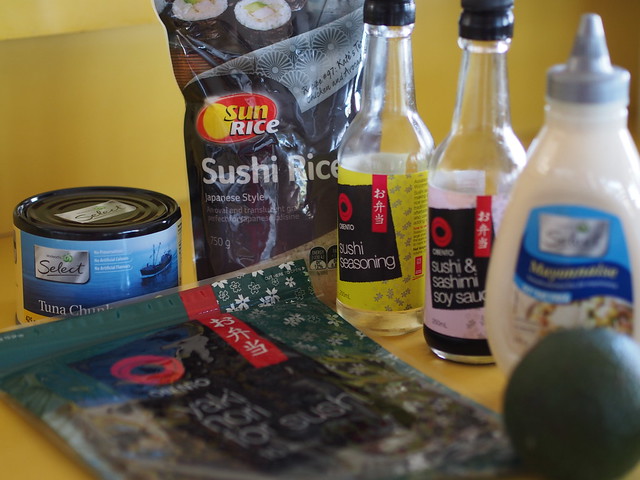
Once you’ve got the basics like the rice seasoning, soy sauce and mayo at your house it’s just a matter of remembering to buy some nori, rice and a filling each week. Too easy. And this is such an economical recipe when you’re making it instead of buying it… especially as your family grows like ours has! And if you’re after a fancier sushi recipe then I have an asparagus and roasted red pepper sushi recipe here.

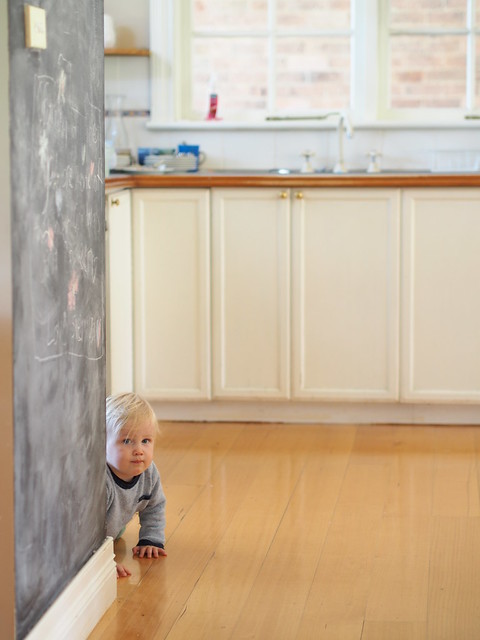
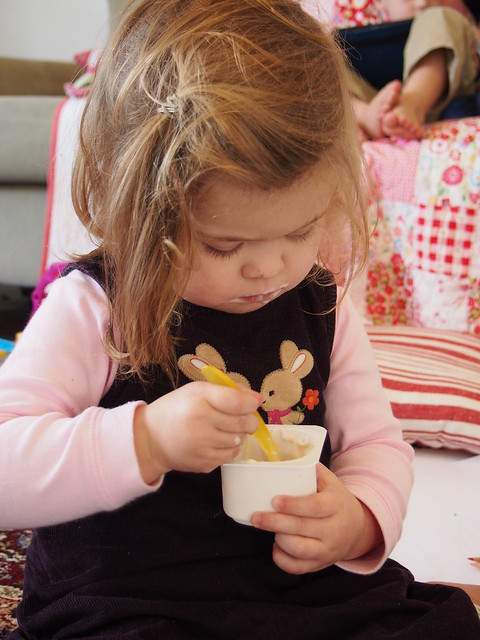
And if rice everywhere gets to you just get the little ones to eat outside!

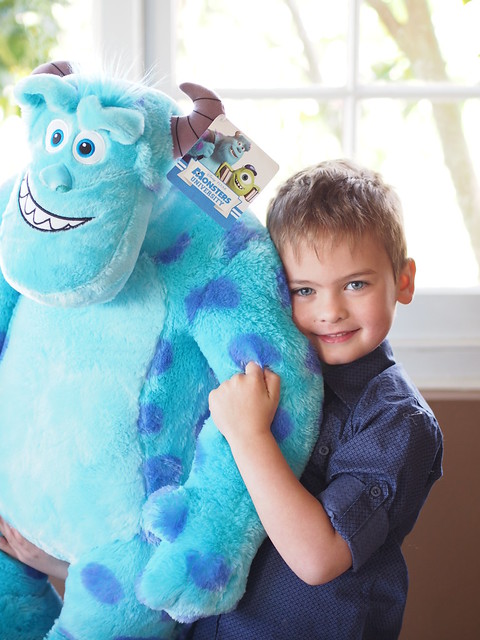
Finn doesn’t mind at all……………………


5.0 from 1 reviews
homemade sushi
 
Prep time
Cook time
Total time
 
This is quick, easy, healthy and yummy!
Recipe type: Dinners
Serves: 4-6
What you'll need
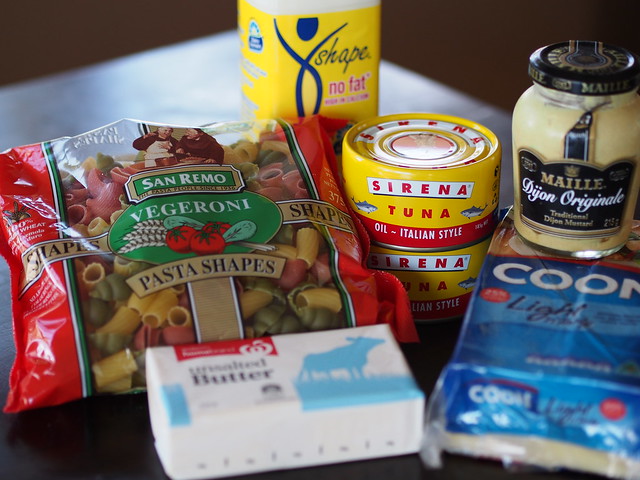
  • 1 packet nori sheets
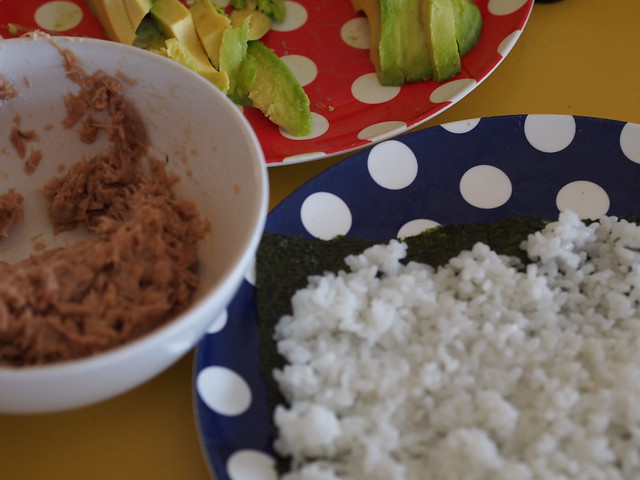
  • 1-2 cups sushi/short grain rice
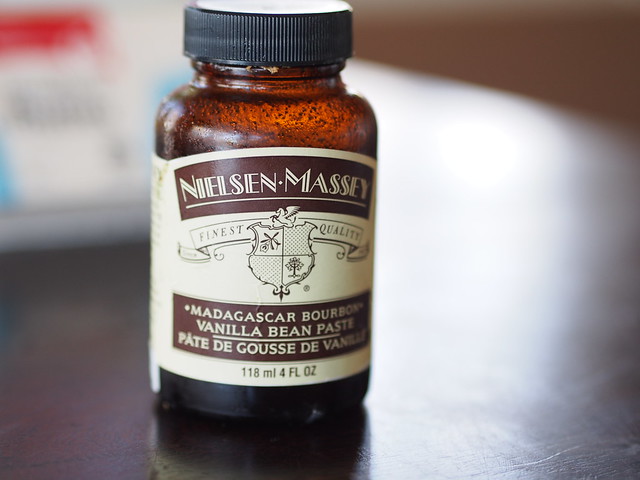
  • sushi rice seasoning
  • soy sauce/sushi dipping sauce
  • 400g tuna, drained
  • 1 avocado
  • mayonaise
Instructions
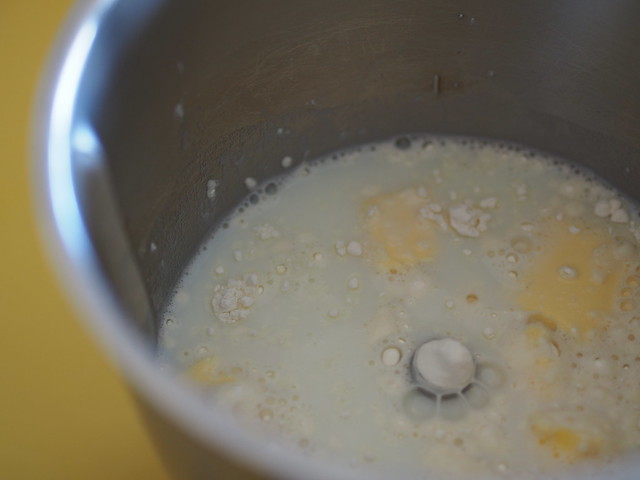
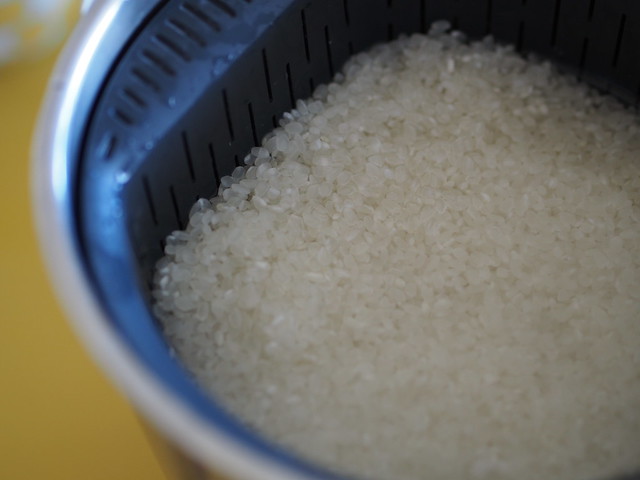
  1. Cook the rice according to the packet.
  2. If you have a thermomix then rinse the rice in your basket, place in your thermomix and cover with just over 1L of water.
  3. Cook for 20 minutes on varoma temperature and speed 4 and fluff up with a fork.
  4. Tip out the rice onto a large dinner plate and leave to cool (the plate helps it cool faster).
  5. Pour a couple of tablespoons of rice seasoning over the top of the rice and with a fork mix it all together.
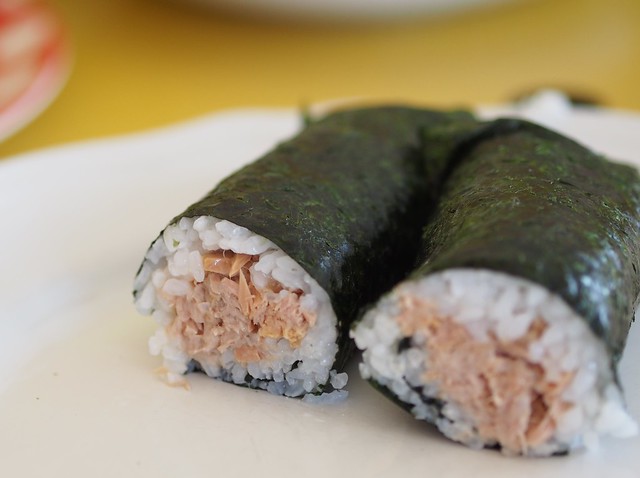
  6. Now lay a piece of nori down flat. Top with rice (about ½ cup of cooked rice) and spread it all out over the nori.
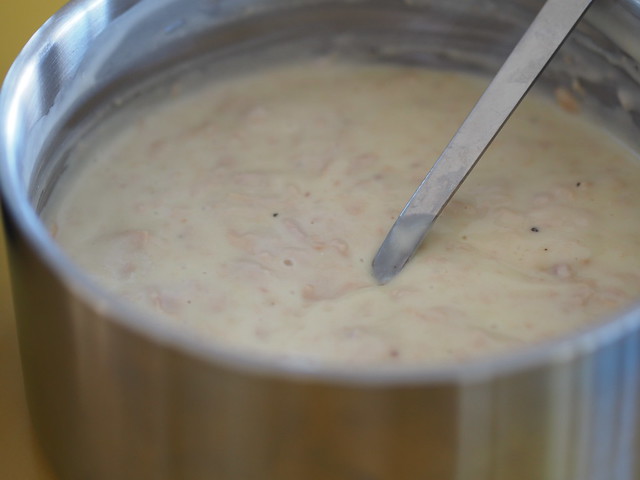
  7. Now top with some tuna that has been drained and mixed with some mayo. Place some avocado on top and roll tightly away from you
  8. Set aside
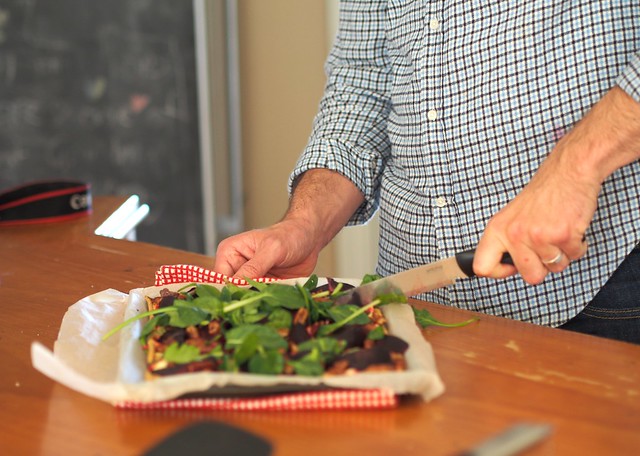
  9. When you've used up all of the rice then get a serrated long knife and either slice each roll in half or slice thickly and serve with soy sauce
  10. Now this won't be the cleanest meal that they'll eat and expect a bit of rice in hair and down clothes but the little ones will love you!


I knitted a hat

Well after the blanket I decided that my next project had to be something quick. Toddler hats are perfect. This is based on the umbilical cord hat which is a great little pattern. I just used 12 ply wool (Bendigo Rustic 12ply), 5.5mm double pointed needles, cast on 66 stitches, kept knitting for about 12 cm before I started my decreasing.

I made this one for tim coulson’s gorgeous little boy roo who reminds me of emerson! And I better make one for emerson…………..but only once I finish the kina for keira. I am really dragging the chain on that kina but will not be starting any new projects until it’s finished!

Ravelry details for this little hat are here.

tuna macaroni my way

So we asked the twins what they would like for their birthday dinner last weekend! You know, special request, best dish I make and all of that. And what did they ask for? Tuna macaroni. Yep. Just good old tuna macaroni. I should be flattered, over the years I’ve perfected the old tuna macaroni and here is how they like it. Thermomix and no thermomix versions. It won’t win masterchef but it’s very popular in this house and if everyone eats it then that makes it a winner in my books………………I must also admit that when I’m pregnant this is one of my favourite dinners.

now you can grate your own cheese in the thermomix but I just love cheese on the good old fashioned grater AND I love eating it this way too. Especially a good vintage cheddar. Yum yum.

this is white sauce in the thermomix, just 7 minutes and you walk away and do something else! I must make this at least once a week for the little ones!

and would you look at this birthday boy, after eating his delicious tuna macaroni he said I can make it next year for his birthday too. Bless him!


tuna macaroni my way
 
Prep time
Cook time
Total time
 
this is so popular in our house!
Recipe type: Dinners
Serves: 4
What you'll need
  • 400g pasta, cooked
  • 50g butter
  • 50g flour
  • 500mls milk
  • 1 or 2 cups grated cheese (I love vintage cheddar)
  • 400g tuna in oil (I just love Sirena tuna)
  • mustard, salt, pepper to season
Instructions
  1. Cook pasta as you normally would and you want it al dente.
  2. Place butter, flour and milk in thermomix bowl and cook for 7 minutes at 100 degrees on speed 4.
  3. Add in cheese, mustard (I do 1-2 tablespoons), pepper and process 10 seconds speed 4.
  4. Place the tuna in your thermoserve bowl and break up with a fork. I drain most of the oil (not all) before this. Pour in the cheese sauce and season with salt and pepper.
  5. Add in the cooked and drained pasta and enjoy.
  6. For something a bit special place into a greased baking dish, top with another cup of grated cheese and bake in a 180 degrees oven until the cheese has melted and is golden. This is really popular with the kids BUT they usually want to it eat it straight away and can't wait. My dad was a fan of crumbling Thins chips and adding that to cheese before it went in the oven.
  7. **If you don't have a thermomix then place butter in a saucepan and almost melt it all, now stir in the flour and mix well.
  8. Bring to a bubble and then add in the milk and whisk well. Turn down the heat to a low/medium and keep stirring until the sauce thickens. You want it to coat the back of the spoon and be a nice thick white sauce.
  9. Add in cheese, mustard and season. Add in the tuna and pasta and enjoy.


how to make birthday cakes in your thermomix

Righto, so you’ve got your Thermomix but you’re still working your way around it or maybe you haven’t got your favourite recipes converted. Or maybe you just buy packet mixes when it’s birthday cake time because the decorating alone is enough to worry about. I must admit that I still love using my KitchenAid for cakes and icing but have done a couple of butter cakes in the thermomix recently and knew it would make a great blog post. What am I saying, I’ve been making lots of cakes in the thermomix lately……………..

A good old fashioned butter cake that tastes like your mum used to make (or reminds you of parties when you were little or perhaps for some of my more mature readers you were the mum making the butter cake back in the day). This one is for you. Made from scratch and absolutely delicious. Not too heavy either.

Here is what you need for your birthday cakes. You will notice lots of home brand for this post. Retro daddy did the shop this week. King of the home brand and keeping the shopping bill down!

Oh I did buy the vanilla paste. That is not homebrand and actually comes from Williams-Sonoma and is just gorgeous and gives you those little black vanilla bits in your baking. About $11 and lasts for ages………..plus it’s a great reason to ‘have’ to pop out there.

Now if you’re making this without a thermomix then use caster sugar and icing sugar. The thermomix processes the raw sugar into caster sugar and also icing sugar which is why I just have the raw sugar bag there. It’s great for saving money and pantry space.

and this is what happens when you put the cakes on the table but turn your back……..

This recipe makes 2 cakes………………….if you’re after a fabulous chocolate cake in the thermomix then try my simple chocolate cake which is just delicious and lots of readers have been enjoying it lately.

4.8 from 11 reviews
butter cake in your thermomix
 
Prep time
Cook time
Total time
 
Author:
Serves: 24
What you'll need
  • 250g unsalted butter, room temperature
  • 1Tbsp vanilla (essence/extract/paste)
  • 1½ cups /320g raw sugar (or caster)
  • 4 eggs
  • 3 cups/450g SR flour
  • 1 cup/250mls milk
  • 3 cups icing sugar (or raw sugar if you like)
  • 2 Tbsp margarine
  • dash of milk
  • lollies to decorate
Instructions
  1. Place raw sugar in TM bowl and process for 10 seconds on speed 9 to make caster sugar.
  2. Add in chopped butter and vanilla and process for 30 seconds on speed 5, scrape down the bowl halfway.
  3. Take out the measuring cup and with the machine running on speed 4 pour in the eggs one at a time through the lid. Takes about 20 seconds max.
  4. Now add in half the flour and half the milk. Process 10 seconds speed 5 and remaining flour and milk and 20 seconds speed 5. The mixture is heavy so scrape down the bowl and make sure the flour and milk are mixing in. I just did this with a spatula.
  5. Give it another 20 seconds if it needs it. Then pour into lined cake tins. This mixture makes 2 cakes but you could also use a large rectangular cake tin and then cut your cakes from the one big cake.
  6. Bake in a preheated oven at 180C/350F for about 40 minutes until cooked right through.
  7. If your oven tends to get hot or the top is browning too quickly and the cake is still wobbly just turn down the heat by 10 degrees or so.
  8. Now you can make your icing sugar in the Thermomix and do this you would put 3 cups of raw sugar into the TM bowl in 2 batches and process for about 30 seconds on speed 9. I do it in 2 batches and then place it in a large bowl ready to make my icing.
  9. Place the margarine in your TM bowl and process for 20 seconds speed 5. Now add in about 1 cup of the icing sugar and a dash of milk. Process at speed 5 until it all comes together
  10. Add another cup of icing sugar and a dash of milk if needed and process again...then add in remaining icing sugar. You want a nice spreadable consistency. Use your spatula to help the icing sugar that is sticking at the top of the bowl.
  11. If it's too thick add a bit more milk and if it's too runny add more icing sugar. If you want to colour your icing then get it all out of your TM bowl FIRST and place in a bowl and colour using a toothpick to add colour to the icing! Don't tip the bottle near the icing or you'll get too much colour in the icing


Cooking with Tenina – Mexican Fiesta Class

You know good things are about to happen when you walk into a big kitchen and see this on a Monday night…………………

and especially when Tenina is there too! Not only is she a great teacher when it comes to all things Thermomix but she’s an entertainer…………………you are going to have fun in that room! I can assure you! Look how much fun she is having making aioli.

Now I have to admit that mexican food in our house consists of tacos, nachos or burritos. Oh and quesadillas. So a class called Mexican Fiesta sounded like a lot of fun. And it’s one of those things where everyone wins because mum comes home with new recipes to try out on the family………and she gets a well deserved night out of the house.

We got things started with Horchata a delicious rice and nut drink…..I loved it and I’m not really a nut milk kind of girl but this was sweet, delicious and refreshing. Just another way to put your Thermomix to good use and make your own healthy drinks.

And how about a trio of dips with some corn chips – Jalapeno and lime aioli, crio bru avocado spread and a red kidney bean and lime dip. These were so fresh and delicious and I’ll definitely be giving them a whirl when I have some friends over.

Then it was time for some mexican charred corn and quinoa salad……and underneath the salad are some delicious homemade tortillas, a spicy pumpkin seed salsa and chicken tinga with potatoes. It was spicy, delicious and fresh. And not a hint of sour cream or grated cheese in sight.

Do you still have room for dessert after those photos? Because for dessert Tenina made her own puff pastry for a delicious chocolate tart with fresh mango on top…..served with some vanilla ice cream.

and if we had a little bit of room left then there was mexican chocolate tablet which had the delicious taste of chocolate, cinnamon, vanilla and almonds. It is made with Crio Bru granules and a little cacao butter. Yummy.

thank you so much to Tenina for such a fabulous class and all of her busy helpers behind the scenes who also made it happen…it was so great to get you know you before the class. And thanks to all the gorgeous ladies sitting near me at the table. We had a great time. Now Tenina, would you please go and get working on the Tenina bus to bring your classes around Australia. We need you………………………..

another Tim Coulson workshop under my belt

Saturday mornings here usually involve staying in my pyjamas a little longer than usual, housework, groceries and family time while Keira takes her art class. But this morning I was up early and heading out to a Tim Coulson photography workshop for the day. Just what I needed to work on my photography and also a little time to myself out of the house. I think everyone needs a bit of time to do something for themselves. And after the week I had it was just what I needed.

The morning was spent inside introducing ourselves and learning. Lots to learn. I may have got a bit teary when he did a slide show of a recent session with some music and a bit of background story.

little roo worked the camera…he reminds me of my emerson so much and made me miss being at home! I know, I leave the house for a day and just miss everyone so much. Crazy.

Before I had even checked the time delicious smells were coming from the kitchen. Thanks to Kesh and Tim for their hard work in the kitchen and all that beautiful food. It was delicious. You can’t beat pumpkin soup, crusty bread and a delicious homemade quiche and salad for lunch. It was just perfect!

Then it was time to head outdoors with our cameras and put what we learnt into action. I still have my L plates on when it comes to taking photos in manual but just get out there and put what I do know into practice and try to improve as I go.

I’m also learning how to use a new camera now that I’m using the Olympus OMD EM-5 (with so much thanks to Olympus for lending it to me for the next year). It’s a great camera to use and I took all of these photos with the 45mm lens and my new skills. And as luck would have it, Kristie one of the lovely ladies at Olympus was at the workshop today and on hand to answer a few questions from me. Thanks Kristie.

the sun was out and the weather was just gorgeous! This is one of my favourite places in Sydney and I was just imagining my crazy kids running around having lots of fun in all that space.

oh you didn’t think I’d let you leave without a shoe shot did you?

and one with my lovely buddy Sarah.

And that was today. If you get the chance to attend a workshop by Tim just do it. I can’t rave about it enough. We were a mixed bunch today of gorgeous people who all came with something we wanted to take away from the day. Tim has something to teach everyone in a very relaxed and personable way. I’m on my way to taking better photos and just love capturing everything at home.

It feels like learning from a friend and you walk away inspired, armed with some new tricks and skills and a new understanding of how your camera actually works. That was my 2nd class with Tim and I focused on shutter speed and aperture this time around.

Thanks to Tim for another great workshop, Kesh for all the behind the scenes work that went on, Roo for just being his cute little self and all the lovely people I met today.

lemon drizzle cake

I’m still working my way through the lemons on my kitchen table and this recipe hits the spot for the lemon lovers out there! You’ll need at least 4 for this recipe and it’s worth it.

it didn’t last long in our house and I’m realising that my new strategy of baking on weekends and blogging the recipes during the week means that I have to blog the cake when there is none left to enjoy in the house. I don’t even have any raw sugar to make a lemon cake today.


5.0 from 1 reviews
lemon drizzle cake
 
Prep time
Cook time
Total time
 
Recipe type: baking
Serves: 10
What you'll need
  • 1 cup raw sugar (or raw caster sugar)
  • grated lemon rind from 2 lemons (or rind segments from 1 lemon)
  • 125g butter, softened
  • 1Tsbp vanilla essence/extract
  • 2 eggs
  • 1 cup milk
  • juice of 1 lemon
  • ½ cup or 55g desiccated coconut
  • 1½ cups/250g SR flour
  • juice of 3 lemons
  • 1½ cups raw sugar or icing sugar
Instructions
  1. Place sugar and lemon rind pieces in thermomix bowl and process for 10 seconds on speed 9. This gives you caster sugar and grated lemon rind.
  2. Add the butter and cream together for 20 seconds speed 5. Scrape down bowl.
  3. Add in vanilla and process 10 seconds speed 5.
  4. Add in eggs, milk and juice of 1 lemon and process 20 seconds speed 4. Scrape down the sides of the bowl.
  5. Add in flour and coconut and process 20 seconds, speed 4 and reverse.
  6. **Pour into a lined cake tin and bake for about 40 minutes in a 170C/340F oven.
  7. Remove from tin and leave to cool
  8. Now place the 1½ cups of raw sugar (in 2 batches) in thermomix bowl and process for 20 -30 seconds on speed 9. Now combine the juice and icing sugar in thermomix bowl for about 20 seconds on speed 4.
  9. Drizzle over the cake. I liked warm cake with the icing but you could wait until the cake was cooled. We can never wait for a cake to cool in this house.
  10. If you don't have a thermomix then cream your butter, caster sugar and grated lemon rind until thick and creamy. Add in the vanilla and eggs and combine well.
  11. Add in milk and lemon juice and mix well. Then sift in the flour and coconut and follow from **. To make the icing you want to mix sifted icing sugar and lemon juice until you have a nice runny sweet icing. Make sure the icing sugar is sifted or you can mix in an appliance to get any lumps out.


the baby blanket is done

Ta da, may I present my first knitted baby blanket! I’ve crocheted a few baby blankets in my time but this is my first knitted one….and I love it.

Mind you, you do need patience for this baby. A good bit of patience as that stocking stitch can get a bit boring but it’s simple that you can take it anywhere without a pattern and just keep on knitting. Great for beginners too because it’s just a big old square with a nice border around it.

And it looks lovely, I think it will suit the parents to be and their style and my new nephew to be…………

Pattern details are on ravelry here, the pattern is called Summer Sky Blanket and it’s from this book. Wool is Bendigo Woollen Mills Rustic in 12 ply (colour is Spruce) and the border is in cream in the Bendigo Woollen Mills Luxury (also 12 ply).  I think this comes in around $30 all up and for a special present for a special baby I think that’s great. Knitting things in larger sizes or blankets is where using the Bendigo wool really comes in handy because the balls are 200g so you get fabulous value.

And now I’ve gone from a blanket to a toddlers hat………………..

simple cinnamon tea cake

When it comes to making cakes in this house the easier the better. I only get out to the shops once or twice a week so like to eat my way through the pantry. This cake doesn’t require anything fancy and was a favourite of mine to make when I was in high school. I used to bake cookies or a cake on a weekend and the love of baking started there. But I have to admit I wasn’t good at cleaning up. I’m sorry to my mum now because my kids are the same.

You won’t need anything fancy for this. Just butter, flour, eggs, sugar, milk, vanilla and cinnamon

Oh and a cute helper doesn’t go astray. I love that from wednesday to friday I spend the school day with my 2 little buddies and this girl makes the best kitchen helper ever!

I hope you enjoy this cake, we left a sliver for retro daddy and it made a delicious after school snack for the little ones. It’s light and buttery and just perfect.

4.9 from 12 reviews
simple cinnamon tea cake
 
Prep time
Cook time
Total time
 
Recipe type: Baking
Serves: 8
What you'll need
  • 125g butter, softened
  • ¾ cup or 160g raw or caster sugar
  • 2 eggs
  • 1 cup/150g SR flour
  • 75g/1/4 cup milk
  • vanilla essence or extract
  • extra sugar for sprinkling
  • cinnamon
Instructions
  1. Place raw sugar in TM bowl and process for 10 seconds on speed 9. Or just use caster sugar in the recipe.
  2. Add butter and process for 20 seconds speed 4.
  3. Add in eggs, flour, milk and vanilla and process for 1 minute on speed 5. Scrape down the bowl once in between.
  4. **Pour mixture into a lined cake tin (not a big one, say 20cm or so) and sprinkle with a tablespoon or two of sugar then a good dusting of cinnamon.
  5. Bake in a 180C/350F oven for about 30 minutes until the centre is cooked. Watch the top doesn't burn. My oven is very old so I need to turn the cake half way to make sure it's cooked all over.
  6. Remove cake from tin and place on a cooling rack. Or slice while hot which is how I like my cake.
  7. And enjoy.
  8. This one is best eaten on the same day but heh that is never a problem in this house. And if it's a problem in yours let me hire out a few of my kids or retro daddy to finish off yours.
  9. If you don't have a thermomix then just chuck all of the ingredients (except for the extra sugar and the cinnamon) in your mixer or a bowl and combine really well for a minute or two until it's light and creamy and follow from **.


looking through things

Next weekend I’m off on another Tim Coulson photography course and I can’t wait. I’ve got the Olympus OM-D ready (thank to Olympus) and a few lenses (thanks to my dad) and looking forward to taking better photos.

One of the things that I’ve been putting into action is looking through things and taking photos from different angles. It means you capture beautiful pictures of beautiful people like these ones.

Butter wouldn’t melt…………….this girl just continues to surprise and make me proud. We started a new playgroup today and she was loving it from the moment we got out of the car. By the time we were up and dancing to the wiggles a boy had found her and they were holding hands for the rest of the time, dancing under the parachute and squealing. It was just so lovely. The playgroup is run by the early intervention service near us and is until we get accepted into their program (waiting lists, I’m learning a lot about them) and has just made our thursday mornings so much better……………..

lemon delicious in the thermomix

When you have a big bowl of lemons on your table then you just have to make lemon delicious. I love the good old classic recipes and tonight I introduced all 5 little ones to lemon delicious. Everyone loved it except for finn. But he rarely eats the sweet stuff. He earnt his name chippy monster for a reason. Mmmmmm look at that delicious lemon delicious straight out of my oven……………..

This is a CWA recipe and very light compared to another recipe I’ve made in the past. I’ve converted it to the thermomix and done the egg whites in my kitchen aid but you can easily do the whole lot in your thermomix or just go old school and do it all by hand.

And look at the faces of happy children who say yum, thanks mum for such a delicious dessert tonight!

emerson also loved it…………..but then he always smiles when I call out his name. But he did take the serving spoon off me………..

Now unfortunately for retro daddy this was so popular that he was left with a teeny tiny serving. But since he’s working late and on a big health kick I think he’ll forgive us. Or maybe not…we shall see


5.0 from 3 reviews
lemon delicious in the thermomix
 
Prep time
Cook time
Total time
 
Author:
Serves: 4-6
What you'll need
  • 50g butter
  • 150g raw caster sugar (or raw sugar)
  • 2 large lemons juiced (or 3 small)
  • 2 eggs, separated
  • 1 cup milk
  • 2 heaped tablespoons self raising flour
Instructions
  1. place butter and caster sugar in TM bowl and process for 20 seconds on speed 4.
  2. Add in lemon juice, egg yolks, flour and milk and process for 20 seconds on speed 6. You might need to scrape the bottom of the bowl and just make sure you've got the butter and sugar mixture with your lemon mixture. Just do another 10-20 seconds if you need to.
  3. **Now whisk your egg whites. I like to do mine in my kitchen aid and it takes about a minute or two until soft peaks form. Gently combine the lemon mixture with the egg whites.
  4. Pour into a greased oven dish (I used one of my pretty pie dishes) and bake for about 25-30 minutes in a 150C/300F oven until it's starting to get golden on top.
  5. You don't want to overbake this dish otherwise you'll lose the lemon custard on the bottom and that's the best bit so I prefer to have mine a little underdone on the top in the centre (my oven is over 40 years old) and the perfect custard inside.
  6. Enjoy. This didn't last long and was just perfect. For a large family or lemon delicious diehards then you might want to double the quantities!
  7. If you don't have a thermomix then don't worry. Cream together the butter and sugar until light and fluffy, add in the juice, egg yolks, sifter flour and milk and combine. Follow from **.

And if you love baking and lemons then check out my gluten free lemon cake, little lemon cakes and lemon biscotti.

the border of the blanket

The end is in sight…………………I’m up to the border of the blanket. A bit like starting the binding of your quilt or when you’ve finished the quilting. You can see that this project is going to get finished and you are motivated to keep going with it. For me it meant going to bed past 1am this morning.

I have loved making this little blanket and am really happy with substituting the Bendigo 12 ply into the pattern. The colours are pretty, perfect for a boy (no, not the royal baby boy who was born today but my soon to be nephew) and it’s warm. Really warm.

The size isn’t too big that you’ll put it away and start another project however I must admit that I was tempted a couple of times to start a new project when the stocking stitch was getting a bit boring.

But now that I’m almost half way through the border I’m very happy and looking forward to finishing this blanket. Who knows? I might even get it done this week while motivation is running high…………………….

And just one thing, I should have picked up another stitch on the corner of the border, I’m a bit cranky at myself but that’s what blocking is for, to stretch it out a little and even it all up. If you’re going to make the pattern make sure you pick up enough stitches and maybe one extra for good luck on the corners. I actually added an extra 2 rows on top of the pattern for the border because I’m using a different yarn and should have picked up an extra 2.

But so far so good……………..

baking and taking photos at home

We’re just easing ourselves back into routine here. I had promised myself no more baking for a while till I’ve walked off the holiday baking but then this happened. Lemon sponge from the thermomix everyday cookbook…………..recipe here

and then this happened too. Apple tea cake (from Devil of a Cookbook) was the second cake out of my oven today. A winner and finn who doesn’t do the sweet stuff had 2 pieces so that is really saying something.

And you should always match your ingredients to your countertops, don’t you think? Thanks to Nicole from Seed Photography for dropping me off a huge big bag of lemons (amongst other things!).

We had a home day after school drop off this morning (which probably explains the baking) and it was a great chance to have a play with my new camera (an Olympus OM-D 5, more on that later) and get some happy snaps of my craft room. Like how my fabric isn’t as neatly organised as it once was. I knew it wouldn’t stay tidy forever.

And I love how a statue of mary stands next to little red riding hood, I think they call it a vignette. Or maybe not.

and then there is my knitting machine! It’s here. A big thank you to my brother in law and sister in law who collected it from Wollongong on their way up to Sydney. It’s all set up. I can thread it, I can get the first row of knitting done and then I have no idea what I’m doing

Threading it takes a little time and I’m guessing practice but it’s pretty impressive once it’s all threaded up. Apparently I need to replace the sponge bar on the machine so the kind people over on the ravelry group for aussie machine knitters have sent me off in the right direction to make my own sponge bar. And no it’s nothing to do with a cake. But fingers crossed I can work out how to do that and then teach myself how to get knitting on this thing!

And would you check out this guy? You would never know that he was sick today and needs to see the doctor about his ears. Honestly, Australia’s happiest baby even when he gets sick.

And while he’s smiling for the camera his dear big sister is concentrating on her yoghurt.

It’s funny how you don’t think that you got up to much during the day but once you take some photos and look back on it you realise that you actually did do stuff. And had a lovely day in the process.

I hope back to school wasn’t too harsh for some of you out there.

A Taste of Asia – another book for the Thermomix

Another day, another Thermomix cookbook review. I thought I’d knock over a few this week and this one, A Taste of Asia, was on my wish list for a while. And I’m happy to report it’s a winner AND at $30 I think it’s very good value as it’s jam packed full of recipes. Until now my favourite cookbook at home for the Thermomix has been my indian one but I think this one might give the indian cookbook a run for it’s money.

It starts with a section on basics and drinks and includes curry powders, plum sauce, chilli sauces, asian stock, satay sauce, coconut rice, wonton wrappers and more. I could keep going. This book really does cover a lot of asian cuisines and I love a lot of types of asian cooking so I was loving the variety.

There’s lots to love in the mains section of the book- steamed homemade beancurd (think tofu), sweet and sour prawns, a few noodle dishes, laksa (mmmmm yum), soy sauce chicken, more prawn dishes, nonya curry chicken, hainanese chicken rice, gung bo chicken (chicken with dried chillies and cashews), more chicken dishes including chicken satay, soups, beef dishes including beef rendang.

Then it’s snacks and desserts and if you’re a yum cha/dim sum kind of person then you’ll love this – pot stickers, bbq pork buns, curry puffs from scratch (I am so making these), steamed buns, steamed pumpkin buns and more……

soup dumplings, cakes, cheesecake, pineapple tarts, fortune cookies and that malaysian favourite – ice kachang (think shaved ice, red beans, corn kernels and sweet syrup – I’ve never tried it but when my parents lived in malaysia it always fascinated our family. OK, we joked about it!). There are also some delicious ice desserts like lychee sorbet, coconut ice cream, black sesame ice cream and green tea ice cream…and more.

Now can you see how I wasn’t lying……..this book is jam packed full of recipes. I haven’t made anything yet but am making mental notes of what I have to make first. One of the reasons that I love my thermomix is because it does so much of the hard work for me and this cookbook should hopefully have me getting a bit more variety onto the dinner table. Definitely a winner this one and I think it suits everybody……..well who likes asian food. If you have a meat and 3 veg kind of person at your house you might want to introduce it in slowly……………

my magnolia tree

I am not a gardener, I would like to be but sadly I’m not. But one thing that I do have working in my favour is my beautiful magnolia tree and right now it is looking it’s best. Well one third of it, the third that flowers while the rest just stays in bud for a while. Every time I’ve been out the front I’ve said to myself that I must bring my camera out and yesterday was the day I finally ran back in and grabbed it.

Now today is also the last day of the school holidays. Two weeks of sleeping in, pjs and no school run are over. School is back tomorrow and it’s back to the grind. We’ve had lots of fun but a little part of me is glad to have the house back to normal during the daytime and get back into routine. We’ve booked a week away in the sun next holidays so we can all count down to that in the meantime.

I hope you enjoyed your school holidays too or maybe you’ve got another week. If you have another week then enjoy it for me because I could use another week……………but then I’d probably need a week after that too……..