best ever chocolate brownies – for a small family or a big crowd

I love baking for a cake stall and pretty much always do my chocolate brownie recipe. Today I upsized it and it was a winner. Here I’ve put the instructions and quantities for whether you want to make just one square pan of brownies or when you need to feed a crowd or make them last. Nothing lasts long here but I made a triple quantity of the batch and they were delicious and turned out beautifully.

There are no fancy ingredients in this recipe and it makes it nice and easy to pick up a couple of things when you want to make them. I usually use dark chocolate but you can use milk chocolate or a mix of both. My personal grocery shopper came home with milk and they were delicious

No thermomix required but I did my raw sugar to caster sugar in mine

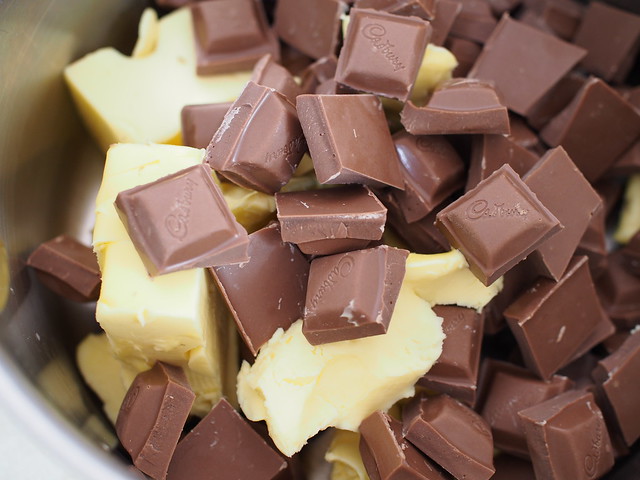
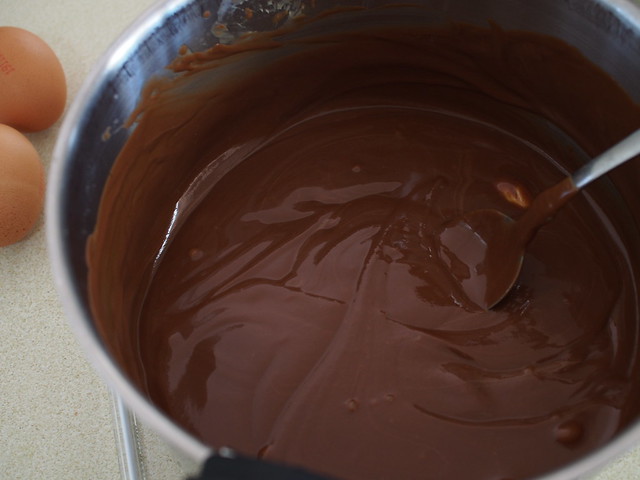
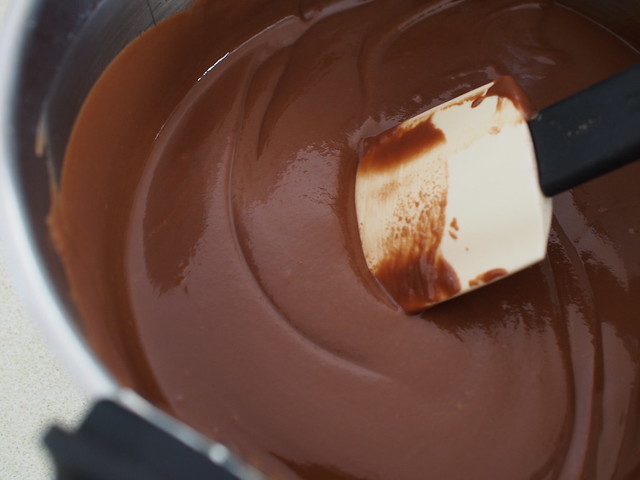
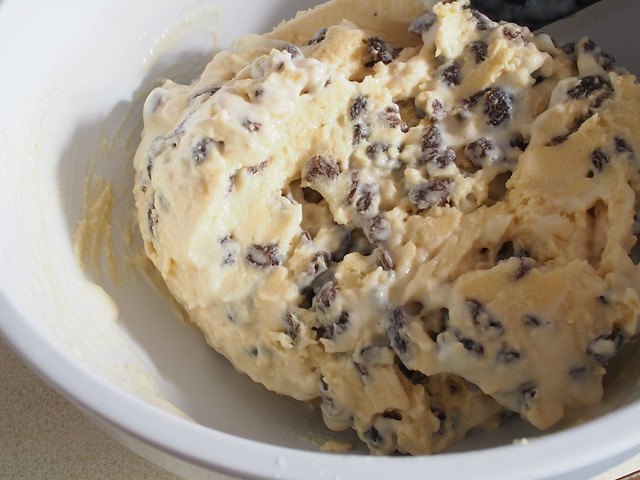
melt the chocolate and butter over a very low heat and take it off when you still have a couple of butter bits left so you don’t start cooking the chocolate

Add in sugar and mix, then eggs and mix and then sift in the flour and baking powder and gently combine. You need to check that you’ve got all the flour mixed in and don’t have any pockets of flour in there. You will have a lovely thick smooth mixture

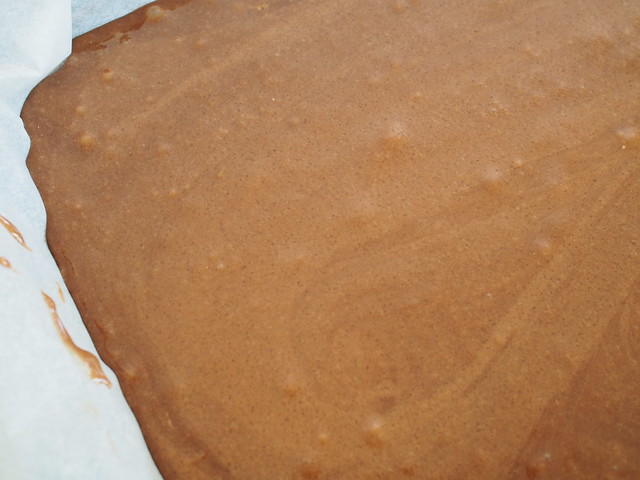
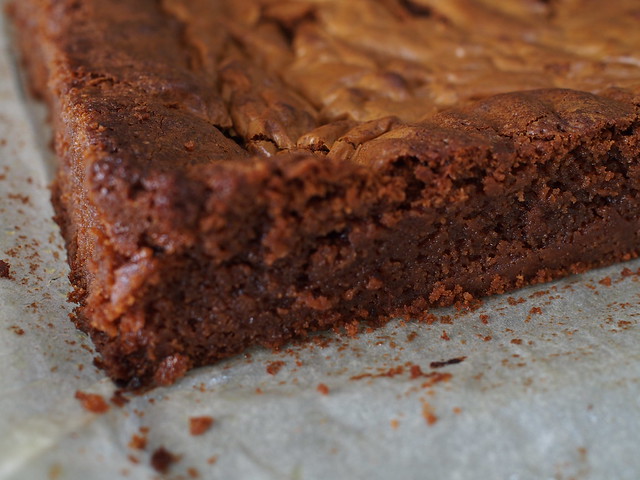
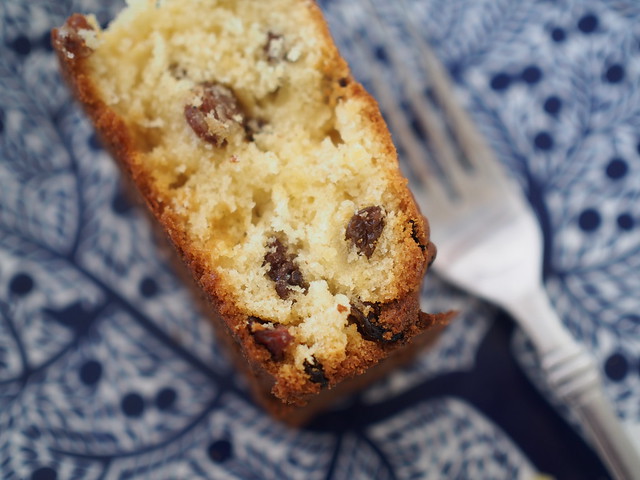
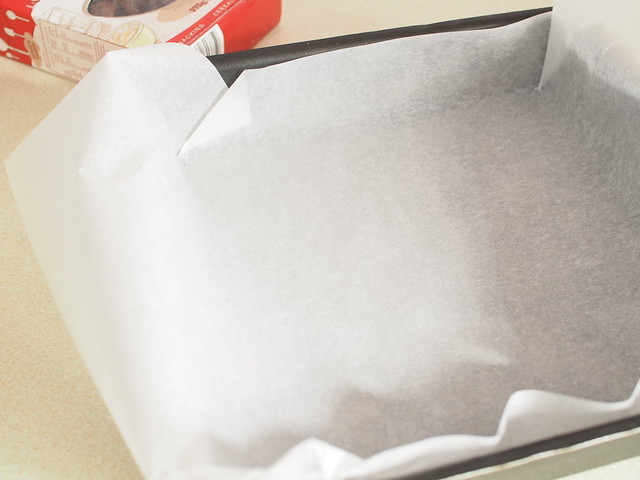
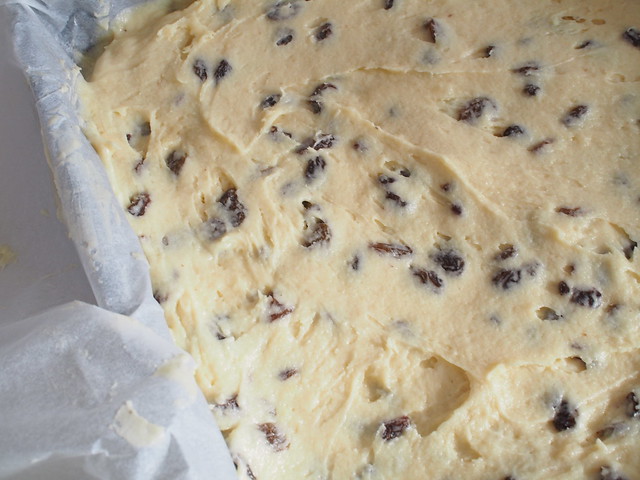
Pour into a lined baking tin and bake according to the recipe card and quantities listed below. Your brownie is cooked when it’s firm to touch on the top and a knife comes out clean but don’t overbake it. It’s better to have the centre a bit gooey and leave the brownie to cool in the tin.

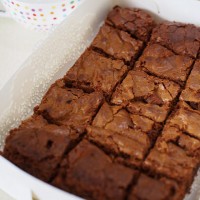
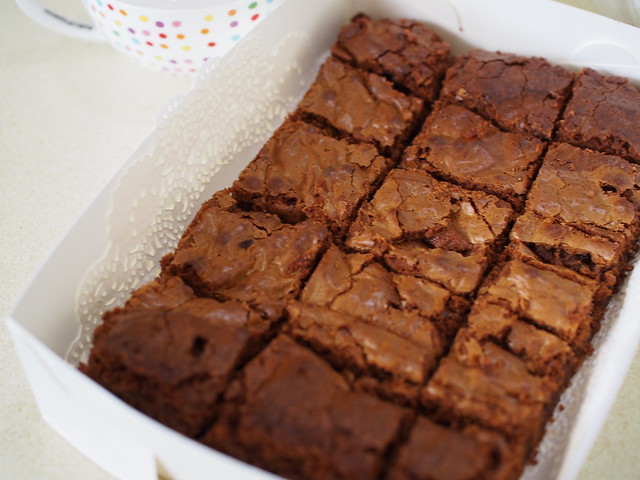
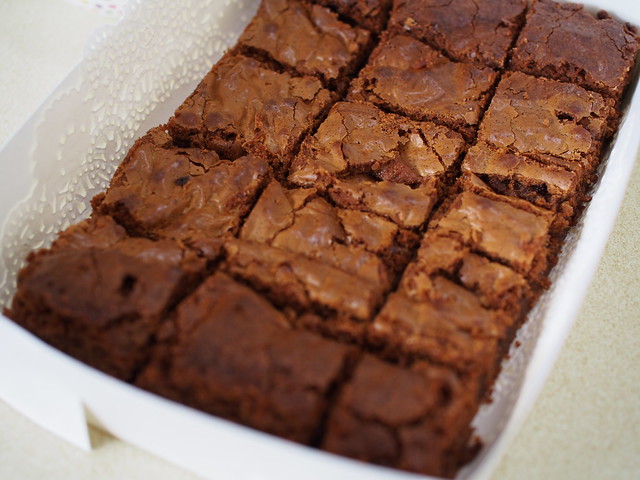
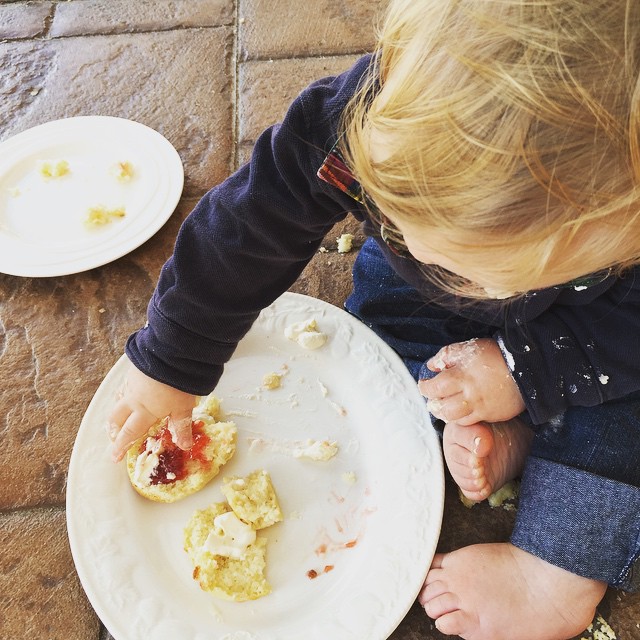
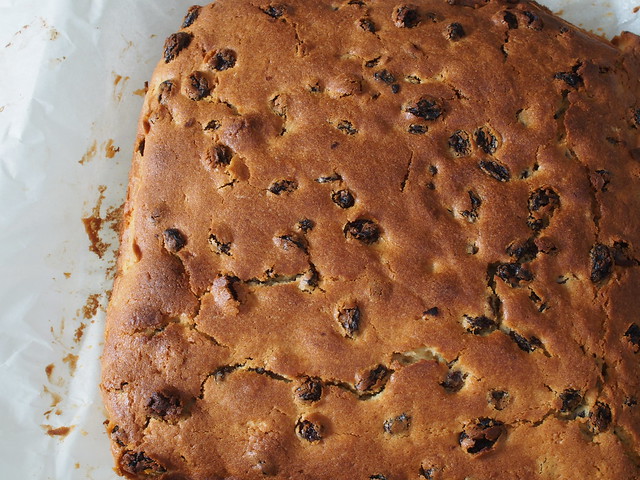
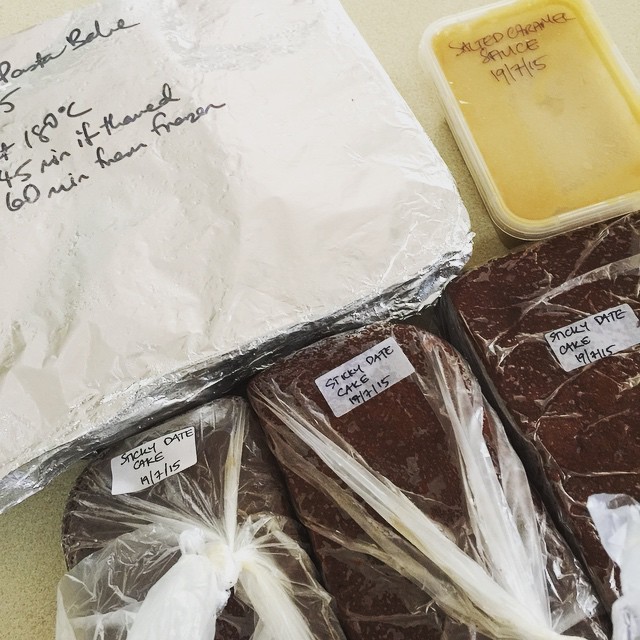
Because we were presenting these for a cake stall we trimmed the edges (oh so good, just pop them a bowl and share them with the kids)

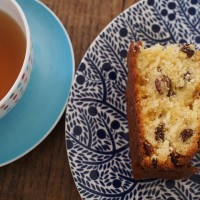
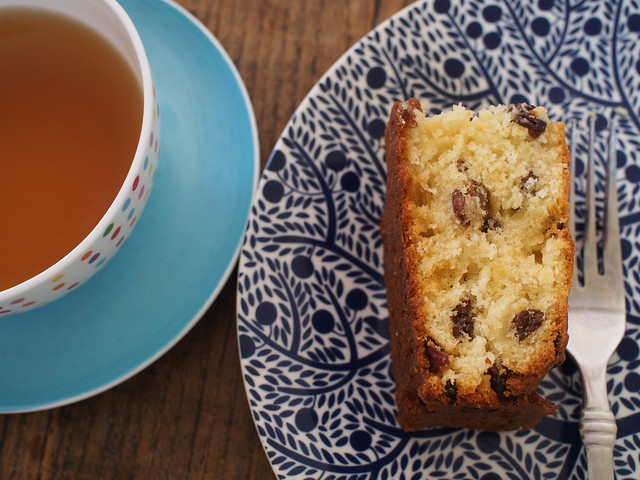
Leave to cool in the tin (I know, it’s hard work, patience is a virtue) and lift out by the baking paper and place on a cooling rack. I leave it to cool some more and then with a sharp knife cut into rows and then cut a few rows at the same time into squares so I can package them up or pop on a plate for a bring a plate. It looks cute on a doily or with some icing sugar dusted over the top too.

Frozen raspberries are absolutely delicious in this and we also loooove a few tablespoons of peanut butter through the batter as well. I hope you enjoy these. We just love them and I’ve been making this recipe since I was about 25 I think so it’ s well loved. The key to the perfect brownie really is not overcooking them so if you know your oven runs hot then lower the temperature a little and watch them closely, as soon as they are cooked get them out of there.


5.0 from 1 reviews
One batch of best ever chocolate brownies
 
Prep time
Cook time
Total time
 
Serves: 12-16
What you'll need
  • 100g unsalted butter
  • 200g dark cooking chocolate (or milk)
  • 2 eggs
  • 1 cup caster sugar
  • ⅔ cup plain flour
  • 1 tsp baking powder
Instructions
  1. Break up the chocolate into a saucepan or a microwave safe bowl and add in the cubed butter. melt over a low heat until melted and stir constantly. You can do this in the microwave for 2½ minutes on medium and stir a few times.
  2. Add in sugar and mix well.
  3. Add in the eggs and mix well
  4. Add in the sifted flour and baking powder and really mix well.
  5. Pour into a lined square baking tray (not too big) and bake in a 180 degrees oven for about 20 minutes. If your oven runs hot/fan forced drop the temperature by 5-10 degrees.
  6. When a knife comes out clean you are done. Leave to cool in tin and then remove by the paper and slice and enjoy

5.0 from 1 reviews
triple batch of best ever chocolate brownies
 
Prep time
Cook time
Total time
 
This is when you really want to feed a crowd!
Serves: 40
What you'll need
  • 300g unsalted butter
  • 600g cooking chocolate
  • 3 cups caster sugar
  • 6 eggs
  • 2 cups plain flour
  • 1-2 heaped tsp of baking powder
Instructions
  1. Break up the chocolate into individual squares and place in a large saucepan with the cubed butter. Melt over a very low heat until almost all melted. Remove from the heat and keep stirring until all of the butter is melted.
  2. Add in the sugar and mix well
  3. Add in the eggs and mix well. I lightly beat my eggs first and then combine into the mixture
  4. Add in the sifted flour and baking powder and combine well ensuring you have no pockets of flour in there.
  5. Pour into a lined huge baking tray or a few smaller ones. I used a roasting tray and it was just a bit too much mixture so you have a few options.
  6. Option 1 - a huge alfoil baking dish or a baking tray about 36x27cm (this is the option I wish I went with), you buy these huge trays in the bbq section of the supermarket and just one will do. Bake in a 170 degrees oven for about 45 minutes.
  7. Option 2 - bake this recipe in 3 square tins or 2 rectangle trays (about 32 x21cms) in a 180 degrees oven. The square tins take about 20 minutes each and a rectangle tray takes about 25-30 minutes. Don't overcook them.
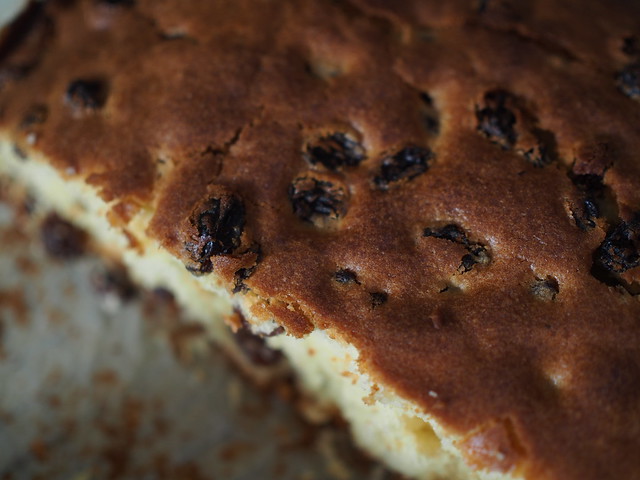
  8. Option 3 - if your largest rectangle tray is about 32x21cms (5cms deep) like mine then just use 1 tsp of baking powder for the whole recipe. Cook in a 170 degrees oven for at least 45-50 minutes or until your top is starting to crisp up and a knife comes out clean. If it comes out clean in a few spots but one is a bit gooey that is ok. Take it out of the oven and leave to cool in the tray.


best ever scones in the thermomix

Recently during the holidays we had some new friends over for morning tea. And I decided to try a lemonade scone recipe. Big mistake, they were taking forever to cook and just didn’t turn out as well as I hoped. In fact I’ve never had that much luck with lemonade scones. Maybe it’s just me. So I went back to basics and CWA’s Prize Winning Scone recipe from 1972, converted to the thermomix with a few tweaks including buttermilk which I had leftover in the fridge. Winning. These turned out so beautifully soft inside and rose and looked like great scones. I wish a scone recipe was on the recipe chip for the new thermomix but this will be my go to scone recipe from now on. No more failures when guests come over.

If you place your scones on the baking tray touching each other you’ll have nice soft edges on your scones which I just love. Space them apart if you prefer a crisper on the outside scone. Now I do the scone mix in the thermomix and the cream in my kitchen aid. You can whip cream in your thermomix with your butterfly but I’m a creature of habit and love chucking it in my kitchen aid to give it a good workout. Warm scones, jam and cream and we had morning tea sorted.

We made a plate of scones, took them outside and the kids enjoyed them before running off to play leaving my little guy to finish the plate off. And finish it off he did. I also love this photo because all my little boys have worn this top. I get a bit sentimental about their favourite clothes.

I hope you enjoy these scones! Let me know what you think or perhaps let me know your best ever scone recipe.

4.0 from 1 reviews
best ever scones in the thermomix
 
Prep time
Cook time
Total time
 
Serves: 12ish
What you'll need
  • 70g raw sugar (or icing sugar)
  • 450g plain flour
  • 3 teaspoons baking powder
  • ½ tsp salt
  • 60g butter cold, cubed
  • 310mls buttermilk
Instructions
  1. Place raw sugar in the thermomix and process 20 seconds on speed 9 to get icing sugar.
  2. Add in flour, baking powder, salt and butter and process 50 seconds, speed 4 until butter has been distributed throughout
  3. Add in buttermilk (you could use milk or cream) and process 20 seconds speed 3 until just mixed through. If your mixture is too soft you can add more flour on your work surface but you want a nice sticky-ish mixture for nice soft scones
  4. **Tip out the mixture onto a floured surface. I just use some baking paper with flour sprinkled over the top to keep my mess to a minimum and flatten out with your hands to make a circle. My dough was over an inch thick
  5. Using a glass or scone cutter (or cookie cutter) cut the dough into circles and place on a lined baking tray
  6. Press together gently if you want softer scones or spread out on the tray if you don't
  7. Brush the top of your scones with a little milk
  8. Bake in a 200 degrees oven for about 12-16 minutes until lightly golden on top
  9. Serve warm with the works (aka jam and whipped cream). I whip my cream while the scones are baking and if kids are around spoon out the jam into a bowl otherwise you get cream through your jam jar. Trust me on that one.
  10. If you don't have a thermomix then sift your dry ingredients and rub in the butter with your finger tips until you have a mixture like breadscrumbs. Make a well in the centre and pour in your buttermilk (or milk or cream) and gently mix without overworking your dough. Follow from **


townmouse children’s wear patterns

Once upon a time I would sew lots of pretty things and pop them on my children to model in the backyard. Those days have kind of become scarcer as there are now 6 little people and 1 me and there isn’t much sewing time.

But this was a great deal, I sent fabric to the lovely Kristine of Townmouse and she returned two little tops and a dress for my little ones to wear and tell you about in this blog post. Some of you will know Kristine through her childrenswear brand Townmouse which made beautiful clothes and her blog of the same name. As her family grew things changed for her business too but now she’s back. With patterns. And they are so gorgeous. You buy the patterns here on etsy, download and print them off at home and sew them yourself and I know you’re going to love them.

My littlest miss loves dresses, she wears them all the time, tights are optional in winter but we’re getting better at wearing tights and our dresses. So here we have the Matilda Gyspy dress pattern in some Lecien Flower Sugar and it looks sweet as pie.

We are going to get a lot of wear out of this. She hasn’t taken it off yet. I know I’ll love this pattern because there are no zippers or buttons and it would be great for the beginner sewer or when you want a fast project.

Our little twinnie picked out this pretty fabric, also Lecien Flower Sugar, and had it made into the Isabella flutter sleeve top. I love a flutter sleeve. Just like I love a ruffle. It makes this top so pretty and sweet.

And then there is my big girl who is growing up and had picked out this Cotton & Steel fabric which has gold on it. This is the same pattern as the top above but has a variation and I love it. I was a bit nervous about how the fabric choice but it’s perfect for the growing girl. The mint green and gold are just perfect and this will be great with jeans, pants and shorts this summer and especially when I ask for her to wear something nice for church. I can see this going with white pants and gold sandals already. I’m so glad we picked up this fabric as it was one of those ones that was a bit different to what I’d usually buy.

And here they are all together, not all looking at me but we had some fun trying to get one photo of all of them. The clothes are perfect in terms of sizing and true to size as I just said our sizes were 4, 6 and 8 and they fit beautifully. The tops are going to be wonderful with little shorts, pants and skirts and the dresses are so sweet and I can’t wait to see this with a little pair of pretty sandals and a bow in her hair.

You can find the Townmouse patterns on Etsy here and thanks to the lovely Kristine you can receive 15% off just by using the code retro15 at checkout (valid until the 8th August). And a very big thank you for making these clothes for me because they probably wouldn’t have been made so fast and definitely wouldn’t have been made as beautifully.

And I will be clearing out all of the fabrics from my store and a lot of my stash including flower sugar so watch this space. Just need to get the kids back to school and a few more volunteer jobs first. 

sultana buttermilk cake

Sometimes life just calls for cake! And I need some coffee and cake. Lots of it. 4 out of the 6 kids are sick and we’ve all been on the antibiotics for a few days and it’s been a hard one to track down so this morning I called over 9 pharmacies trying to find 4 bottles of the stuff. Yep that’s how I spent my morning. But at least I had a delicious cake in the oven.

But at the same time all these days quarantined at home are kind of nice. Now that the baby is better and back to his normal self I can actually put him down and do things around the house. And things are getting done. Kind of. In a slower than normal way but we’re getting there.

When I really want a good cake recipe I go to my CWA cookbooks. I love them. And this recipe comes from the first book I bought when I had just one little child in the family. It’s well loved. You can’t beat sultana cake and while it was cooling in the tin (something I usually don’t do), I was ringing around all the pharmacies and too busy to be tempted to have some hot cake out of the oven.

The buttermilk can be replaced with regular milk but it made the cake so delicious and tasty. And my square tin is always getting a good workout. If you don’t have a square cake tin then make sure you get one. So good for cakes, brownies, frittatas and everything. This one is from way back when life was more glamorous and I visited my then boyfriend now husband in paris and would shop on saturdays. It’s a tefal so you can probably get one exactly the same here but I love the story. He didn’t share my love of shopping in paris as much as I did but was always a good sport.


sultana buttermilk cake
 
Prep time
Cook time
Total time
 
I've adapted this good old fashioned sultana cake from CWA Cookbook Seventy Years in the Making
Serves: 16
What you'll need
  • 230g/1 cup raw sugar (or caster sugar and omit step 1)
  • 225g unsalted butter, room temperature
  • 3 eggs
  • 350g plain flour
  • 2tsp baking powder
  • pinch salt
  • 350g sultanas dusted lightly in flour
  • 150mls buttermilk (or regular milk)
Instructions
  1. If using your thermomix then place raw sugar in bowl and process 10 seconds speed 9 to make caster sugar. Add in butter (cubed) and process 1 minute speed 4)
  2. With the thermomix running on speed 3 add in the eggs through the top of your lid and process 30 seconds. Add in flour, baking powder and a dash of salt and process another 30 seconds speed 4.
  3. Now I like to mix in the sultanas myself but you can do it all in the thermomix, just add the sultanas which you have dusted in flour and buttermilk/milk and mix for 1-2 minutes, speed 2 or 3, reverse until combined.
  4. **My way is to remove mixture from thermomix and tip into a large mixing bowl. Add in the sultanas and buttermilk and with a spatula or big spoon mix well so that the liquid is totally absorbed and the sultanas are evenly distributed.
  5. Tip into a lined square cake tin (or round, I just love my square one) and bake in a 180 degrees for at least one hour. Now my oven is very old and runs a bit hot so it was just under 1 hour and all cooked. You could need up to 1¼ hours or until a skewer comes out clean.
  6. If you don't have a thermomix then you are going to cream your butter and sugar until nice and thick and creamy. Add in the eggs one by one and then add in the sifted flour, baking powder and salt and mix well and follow from **


not much knitting…….

Well there isn’t much of anything going on around here. We thought our big guy had a case of croup but it turned out to be whooping cough which totally surprised us. So he’s on antibiotics, everyone else has been swabbed and is home while we wait for results. And the thing is that they are well and home all week. Full of energy, running around, making a mess and wanting food. All the time. It’s a bit crazy. I did knit one sock last week before the sickness hit. Pattern is a 2 needle sock pattern by debbie bliss which you can find in a few of her books under different names and is so easy and fun.

I let my fellow class parent know that I’m home with the kids and she offered to bring over dinner and I said no we’re good and she said too late and totally spoilt us. And she’s so organised with dates on her food and what’s in there. I usually pop a note in but never write on the packaging but I like the system and need to get organised I think.

Anyway so I’m trying to catch up on the housework, get the kids helping out with chores, trying to get them to read books instead of watch movies, feeding them, keeping them happy and entertained and trying to grab a bit of knitting time. I did have a productive weekend with a few pencil rolls. And I was asked for the pattern. I use the pattern from this book and I put a few more details in this post from earlier in the year.

Instead of 24 pencils I use  a 12 pencil pack and make the length of my fabric pieces 13 inches rather than the 24 3/4 that the pattern calls for. It’s a super easy pattern once you’ve made one or two and I find cutting all the pieces first and then sewing in a big session is a great way to whip them up. I make a little drawstring bag big enough for a colouring book and the pencil roll and it really makes  a sweet birthday present.

Anyway I’ve just cast on a granny’s favourite in cream (newborn size) to start a stash of newborn knits for all the babies that are going to be born soon. And hopefully will get a minute to myself to get some knitting done. Here is what a granny’s favourite looks like, just perfectly sweet for a newborn. I’ve knit it twice before here and here and love it. You can find the pattern on ravelry here.

little kina

One of the things I struggle with is finding time to finish knitting projects. I might have solved my problems with knitting this little kina. Knitting for dolls. I might be on to something. So satisfying to start and finish something in a weekend.

This is a super cute little project and you probably already know that I love the kina pattern. You can see them here on ravelry. Just a few.

The yarn is soon to be released by Bendigo Woollen Mills and super soft and lovely. The colour is the most perfect raspberry red I’ve seen and I’m going to love this for my girls. Perfectly pinkish red and so sweet for one of our little dolls.

Each of the girls have a waldorf/steiner doll but they were just chucking them around the room so I’ve been keeping them high on a wardrobe and have now decided they might need a few little cardigans. Especially when they are this quick and satisfying to knit. The button was from my stash when I picked up a few tubes at a closing down sale.

All in all one very satisfying project and something that the beginners out there could tackle if you can knit, purl and learn how to make 1. Ravelry details are here.

Now it’s back to my other projects…………..

so you want to grow your blog

One of the questions I receive every now and then is from a friend or someone who has started a blog. And they want to grow it. And they wonder how to do it. There are so many blogs right now but there is always room for more. Here are a few ideas and tips that I hope help you………….

There is no magic formula

Yes I’m sorry to say there is no recipe to grow your blog. No special things to do or a list to follow that will guarantee success. There are no overnight success stories just people who have put in time and effort.

Be consistent

Time and effort are what is required to grow anything. It doesn’t have to be in the middle of the day, you might do your work at night and just check emails during the day. You can definitely work around other commitments but you can’t get away from putting the time in. And not just on your blog. Across everything – facebook, pinterest, instagram, your emails, reading other blogs and more. I’ve been blogging for 9 years and am definitely of the slow and steady blogger.

Use social media

Facebook can be a right pain when you think no one is reading your posts but its important to be on there. Make sure you have your blog name across social media and share your posts and use social media to grow your blog. I love Pinterest and Instagram right now. Follow people who you like and find inspiring and in your same niche. When it comes to Facebook share a variety of information – are you teaching your lovely readers something new, sharing something funny, letting them know something about you, is it relevant, do you love it, is it in your style. Follow lots of great bloggers, celebrities, websites, pages that relate to your niche and share little bits with your readers. Make it fun, keep it positive and don’t give up!!!!!

Have a newsletter

Mailchimp is a great way to keep your readers posted with what’s been happening and avoids your message getting lost in social media. Mind you this takes some work to get a newsletter out and I’m not the greatest at it but it’s well worth having an email list. Especially when you have something special to share or a giveaway. I am not so good at the newsletters and I’m OK with that.

Know your reader

Know what you will and won’t blog about. Do you think your target market might be offended with your language (mind you some bloggers are known for their language and that is why people read them but you need to think about YOUR readers). Make a mental picture of your reader and what she (or he) is interested in and needs to know.

Get out there and meet other bloggers

Meet ups, conferences, events, nights out, online blog post sharing….you need to get you and your blog out there. You don’t always have to leave home to do it but you do need to put yourself out there. Leave comments on blogs and social media (don’t spam!), go to conferences, join facebook groups (Blog Chicks, Digital Parents, Problogger) and learn from others. I find Digital Parents and some of the great facebook pages are wonderful when you’re starting out or have a question and want to ask someone

Give something away

A fun giveaway, an e-book, a recipe, something you’ve bought or have that would be fun to giveaway is a great way to get people to your blog and get their attention. If you’ve got great recipes then bundle them up into an e-book and perhaps offer it for free when they join your mailing list

Be yourself

What is it about you and that makes you YOU? Not all mums are the same and not all bloggers are the same so make sure you put your personality and what it is that makes you YOU into your blog and everything you put out there. Maybe you’ve got 10 kids, or are super organised, or love chocolate, or are obsessed with craft. There are people out there who want to know something from you and make sure you are being yourself and sharing it. 

Learn how to take photos

Whether it’s on your iPhone or your camera learn a few tips and tricks that help you take good photos. If you can get off auto then fabulous if you can’t then edit your photos, crop or follow a few simple rules and do your own photos. I think it really makes your blog yours if you are using your own photos. Nothing worse than seeing the same photo on other people’s blogs unless they are sharing your wonderful work and bringing it back to you. Use picmonkey to edit or make your photos fun, think about adding text to your pinterest photos and for social media.

Follow bloggers who are doing it right

Fill your social media with people you like and admire, bloggers who might not be in your niche but are getting noticed and putting themselves out there, go global and don’t just stick to the aussies. I can’t tell you how much I’m loving the Scandinavian knitters on my Instagram feed.

Just have fun

Unique views, page views, followers blah blah blah. I check my google analytics once a month and that’s how I like it. If you’re always chasing the numbers you are not going to be the most authentic person or enjoy the ride. It should be fun and about friendship and sharing. It’s fine to set goals and things to work towards but if you really are obsessed with the numbers and why they aren’t going anywhere then it’s taking your time and energy away from everything else. Read, get inspired, get outside, go somewhere, take your camera and just have fun.

Got any advice? A question? Fire away………………..

65 hats all ready to go………….

Remember when I put the call out for hats for the Childrens Hospital at Westmead….well I’ve still been receiving hats and now have 65 ready to go! 65!!!!!!!!!

The biggest thank you to each and everyone who made and donated a hat (or two or three). They are so beautiful and now to contact the lovely reader Lisa who asked me to collect them. I also have a bit of a surprise to go with them so you’ll have to wait and see but we’ll be donating a few things together and I just know they’ll be popular. And the perfect time of year.

So what do we think….squares next? I’m up for my next challenge. First there was Quilts for Queensland, then these hats and what about knitted and crocheted squares for some big beautiful blankets for little ones? Or do you think we should keep making hats? You let me know what you think……………………………….

and thank you again…………….

morning at the farm

For our little guy’s birthday we thought (OK, I thought) it would be fun to head down to an animal farm. I thought he’d enjoy it since he loves animals. But he just wasn’t in the mood and the fact that he ran away from us and up the driveway to get out of the place was kind of a sign. He’s a runner and while we were working out where to pay and I was holding hands he snuck off in a huff and then started running for the road. The kids started yelling after daddy and it felt like everyone was looking at us as we tried to get him back and coax him to come into the animal farm. I kept smiling and wishing that perhaps just for that moment that we were a little family with 2 children and not 6, some of them yelling at daddy and running up the driveway after him! And breathe.

I just took my iphone instead of my camera as I had the baby on me and was also bag lady but so glad I captured so many little moments of our morning. All the kids had a great time at the farm. OK well someone didn’t want to go to this farm because it wasn’t the farm with tractor rides so they decided it was the worst farm ever and needed a talking to about manners etc. In the end he loved it and wanted to go back again and admitted he was being ridiculous. His words.

Our little girl loved it the most. The big goats were going a bit crazy for the food but once she started feeding the baby ones she really loved it and we did another loop just to see them as she told them sorry no more food in her own little words. I think we might need a baby goat or little lamb at our house. But now that I’ve seen the bigger goats I’m not so sure.

There were baby chicks, lots of baby mice (I kept thinking about the mice we’ve had in our house and they weren’t as cute as the other baby animals), bunny rabbits, puppies, beautiful deer, goats (lots of goats), cows, sheep and lambs, ponies, donkeys, alpacas and lammas too. Chickens, geese, turkeys, pigs and I hope I haven’t left any out. There was almost mud, manure and that wonderful smell of manure but somehow your nose gets used to it. And it was noisy….even the baby started to imitate the baby goat noises after them so it was definitely enjoyed by everyone. Except birthday boy who needed a little drink.

The funniest thing was that all of the other visitors on the day had little children and some didn’t want to walk in mud or go near the animals or wash their hands or sit down with the chicks and you can see the parents all working so hard….and we’re doing it for the kids. I had to laugh.

Anyway we had the greatest morning followed up with lunch, swimming lessons, some cupcake baking and decorating, birthday boy’s favourite dinner of chicken nuggets and chips and then cake and Cars movie. I’m sure that baby number 1 in the house had a 3rd party with friends and a new outfit but now that we’re a family of 8 we’ve got all the party guests right here and had a great day making it all about him. We’re almost toilet trained just in the nick of time with preschool starting for him next week and we can really see his personality coming out this year and can’t wait to see more of this cheekiness. I don’t know where he gets it…..

the magic of Disney on Ice

This week was my first time at Disney on Ice and it was definitely magical. I knew that my little girl would love it and I kept talking about seeing the princesses but I had no idea just how much she would love it. She soaked up every minute of it! Pointing, laughing, getting nervous, tapping us to point, singing, dancing in her seat, waving her arms up and down with the music. And when her lantern lit up she kept saying magic, magic. This is someone who doesn’t have a lot of words but she knows her Disney princesses so could say snow when snow white came out and her other favourite princesses.

I have to confess during Rapunzel that we were both saying magic as it was the highlight of the show and so much fun. For first timers we had the best day………….EVER!!!!!!!!!! (Tangled joke). We had 8 of us all up and it was just the perfect length for little ones. Not too long that they lose interest and even the 9 year olds thought it was the best thing they’d ever seen.

If you live in Sydney there are still tickets for each show until Sunday and it was wonderful! Be quick and just go here. And we were right up the back of the reserve A and had a wonderful view so don’t worry if you think you are too far back because it all looks down on the arena. We are now hooked for life and especially with my little girl who was on cloud nine for the rest of the day. In fact I think we’ll have to make sure some other little ones with special needs get to come with us next year because it was just that special!!!!!!!

A big thank you to Disney on Ice for our tickets, we felt so lucky to be able to take the whole family and enjoy it together. We are going to be customers for life now……………

Sweetly Stitched Handmades by Amy Sinibaldi aka nana company

Well I bought this book for myself and I have been trying to read it but there’s just one problem. My girls keep taking it off me. They adore it.

If you know of nana company the blog then you probably know about this book.


It’s adorable. Super cute little florals and linens and hand stitching make all of the projects so adorable and unique.

I ordered the book on amazon, waited patiently, it arrived and I kept saying to my girls just let me read it first and then you can read it. And they keep reading it. They’ve already picked the projects I’m going to make and they’ve picked the fabric too.

Sometimes buying a book is about having a little bit of something pretty in your house and this book definitely fits the bill. I’ve admired all the sweet little stitchings and projects by Amy and now I get this book and hopefully a little bit of inspiration to make them myself.

Definitely a book if you love patchwork, small projects, japanese craft and stitching. It’s really lovely and also might be a good excuse for me to cut into my Liberty fabrics which I’m just a little bit too precious with.

Just hide it from your daughters!

the latest sewing machines from Brother

If you’ve ever asked me what sewing machine I use and recommend then you’ll know it’s a Brother. I started with an Innovis 600, then upgraded to the QC1000 which I’m still using and loving and also have a Brother overlocker. So after all of those years of being a happy customer I couldn’t say no to an invite to their head office to see their latest machines! And they didn’t disappoint. I had a lovely morning and didn’t want to leave except I had a babysitter at home.

There are 5 new machines in total and I have my favourite!

IMG_3896

My favourite machine is of course the most expensive of the new machines, no surprise there. Its the Brother NQ3500D which you can use for sewing, quilting and embroidery and is the Disney model which comes with Disney embroidery built in. It also has a USB port so you can find other embroidery images and upload them to your machine. So wonderful to use the internet to search for what you want. I also loved the LED lighting under the arm so it lights up your work surface. My machine doesn’t have this and it’s got a nice big work surface  with 8.3 inches from needle to arm which is great for working larger quilts with your machine.

Now I have to confess that I think of machine embroidery and I think of towels and t-shirts and that’s about it. I’ve been tempted to get the embroidery features before when looking for a machine but then wondered how much would I use it. But now that I’ve spent the morning with the new machines and seen how easy they are to use I’m already in overdrive thinking about all the great things we could make for our school craft stall and for the kids. And how I can get my hands on one. There are 4 different sized hoops that you can put on the machine and you can size up the embroidery you want to do so that you can make tiny embroidery motifs or larger ones. And best of all you get it started and then can do other things while it does its business. I like that one as I’m a serious multi-tasker.

There are a variety of embroidery threads you can use but if you use the Brother embroidery threads (I didn’t even know there was such a thing) your machine tells you which number threads you need for a particular motif and you just select them. You can also find these at Spotlight (I have to confess I haven’t seen them).

The NQ3500D has similar features to my own machine in that it comes with feet for free motion and you can also use the extension table for your larger projects or free motion. I also love automatic tension, needle threader, thread cutter and there is a new feature on all of the machines on display including the NQ3500D and that’s the lock stitch. This was a new one for me and is this circle button on the machine which ties off your stitches at the beginning and end of your project. I’d love this for my free motion and when I’m doing font on my machine.

If you’re after just an embroidery machine then the new Innovis NV800E is the latest embroidery only machine from Brother and you can read more about it here. This is a great option if you want to add a machine just for embroidery especially if you already love the machine you are using.

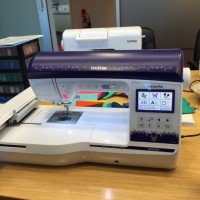
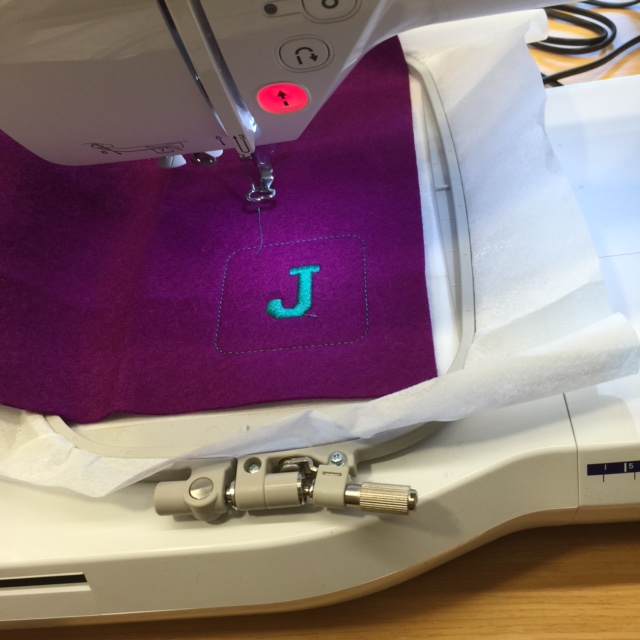
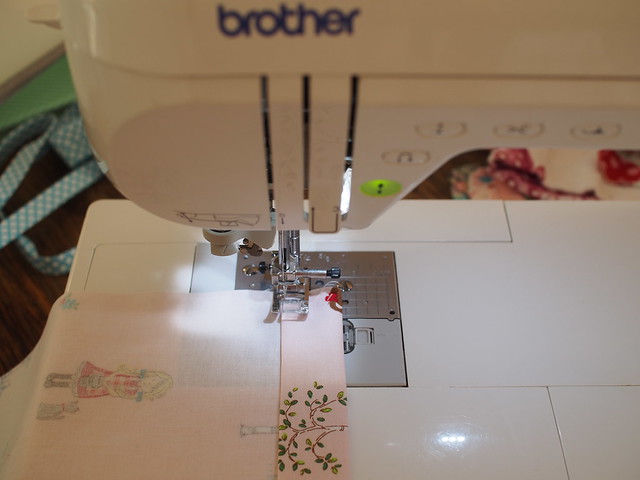
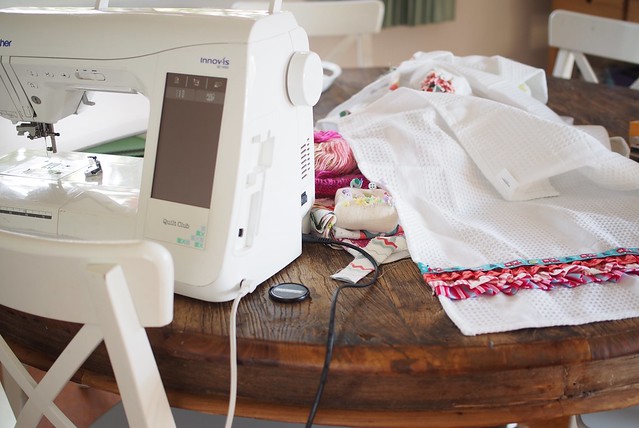
But if you’re not after the embroidery functions then you’ll love some of the new sewing and quilting machines in the Innovis range – NV1100, NV1300 and NV1800Q which you can read about here. The NV1800Q really caught my eye and is a more compact quilting machine than mine but has a lot of the same features as well as some new ones that I don’t have – like the LED light over the work surface and the lock stitch. And I have to tell you that I quilted my very first single bed quilt on a Brother Innovis 600 over 4 years ago. They are a great range of machines and have the features you need for free motion like the ability to lower feed dogs, free motion feet, extension tables (don’t come with all models)


Some interesting and fun facts I learnt on the day

The NS range still represents the great entry level machines that I recommend for readers and friends. The NS10 has been replaced by the NS15 (RRP $499) and offers great little features that really make sewing enjoyable like needle threader and thread cutter. Trust me on that one.

The top of the line Brother sewing machine has a DVD function so you can play DVDs while you are sewing. Apparently this is for you to watch tutorials, my mind was thinking you could have a home entertainment system in your sewing room! Sewing for a market or friends takes on a whole new life when you can be watching movies or your favourite shows on your machine!!!!

The Brother ScanNCut which is a super popular product (I’m always seeing it come up in my facebook feed) can even be used for fondant by cake decorators. There you go.

So there you have it! You can find out more about the range of Brother machines here and when you click on each particular machine you can read the product brochure too which is a great help when you are trying to do your research. Follow Brother on Facebook and Instagram and if you have a Brother be sure to tag your creations with @brotheraustralia #brotherinspires. I was so inspired after my morning that I came home and finished some craft stall sewing with my little miss on my lap.

Any questions just ask! Choosing a sewing machine can be daunting even if you’re an experienced sewer……..


last minute drawstring bags

It’s Sunday and the twins have a party to go to.  I’m all out of gift bags, wrapping and my appliqued calico bags that I usually use for parties. I do have loads of fabric. Loads. And I needed something to wrap it all up. And since drawstring bags are on my to do list for the school fete I thought I’d whip one up, share the tutorial and have the present wrapped all at once. That and since moving my sewing machine to the dining room I’m getting more sewing done…..

The fabric really steals the show so pick something perfect for the occasion. This is Country Girls by tasha noel for Riley Blake Designs and it is perfect!

Here is what you will need

Rectangle of fabric larger than your present or a fat quarter is perfect

2 1/2 inch strip of fabric or premade binding or ribbon ( 2x the width of finished bag)

your usual sewing supplies and sewing machine

how to make

Cut out a rectangle of fabric (or two square pieces) of fabric that are larger than the gift or what you want to use the bag for. Or just use a fat quarter which is a nice rectangle size in itself. I used my rotary cutter, mat and ruler. Quilting supplies are great to have in your sewing room but you can make a paper template to ensure you cut out neatly or draw in pencil on the wrong side of your fabric and cut. It’s up to you. Here was our party gift so we made sure it would fit in the bag.

Now zig zag/overlock your edges. We do this first to make the opening for our drawstring easier to work with.

Take your fabric to the iron (I hate ironing so often wonder why I have a craft that requires ironing). With the wrong side of your fabric facing up, fold over one side edge a little bit over for about 2 inches from the top of your fabric and press down.

We are creating a seam for our drawstring opening because we need our side seams for the bag to stop just before our drawstring opening. Repeat on the other short edge of your fabric. You are helping create a neat drawstring opening that will look like this at your machine later on.

Back to our ironing, fold down the top edge of your rectangle by a little bit and press.

Fold down again more than the width of your ribbon/tie/whatever you are using for the string part of your bag.

Back at your machine with the wrong side of your fabric facing you we are going to open up the folded over edge and on each side sew close to the folded over edge of your fabric (remember we pressed down about 2 inches to create a neat opening). Now fold back over and it should look like this.

Now you are going to sew close to the folded over edge with a neat row of stitches. I find sewing on the wrong side means I don’t miss any of the fabric out as I’m sewing.

Let’s sew our side seams. With right sides together fold fabric together, pin the side and bottom of your bag and sew together with your preferred seam allowance. I use 1/2 inch and remember to stop when you get to the opening. What I like to do is go back and forth over my end stitches at the top to reinforce the opening. If you do sew over your opening don’t worry. Unpick and you won’t do that again. It’s like sewing pants together the wrong way…you’ll only do it once.

cut your ribbon/tie/string a bit longer than twice the width of your bag

You can put a pin on one end and a big safety pin on the other or tie one end into a knot and safety pin on the other and we are going to thread our tie through the opening.

To finish the ties I like to tie into a knot near the end and trim the excess. It looks neat and is easy.

Now admire your bag…and put something in it! Perfect for a beginner sewer, to make for a kids party, fete or craft stall or to have a stash when you want to give a little gift. Have fun…..any questions just ask!

cute + easy ruffled hand towels

The school fete will be here before I know it. There are actually two craft stalls. One for Christmas craft which a super organised lady is running and then there is the craft stall that I’m running. And I’m not super organised. But now that we’re coming into term 3 I’m getting super organised. I mean my Pinterest board is full of great ideas and I’ve started giving people projects to do and sitting down to do some.

And one of the projects on my list was ruffled tea towels that I’d seen on Pinterest. The night before our sewing day I started to read how to make one and then realised I needed a ruffle foot. And I stopped reading. But don’t worry you don’t need a ruffle foot and I was going to call these tea towels but they are so cute that I put the sample one in my bathroom.

here is what you will need

a plain white waffle tea towel or hand towel (spotlight/homewares store)

jelly roll strips or 2.5 inch strips of fabric (by width of fabric – 44 inches or near enough)

ribbon to hide your top line of stitches

your usual sewing supplies and a sewing machine

how to make

The first step is to fold your jelly roll/strip in half lengthways and press with your iron. Take to your machine and zig zag or overlock the edge. On my sample I didn’t do this step on a ruffle and it was starting to fray so do yourself a favour and zigzag

Now put your stitch setting on the longest length you can so you can gather your strip. On my machine it’s a 5 on the stitch length. Do one big long line of stitches near your zig zag edge but not right on top of it.

Now gently pull the lower thread (on the back of your sewing) and gather evenly. To get a really full ruffle you’ll use the whole length of fabric so gather just a bit longer than the width of your tea towel because you’re going to tuck a bit on each end and sew to the back of the tea towel.

Work out some nice co-ordinating fabrics and you could do 3 or 4 ruffles to a towel. Start with your bottom ruffle and pin across the bottom of your towel or a little bit up like we did here. Take care to note that if your towel comes with a hanging tape that it’s at the top and ruffles at the bottom. Fold over the edge on itself at the back of the tea towel and sew to your tea towel on or close to your gather line. Repeat with the other ruffle strips going up the towel.

Trim all of your threads and find some fun ribbon and pin across the top ruffle and then sew.

You are done! Admire! Quick and easy and fun for a quick gift or your school fete. And a big thank you to my lovely reader and friend Robyn who joined me at my school craft sewing day. What a champion! She did all of these pretty ruffles for me and now I just need to trim and get some pretty ribbon and they are done.

I hope you enjoy making these and I hope I can keep the momentum going and get some more finished………..

the opinionated knitter by Elizabeth Zimmermann

Happy new financial year! I’m writing this on my new computer (bought at 5.30pm last night since they couldn’t fix my old one) and have a gorgeous book to review.

I love my knitting books and think I have a new favourite. The Opinionated Knitter is a collection of newsletters by Elizabeth Zimmermann who is a knitting legend from the US. But the book is more than that because it has photos of her, her family, her projects, tips for each project, funny little stories and is just so beautifully put together. And I’m knitting one of the patterns from the book but I keep sitting down to read the book and laugh or have a little cry. It really is that special.

Here is a little section that I loved when she is talking about knitting

“It can be taken anywhere, stuffed into a bag or pocket and the plain bits may be worked in the charming company of friends, sitting or waiting in the car, or at any time when one wishes to idle while preserving an appearance of busy industry. The ivory tower may be used when actually designing a pattern or putting in a yoke on a plain sweater……” (this is from p87 ).

She writes so beautifully. Her patterns take some getting used to because she writes them matter of factly for you to follow as you go – counting the ridges of your garter stitch rather than detailed pattern instructions. Now if that makes you panic then don’t worry because there are so many helpful tips online and especially in ravelry. I even found some detailed youtube videos here for the Baby Surprise Jacket which helped me last night just to confirm I was on the right track.

I think this book is a must for all knitters and I just know that the knitters in my family would love it as it would be a trip down memory lane for them and for the newer knitters its a look back at knitting. The patterns are a great mix of baby, children’s and adults and for hats, cardigans, jumpers, a blanket and a few more.

The writing is just beautiful, you get to find out more about her life and her no nonsense but funny way of looking at everything. I am so glad I picked up this book and decided to get it. I found mine for $30 on amazon but have just seen that knitpicks are delivering to australia and it’s less than $24 here.  And what’s really nice is that the patterns appear in the book taken from the newsletters with the typewriter print and diagrams too. Typewriters? Remember those? I know! I remember our blue one.

I just can’t say enough about this book and just had to share a review of it with you. I’ve had The Knitters’ Almanac in my knitting book collection for ages and this complements it nicely. The Knitters Almanac is a small paperback full of lovely patterns and notes. Elizabeth’s family continues to run the family business Schoolhouse Press which you can find here full of lovely things too.