guest pinning for halloween

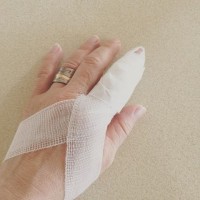
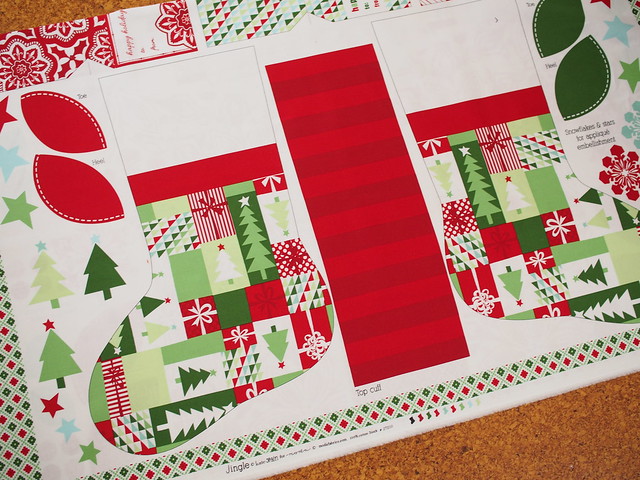
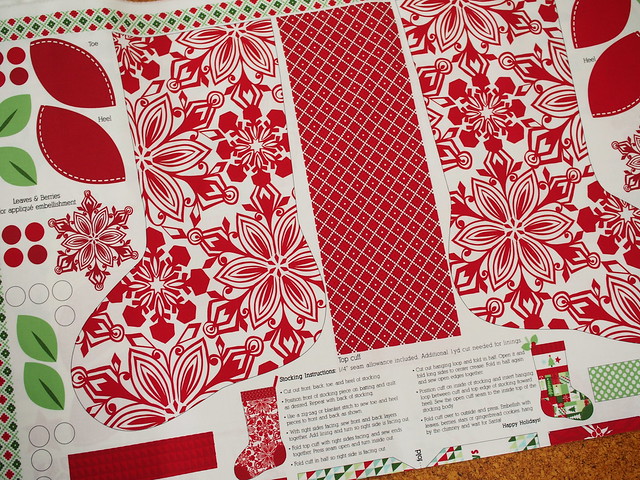
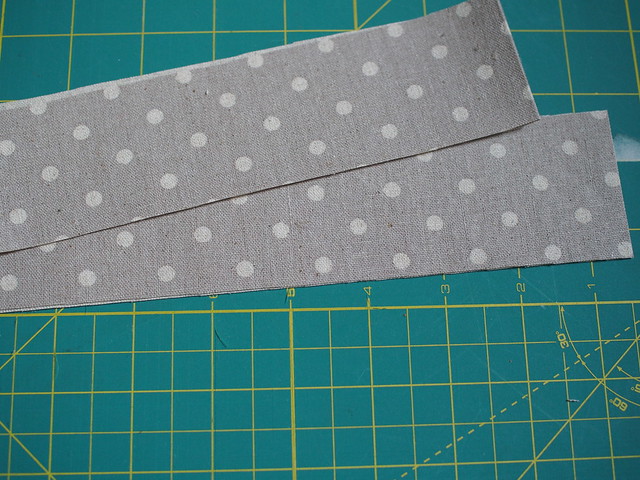
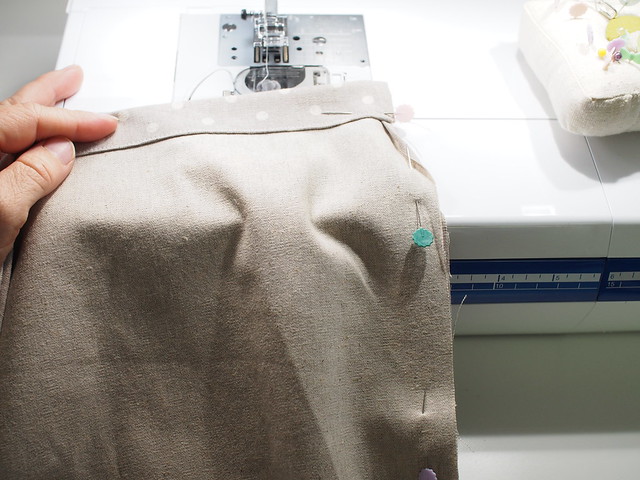
Well I don’t really need a costume for halloween (not that I’m trick or treating) because now that my finger is unbandaged I’ve named it my freddy krueger finger. It’s quite something with 7 stitches in bright blue. Still a bit sore but feeling much better…and I faced my rotary cutter again for some cutting.

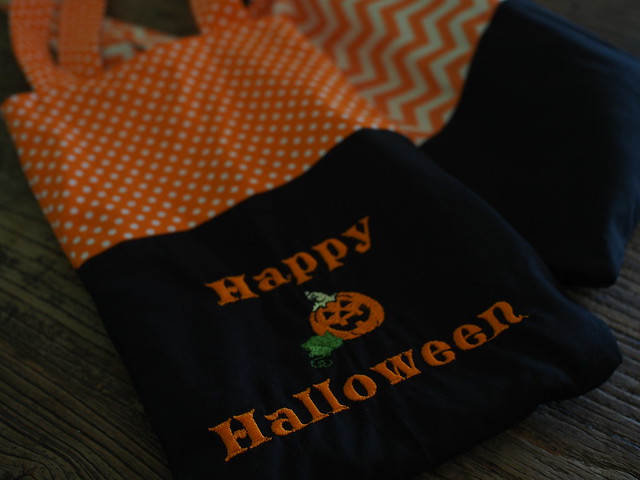
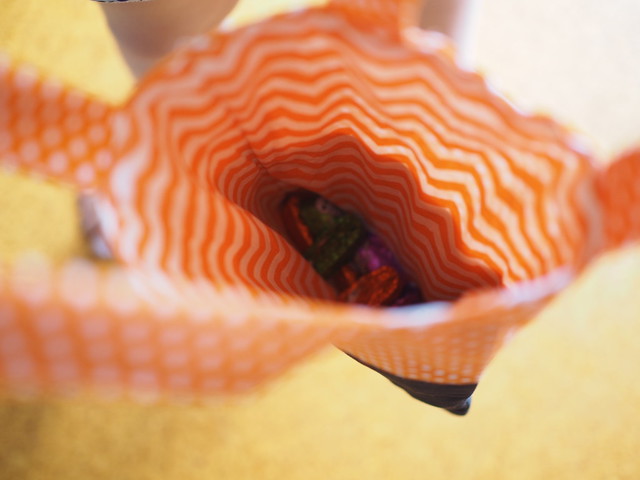
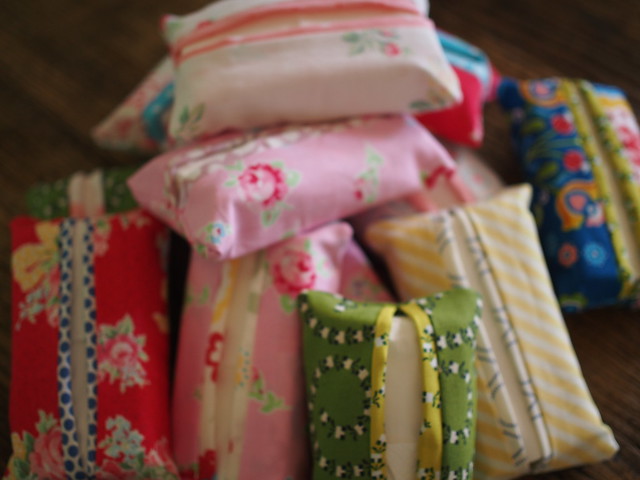
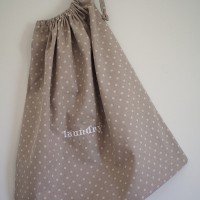
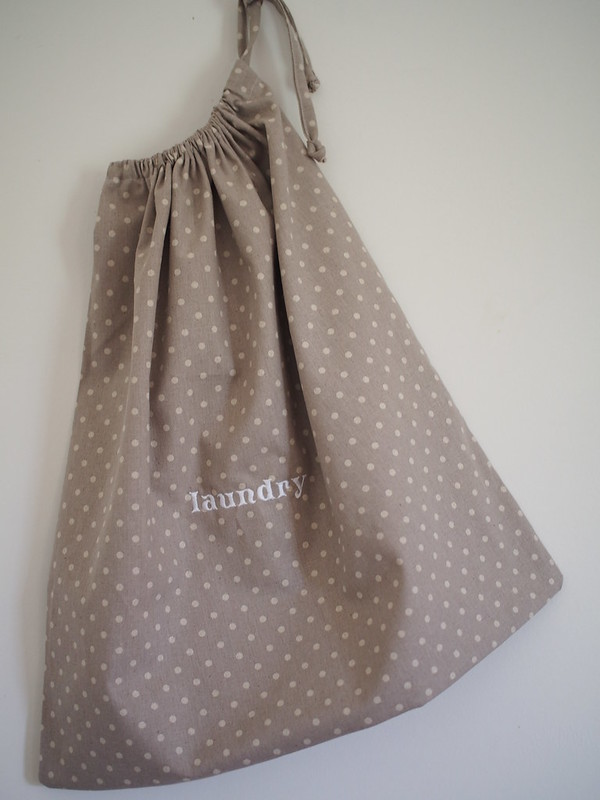
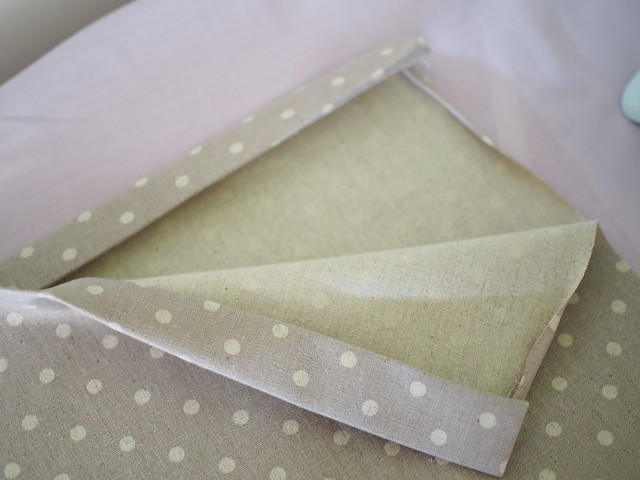
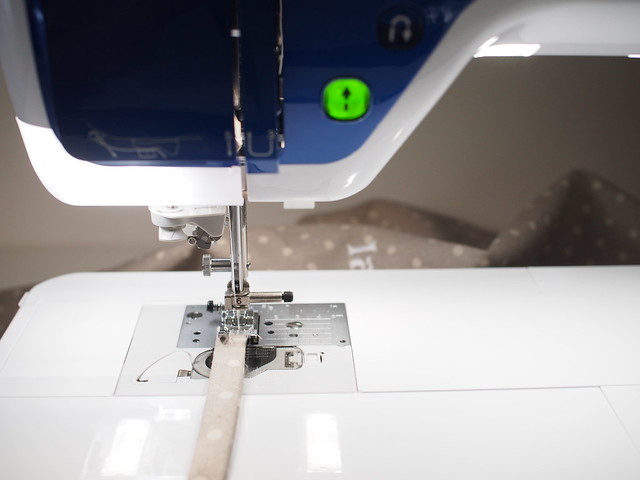
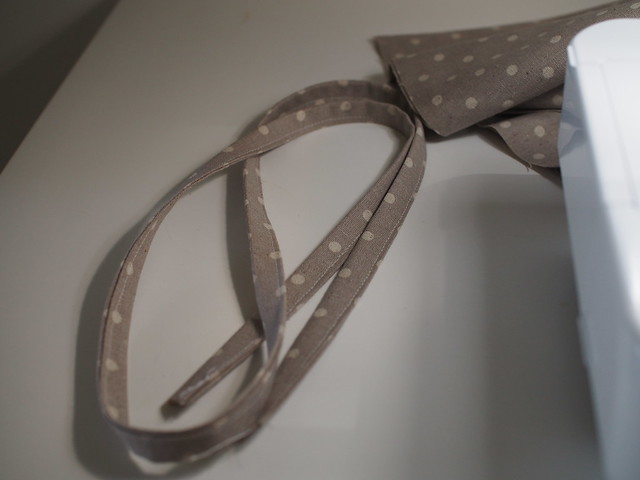
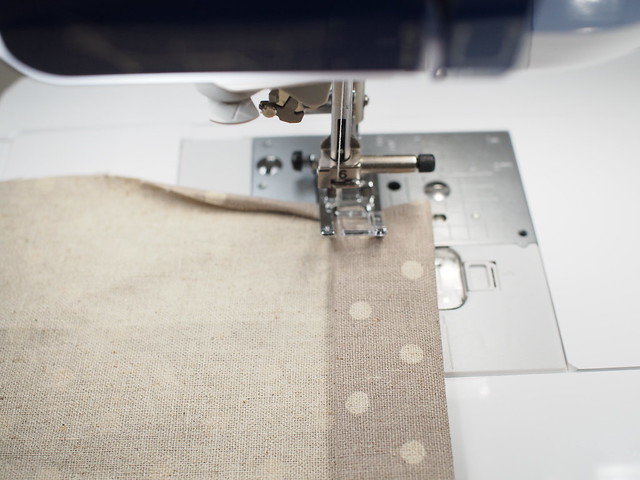
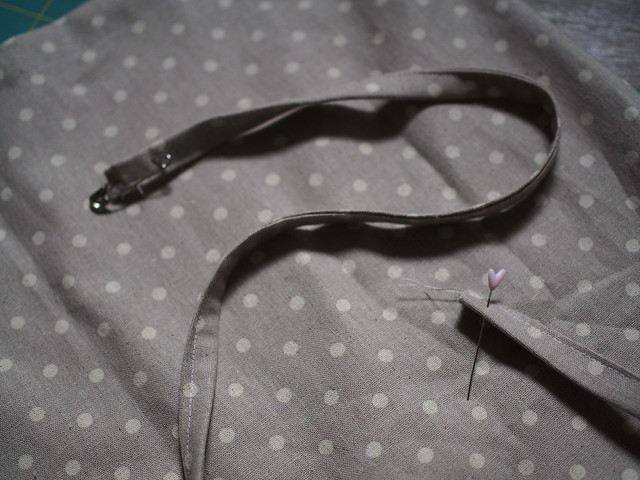
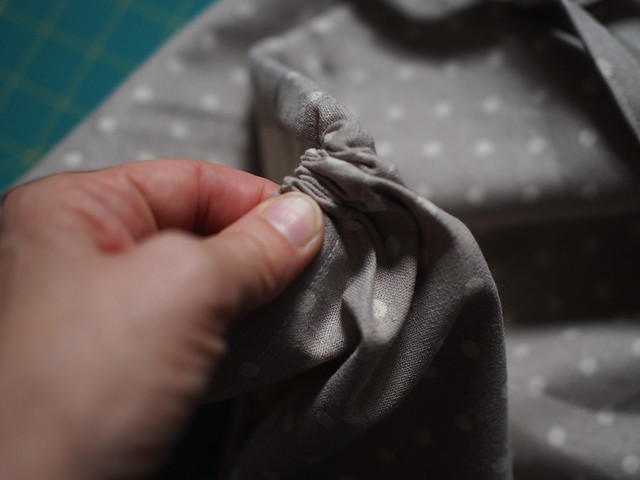
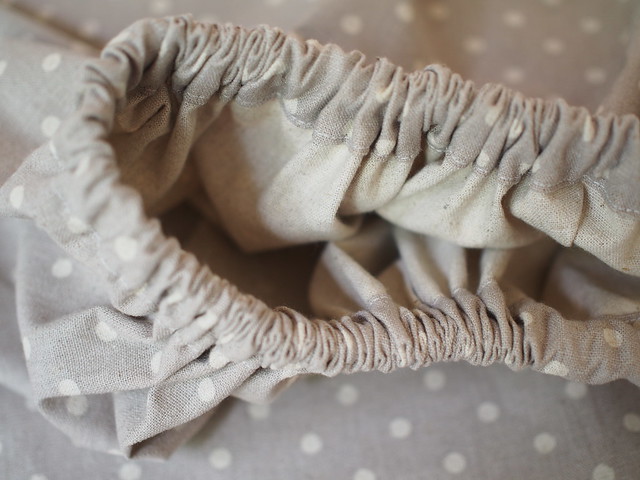
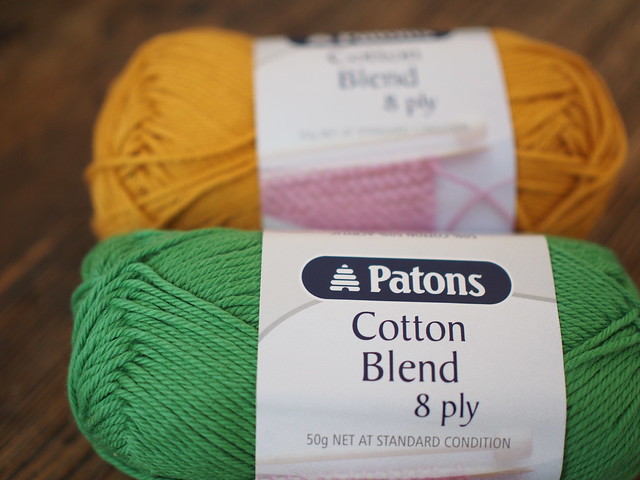
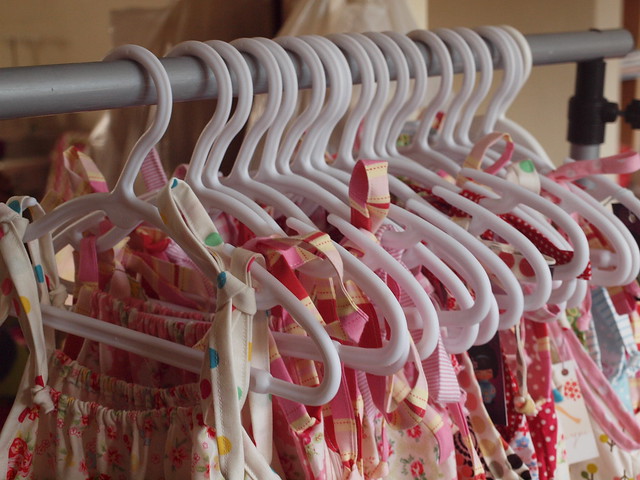
Now, for the next 2 weeks I’m over on Brother Australia’s Pinterest board for Halloween and you can see some of the fun things I’ve been pinning over there. I think the mason jar crafts and some of the foods are my favourite. And I whipped up some quick and cute trick or treat bags that my girls have nabbed as their own too. You can find the instructions here. They make great little gifts in different fabrics too. These fabrics all came from Spotlight in the quilting section and didn’t cost too much. I really don’t buy orange fabric so was struggling to find anything in the stash


be careful with your rotary cutter

Ever since I’ve started using rotary cutters (must be at least 6 or more years ago) I’ve been so careful around the kids…and in my craft room. That was until yesterday when I was rushing, thinking of other things, a bit flustered about how much I still had to do for my school fete and was trimming down some fabrics for a pencil roll and lifted my hand at the same time as the cutter was still going and I lifted it off and into the path of my hand. Oh the pain.

Thankfully I had a clean towel nearby, and wrapped it, unlocked the front door as my friend was coming for lunch and I was scared I might faint which I did the last time I sliced my finger (same hand on a sheet of glass). How lucky my friend was on her way for some sewing. She drove my van up to the dr who looked at it and said she could do the stitches there and then. The 2 anaesthetics in my finger were more painful than the wound but she stitched me up, it was a nasty deep wound, wrapped it up and sent us on our way. It’s still hurting so I’m treating myself with nurofen, donuts and coffee.

I can’t even bring myself to look at the offending cutter so am sticking to scissors when it stops hurting and I can get stuck into sewing again. So please be careful of your fingers, always concentrate when using your cutter because it’s so painful and dangerous.

making friends when you are a mum

Being at home with little ones can be lonely at times. I’m a homebody and I love it but I also love catching up with other mums. And I realised it early on. Whether you’re a new mum, you’ve moved house (or country!), have found yourself in a new situation, are feeling a bit lonely or maybe wondering how can I make some friends here are a few ideas that have always worked for me.

1. Join a playgroup

if you have little ones not yet at school then playgroup is just wonderful. A cuppa, time to chat, people who live near you, the kids get to play, even if you have a baby find one near you and join up. I am a big time fan of church playgroups and special needs playgroups. You can find your nearest playgroup here and if you have a little one with special needs then look for a MyTime group near you here. If you go to one and it’s not for you then find another.

2. Volunteer

Yep once the kids start preschool and school you’ll want to get in there. Even if you have other little ones it’s a great friendly way to meet other parents. I’ve always volunteered (it must be in my DNA as my mum was the same, serial over-volunteers in our family!). My husband did warn me to ease myself into volunteering at a new school but I have always found it’s great to be involved, you know what’s going on, you can offer constructive advice and have a say in things. And trust me the school always needs helpers. I’m really looking forward to being able to help at special school next year as it’s something I’m passionate about. Just keep reading your newsletter and looking for ways you can help.

3. Keep smiling and saying hi

If you think people aren’t very friendly where you are just keep smiling and saying hi. Even if I look a bit stressed or my hands are full I always have a smile and try to say hi. Make small talk. And even if it’s just a wave from the car then just do that. I love waving at the mums I know or if I’m going past them.

4. Just take that first step and have coffee or a playdate

If you’ve met a nice mum then see if she’s free for a coffee or wants a playdate at the park. I realise that now sounds like I’ve told you to set up a romantic date but sometimes we meet someone and think wow what a nice mum and I have a lot in common let’s catch up. Or thank goodness there is someone normal around here like me! I need to stay in touch.

5. Put people’s numbers in your phone

I do this so I don’t forget or can pass things on. It’s really useful to do this if you’re a special needs mum and meet another mum out and have something to tell her or share with her later. Or you forget something. And ALWAYS have the number of a mum in your child’s class so that if you need to find out homework, mufti days or something else then you won’t be stuck. For a second I thought wow what did our mums do. Well I think they probably picked up the phone and rang another mum. On a telephone. With the round dial. Back in the day. Now I hardly ring anyone except to make appointments or to call my grandparents and mother in law.

6. Join online facebook groups

What did we do before Facebook? There are some great closed groups on facebook for your hobbies, special interests, children with special needs or particular health issues and mums near where you live. Join up the ones that interest you, not too many or they fill up your feed and get in touch. I was at the park recently and met a mum with the cutest little boy with special needs and I told her about 2 facebook groups and she told me she was going home to join them straight away. I have found out more from other mums than a geneticist could tell me so it’s worth being on facebook for the various groups and pages that can make you feel less alone.

7. Join a local group or community college

I’ve done some great courses over the years at local colleges – cake decorating (I’ve done quite a few and am hopeless, absolutely hopeless! we did 1 term on sugar flowers and I could only do rose buds and frangipanis). I’ve done japanese cooking, pattern design, wine tasting (that was a good one!), nutrition, sewing and more. There are so many courses and it’s nice to do something for fun and learn a new skill or hobby. I’ve met the nicest people and a real mixture of people when I’ve done courses. They aren’t all expensive either which is great. Check out the local newspaper and noticeboards for local groups especially if you’re a crafter or exerciser.

8. get in touch with friends you haven’t seen in a while

Goes without saying that everyone is busy these days so make some time to catch up with an old friend. They are the best because you can pick up where you left off.

What’s your best tip?

my baby girl is growing up

I have a very busy start to the week with the usual school and preschool run, meeting at school, groceries to buy so that I can make cupcakes for preschool and a pink ombre cake that I’m making for my sweet birthday girl. And a last minute shopping trip to buy some palace pets. I can’t believe she turns 5. I never could have imagined how much we’d love this sweet little one. What a journey and yet she’s just one of the kids. Sweet to the core, learning new words, picking up the proloquo2go so quickly, ready for big school, hates wearing hair clips (I’m working on it), loves anything pink and girly, adores her palace pets, loves colouring, in amazing health (touch wood) and a beautiful member of our family.

I know some of you have a real soft spot for our little girl and I thank you for that. She is so precious to us. I’m grateful for every day we have with her and the people who take the time to care and keep up to date with how she’s going. We’ll be taking her out for a chinese dinner, there will be pink cake, and some dancing and party games with her brothers and sisters.

And we are so excited for the year ahead……

fun things to sew for a school fete – part 1

Oops it’s been almost a week between blog posts. Life is definitely busy. School is back, preschool is back, speech therapy is back and I’m sewing a few projects for Brother and a lot of things for our school fete. It’s going to sneak up on me. I just know it. Here are a few of the things I’ve been whipping up. Firstly some grocery bag holders. I’m not sure why I haven’t made these before as they are just so easy. Take a fat quarter, sew up the side seams on the longest edges, put some elastic casing at the top and bottom, put the elastic in, sew the casing closed, attach some ribbon to the outside to make a hanging loop and you are done. So addictive and I found it a great way to use some odd fat quarters. I think more of these are coming.

Next up is an old favourite. Tissue holders. These are so easy and I just cut 2 big piles of fabric and match them up in some nice co-ordinating pairs and off I go. Super quick and easy. I found this youtube tutorial last year and once you’ve made a few you are on a roll. Pick up the tissue packs at the supermarket, priceline or target.

Quick and easy skirts are always fun and another great way to use up fabric, you can whip up a few in the afternoon.

Next on my list are about 20 pencil rolls. I’ve saved the best (or the biggest sewing job) until close to the end. I do these as 12 pencils to a roll and use some bias binding folded over and sewn together as my ties. Easy but takes a bit more time than the other projects but I know that they will be popular. I probably won’t use my favourite japanese linen but have a few canvas fabrics and spots, stripes and cute prints to use up.  I also think gel pens would be a great option for older girls.

I have a big pinterest board here if you need some ideas and I’ve already got ideas for Christmas presents. My biggest piece of advice when you are sewing bulk items or making things for a fete is pick simple projects with great fabric choices. Do all the cutting in one go for a project, next night or time you are sewing you might do all the side seams and overlock, then the next session you might be at the iron and then sewing. I find that way I don’t make mistakes and get through the bulk lot faster and can move on to the next item!

Got any tips for me?

Kwik Sew K0143 in Flower Sugar

It was the last day of school holidays yesterday so I grabbed the opportunity to get some sewing done. I cut out the pattern and fabric the night before, sewed the dress in about 5 mini sessions at my machine and quickly finished it off this morning. I was hoping she was going to wear it to preschool but she’s insisting on something else. I’d wear this one I love it so much.

This pattern, Kwik Sew K0143, was so straightforward. It did have a zipper and I haven’t done a zipper in about 5 years so I was nervous. Putting the zipper in was easy but mine is far from perfect. I’ve always managed to enjoy sewing for little girls without sewing zippers into dresses. There are just so many patterns with elastic and gathering that you can avoid zippers. It wasn’t that bad to put in and the instructions were easy but I’ll work on zippers.

The bodice construction was very easy and it was all put together and then attached to the dress. There was still a little bit of hand stitching required at the back of the zipper. Now I was going to hand stitch the bodice to the lining but the pattern called for stitch in the ditch. My stitch in the ditch is more like a meandering path so I can see a few little spots that I’ve missed the mark but overall it worked well and saved me handstitching. I didn’t want to go up a bit and sew through the bodice neatly around but next time I will.

There were lots of step by step drawings included in the pattern so you knew what the instructions were talking about and compared to the McCalls dress I sewed recently this pattern was so much easier to follow and enjoyable.

The fabric is Flower Sugar and the pockets weren’t supposed to be contrasting but I just love the contrast. And the pockets were super easy to put in too.

All in all this was a great pattern and I don’t know why I haven’t discovered them before. I’ll definitely be making this one again (the other girls are lining up for one each) and someone got a new summer dress so everyone is happy.

And they are all back to school and preschool today!

Christmas fabric giveaway

CONGRATULTIONS LEE WHO WON THIS GIVEAWAY!!!!!!!!!!!!!!

Long time no giveaway so with a new delivery of fabric on my doorstep here we go! One gorgeous panel of Christmas fabric from the Jingle range by Kate Spain for Moda.

You can make 2 Christmas stockings or could back with another fabric and make 4 and a few other little cute things. I’m thinking these would be gorgeous quilted. I’m also popping in a metre of some Bonnie & Camille in festive red and white too.

So wherever you live in the world just leave a comment telling me why you’re going to do some sewing this Christmas (coming from someone who has good intentions and gets caught up with other things). I’ll pick a winner next Sunday 11th October! Good luck…………

embroidered linen laundry bag

So I had this great idea to make a laundry bag for the mother daughter camp we went on recently. But of course life got in the way and I was still learning how to do embroidery on my machine (and still learning). So now that I’m in school holidays I’ve whipped this up in an afternoon. And in the interest of full disclosure my dear husband had taken 4 of the big kids to the movies which did make sewing time a little easier.

Embroidering on my machine is so much fun. Thanks to Brother Australia, I’m using a Brother Dreamweaver 6200D but you could do the embroidery on any embroidery machine and any size hoop. You can even make the bag and do the stitching in hand yourself. And I can leave the room when it’s doing the embroidery and then it plays a little tune and comes up with a smiley face when its finished sewing. So sweet.

The linen I used for this bag is by MoMo for Moda and so beautiful. I bought it when I was selling fabric but just couldn’t part with it all. It’s nice and thick which gives the bag and also the stitching a bit of support. You can use any fabric but I find a good quality quilting cotton or linen/cotton blend or a cotton canvas works really well when you are embroidering the font and using for a more durable bag.

What you’ll need 

rotary cutter, ruler and mat (or scissors)

about 80cm of fabric (112cm wide)

embroidery thread for your machine

tear away stabiliser if you doing machine embroidery

regular sewing thread

pins and sewing supplies

Instructions

Cut your fabric for the bag. I use my rotary cutter, ruler and mat to get a nice neat rectangle. For this sized bag I used about 60cm (about 24 inches) x width of fabric. Trim off the selvages

Cut a 2 inch strip of fabric going across the width of the fabric which we will use for the bag tie later on.

Attach tear away stabiliser to the wrong side of your fabric where you want the embroidery. I used my medium embroidery hoop (my machine came with 2 and this is the smaller of the 2) and a piece of stabiliser just a bit bigger than my hoop.

I like an iron on stabliser that is tear away which means it just tears away from my work when I’ve finished. This is what it looks like after I quickly ripped off the excess stabiliser. Just those little bits to remove and a few threads to trim but very neat.

Attach hoop to fabric with the stabiliser and a little tip is to have the excess of your fabric to the right away from the end of your embroidery arm. Take your hoop to your machine.

Select the font you want, if I wanted to use the font in large letters then I would have needed the bigger hoop (and I’d already hooped up my fabric and stabiliser) so I used medium font and upsized it a little.

Now let the machine do the work.

Remove the hoop and stabiliser and let’s work on the rest of the bag. At the iron press over the tie fabric once across the width of the fabric and then open up and press each end in towards the centre line. Press again.

Fold over one side to the other and press well along the tie.

Create a pocket for your tie. Start by tidying up our edges. Fold over the top of the side edge of your fabric a little bit and a little bit again and press well. Repeat on the other top side of the fabric top.

Now press over the top of the fabric going right along the top edge of the fabric by a little bit.

Press over again by a width that is more than your finished tie/ribbon/binding folded over.

At the sewing machine you are going to sew your tie from one end to the other. Set aside.

Sew the folded over top of your fabric from one end to the other.

Now with right sides of the fabric together you are going to pin the side and bottom of the bag together. Sew from just at the bottom of where you created the opening for your ties and sew down the side of the bag and then across the bottom of the bag.

Now take your tie and put a safety pin in one end and a pin in the other. The safety pin will help you push through the tie and the pin will stop the other end from getting lost in your tie casing.

I tie a knot in each end of the tie and trim the excess fabric. Voila the bag ties are done

You can overlock or zig zag your inside edges. I just zig zagged on my machine and trimmed the corners and I was done. Stand back and admire your bag.

the almost lost washcloth and mini version

A fun and easy project for knitters and crocheters of all levels is to make washcloths/facewashers/dishcloths. There are so many patterns from a basic square to something a lot more fancy. Use some cotton and you have a nice quick and easy project. Great when you’re wanting something in between other projects or are just starting out. And if you’ve never had of any of these in your house before then you’re going to love them. I love them for the bathtime and we started out with the girls calling them princess face washers because they were pink and so pretty. They last a few nights in the bath then chuck them in the wash, dry them and pop them back in the bathroom again. They really are so sweet and lovely. And you made them so it’s even better.

One of my all time favourite patterns to use is the almost lost washcloth which you can find here. It’s super easy and just cast on, knit, yarn over, cast off and knit some more. You work around in a circle with 14 stitches and there is nothing too complicated about it but it just turns out so perfectly in the end.

My favourite yarn to use is Lily Sugar n Cream which is a worsted weight and I love the mix of colours that you get with the ombres (this bright and colourful one below is done in sugar n cream).  If you live in Australia like me then I buy mine from here. You can also find some at Wool Shack here.  Another option would be to order direct from the states but it starts to get a bit pricey with postage which is why I buy here.

If you’re after something smaller then there is a mini almost lost washcloth pattern and thanks to my lovely reader and friend Robyn who let me know about this one. It’s super cute and I whipped up one a night this week. These are going to be great for the kids in the bath. I love it but have to say that I love the larger pattern more for my craft stall.

I used a few different yarns for these mini ones because I’ve been clearing out the stash for my school craft stall. The lilac one is Debbie Bliss eco baby, it was splitty (you can see in the photos) and not my favourite. And I love debbie bliss yarns so that’s really saying something. I let the baby play with the rest of that ball.

The green is Debbie Bliss cotton dk which I love. It’s a really thick 8 ply and works up beautifully. And the bright coral is Patons Cotton which has a bit of acrylic in it and usually I’m not a fan of the old acrylic but it’s only a bit in this one and I love the colours in the range which you can see here. How great is this green. I want a cardigan for myself just in this colour. Or the mustard. Love the mustard colour too. Lots of great colours in this range.

I also love (of course) Bendigo Woollen Mills cotton and I’m using their 8 ply in blush for another facewasher for our school fete. There are a few colours in 10 ply which you can find here. Parchment, blush and coral are my fave colours in the Bendigo range. You might need a smaller needle as it’s not as thick as other cottons but it’s such good value and a great colour range. This is parchment which I just love.

Got a favourite facewasher pattern? Have I inspired you to start? Why not start now for Christmas! They make adorable presents with something lovely for the bathroom and you could even do a matching handtowel if you’re brave enough.

how I work from home

This year marked 9 years of blogging for me. I’m not sure where those years have gone but it’s certainly gone quickly. And I always envisaged that I’d be a stay at home mum in the traditional sense of the word and not bring in any money. But that didn’t last long because everything costs money and being able to buy our first house and do a few nice things in those early days like baby swim lessons and craft cost money. So I did a bit here and there ranging from Avon to Tupperware to setting up my online fabric store. The extra money let me have some play money. Over those years our family has grown to 8 and the costs have gone up and up and up. Weekly speech therapy, speech for another little one, specialist appointments, preschool and school fees, activities (and we don’t do that many), clothes, shoes, housing costs, babysitting and on and on and on some more.

So having some money coming in has always been a welcome relief. But it does require work and making sure that my priorities are always right. And my golden rule if you’re going to work from home is always putting the kids and family life first. It keeps everyone happy.

Here are some tips and tricks and how I manage to work from home and how I’ve done so over the years. I’m hoping you might add some tips in the comments to help out my readers. I often receive emails from lovely mums out there who desperately want to stay home but the rising cost of living (well the crazy cost of living at the moment especially if you need to live in a major city for work) put so much pressure on mums to return to work to pay the mortgage or rent or just the bills. I hope this helps you.

Find something that you will love and enjoy

the only way I’ve managed to do this for so long is because I’ve loved it. The blog has changed over the years and I’ve learnt new things like wordpress and how to fix simple things on my blog. But it’s always been fun. Brainstorm ideas if you are starting out – I do think that selling a product online is a great way to start. Create a simple website or have it done for you with a simple template from etsy or the internet, keep your hosting costs low and sell something you’ve made/bought or a service. You will find this a faster way to bring in some money than hoping that blogging will be your money earner. Once you’ve been online a while then you can look at earning money through a website.

Keep some sort of business hours

Everyone wants everything done yesterday. If people are emailing you on weekends it is perfectly acceptable to reply during the week. Do you think your favourite store answers your questions outside of business hours? Have a little part of your website or in your FAQ that says when you will answer questions or when you are available if it starts to become a problem. Turn your phone off at night or keep it in another room (I like to charge mine up in my bedroom so I don’t have it after dinner).

Use your phone

Thursday and Fridays I have all the little kids with me so I find it very hard to turn on my computer. So I don’t. I use my phone to check and reply to any emails and keep the facebook ticking along. It means I’m with my little ones and don’t have to use the computer or spend time away from them on those days.

Set aside time each week when you work and get things done

Preschool or daycare days or time when you can have a few hours on the computer are a great time to write a few posts, update your website, do orders, tidy things up, take more photos, get your tax and paperwork done and tick a few things off your to do list. You’ll be motivated because you have peace and quiet and you can focus. Also when everyone has gone to bed (assuming I haven’t fallen asleep with them) can be a good time to get things done.

Don’t quit

So many times (I’ve lost count) I’ve just wanted to give up and walk away. Just leave things ticking along and take a break. You can always take a break and come back to it. Everyone understands. It’s better to take a break than do a big dramatic ‘I’m leaving’ and then have to come back later. Then when you really want to quit you’ve taken a few breaks and know that it’s the right time to move on.

Have a FAQ page

If you’re getting asked the same questions over and over then create a FAQ page and put them all there. When people email you or ask a question then send them to that page

You don’t have to reply to or go to everything 

Once you start getting inundated with PR requests and emails it’s important to note that you don’t have to reply to everything. It’s not going to make you a bad person. I have to delete so many emails just to stay on top of emails. I don’t do events unless they paid or a brand that I really want to work with. Most other events are a bit of fluff and I can get the information elsewhere. Plus the cost of travel, babysitting and time away from home plus who is going to do the school run. Just be polite and ask to be kept up to date.

Get help at home when you need it

If you’re bringing in some money then it might be the time to get someone to help clean the house or a bit of babysitting so you can do some work. Another option is having someone come in and package up order, do your mail, manage your emails (like a virtual assistant), do your newsletters to free up your time.

Make times for phone calls

When the phone rings everyone needs me, the baby wants to be fed, someone wants something opened and all hell breaks loose. It’s crazy town most times of the day here and even worse when I get on the phone. Set a time when it’s good to talk and just let the person know or you’ll call them back. I make it after lunch when the house is ‘usually’ quiet and pop on a dvd and hope for the best. Keep it brief and I stick to email and messages as much as I can. Have a toy tub or something for the kids just in case they see you on the phone and decide now is the time to ask you for everything.

It’s OK to change direction 

Perhaps you thought you’d be a blogger but it hasn’t panned out. You’ve got the skills and know your way around social media. Why not mentor other bloggers or do the social media for a small business (or big business) in your area or through someone you know. Bringing in some money and using your expertise and working from home. Win win.

Join closed Facebook groups

There are some great blogging groups on Facebook where you can ask newbie questions and help other people out too. No question is too silly and you’ll get support and advice.

Have a buddy

Have a friend, another blogger/business owner in your field and help each other out. You share their work and they share yours. Leverage off each other. It will also be a great support and friendship.

Keep up the activities

Keep doing your usual outside the house – whether it’s running (not me, but maybe you!), playgroup, mothers group and so on. Keep them up. You can easily throw yourself into online life but for the kids and your own sanity keep getting out and about. We loved playgroup (me especially) until my twins started preschool. I started going when I had my first baby so I could get out of the house and it saved my life. As my family grew faster than anyone at mothers group I found my friendships and sanity at playgroup. Church playgroups are always my favourite as you get mums and grandmas and a warm welcome.

Remember that opportunities will always be there

Thanks to my friend Jennie of Posie Patchwork who gave me that advice when I had 4 little ones. She’s so right. Opportunities will always be there. Whether you have a newborn or are planning a new baby or are going through a difficult patch at home. Everything will still be there. Step off for a little while or perhaps keep dreaming of your business. There will always be opportunities for mums to work from home and it might not be your time yet. Do some online courses, read some books, make lists, do craft (my personal favourite) or your favourite hobby and relax. The only thing that is growing is your family and children.

Don’t forget your husband

Goes without saying doesn’t it. Just as you don’t like to be forgotten after a hard day looking after the kids don’t forget about your dear husband. I show love through food (yes, a nicely cooked dinner) and a clean as I can get it house. Obviously there are going to be crazy days – if you have a baby then forget what I just said because life is hard enough so don’t worry about the beautiful dinner and clean house, focus on the baby – but overall remember why you are home and look after everyone in your house.

Just keep doing it! I think that’s my motto. After 9 years I still get exciting new projects to work on and still love that I can work from home, raise my larger than average family, bring in money which has allowed us to do weekly speech and move to acreage and made a real difference.

school holiday sewing and McCalls M5835

Yesterday was the first official day of the holidays! Woo hoo! We baked some scrolls, relaxed at home (made easier because one little person had a fever and was throwing up so we weren’t going anywhere), got through some laundry, braved the outside after finding a red belly black snake out there on sunday and I got some sewing done at the rare moment that my 3 littlest ones were sleeping.

I picked up this pattern on eBay a year or so ago because I love a flutter sleeve and ruffle. And this has a double ruffle at the bottom of the dress…..even better. The fabric is from my stash and was purchased at a closing down sale. It’s called Town & Country and is by Lewis & Irene. Apparently the range came out in 2014. A little tip when you are buying fabric from a range is to buy 2 from the same range because often you need a contrasting fabric or a ruffle or want to use leftovers of the fabric for another project.

I cut out the dress on Sunday and put the main dress part together. On Monday I took some time to put it all together. Oh boy the bodice was killing me. I got the exterior of the dress is all sorted but once it came to the lining it didn’t work out and I had some excess fabric on each side. I’ve done older style patterns with bodices and lining before and I was desperately trying to remember how my sewing teacher taught me to put them together. This morning (After I had spent an hour on the bodice and finished the dress) I did some research online and found there is even a blog post for the pattern to help you with the bodice. Just read here.

Anyway the dress is just gorgeous. The double ruffle down the bottom gives the dress some weight and it was worth all the fussing around with the bodice. I have a little girl who only wears dresses and skirts so I’m going to make the bodice (the new way) and whip up another one. I always find the 2nd time around is much faster. I definitely give this pattern a thumbs up but only if you follow the instructions for the bodice from the link above or your own method and not the pattern. Another bonus was no button hole, just sew on a cute button and make a loop from thread.

I’ve been absolutely loving my new machine, it’s sewing beautifully. I whipped up a drawstring bag, some personalised facewashers and another pencil roll on the weekend for a birthday party and they were a hit. And a huge hit at home because apparently today I’m making drawstring bags for everyone with their name on. I never realised how much fun you can have with embroidering and I think every birthday party will have the present sorted. Growing up I had one of those names where you NEVER got anything personalised!

If you’re on school holidays then enjoy! I unplugged the foxtel before 10am yesterday and it’s out of action for the rest of the holidays. So far so good…………

blossom time

I love this time of year in my garden and especially when it’s blossom time. Only two trees with blossoms but that’s enough for me.

and my little guy is walking! a few steps here and there and even though he’s the 6th baby of mine to walk, it’s just as exciting as the first.

I took all of these with my 25mm lens which is still my favourite!

kina in milky way

Another day, another kina. With so many baby girls being born around me I can’t say no to knitting a kina. The yarn I used this time around is Bendigo Woollen Mill’s Milky Way (colour is Venus). Milky Way is lovely and soft and a fun one to knit with since it has milk protein in it. Something that is a bit of a novelty for me. The yarn is springy and soft and the colour is a little bit washed out when you look up close which I liked. It’s something different.

Unfortunately my little guy has discovered pulling out yarn from the ball so made a big mess of the ball and I had to cut it half way through the project, cut out one big mess out and restart the kina. I’ve pulled too tightly on the ends and I’m not happy with the edge. One of the reasons I love my 200g balls is because you don’t have to worry about starting a new ball midway through your project. But anyway. My knitting is now up high with my ball of yarn on the top of the couch cushion and away from little fingers. Plus it doesn’t look like a machine made it so that’s a good thing. I’ll call it the personal touch of imperfection.

I matched it up with a cute little cotton tunic with leggings from Target and it’s ready to go. Now on to my next project………….

Win a $100 Spotlight Gift Card

Well it’s the start of a new week and I have a $100 gift card for Spotlight up for grabs. All you need to do is complete my reader survey for 2015 and you’re in the running. Too easy! Just go here

And hopefully your shopping trip will be minus the kids………who just seem to go a little crazy when it comes to Spotlight!

best ever banana bread

One of the most popular recipes on my blog….and in this house is my banana bread. It never lets me down and is always a winner. So here it is………………..a version for the thermomix owners and a good old school recipe card too! Enjoy……I feel like some right now. To make a gluten free version use a cup for cup substitute like White Wings GF flour or Woolworths Macro GF flour and leave to cool before slicing. Cardinal rule of baking with gluten free flour if you ask me


5.0 from 9 reviews
best ever banana bread
 
Prep time
Cook time
Total time
 
Serves: 8
What you'll need
  • 2 large mashed bananas
  • 125g melted butter
  • 2 Tbsp maple syrup (optional)
  • 2 Tbsp milk
  • 2 eggs
  • 1½ cups plain flour
  • 2 tsp baking powder
  • 1 Cup caster sugar (or brown)
Instructions
  1. Combine butter, maple syrup, milk, eggs, sugar and add banana to this mixture.
  2. Sift in flour and baking powder and pour into lined loaf tin.
  3. Bake for about 1 hour - 1 hour 15 minutes in 170C oven or until a knife comes out clean.
  4. Cool on a cake rack and serve warm.
  5. If your mixture is a little too wet just add a tablespoon or two of sifted flour.
  6. Another little tip is to freeze 2 or 3 peeled bananas in a ziplock bag or freezer container, mash while slightly frozen and pop them in your cake mix…..too easy!

5.0 from 9 reviews
best ever banana bread in the thermomix
 
Prep time
Cook time
Total time
 
Serves: 8
What you'll need
  • 2 large bananas, roughly chopped
  • 125g butter, cubed
  • 1Tbsp vanilla essence/extract
  • 2 Tbsp milk
  • 2 eggs
  • 1 cup caster sugar
  • 1½ cups plain flour (you can use SR flour and just leave out the baking powder)
  • 2 tsp baking powder
Instructions
  1. Preheat oven to 170 degrees.
  2. Place butter into TM bowl and melt by processing for 2 minutes on 100 degrees and speed 2. Add in banana and process for 10 seconds on speed 4 to mash it all up.
  3. Add in vanilla, milk, eggs and sugar and process for 20 seconds on speed 4.
  4. Scrape down sides of bowl once inbetween mixing.
  5. Now add in sifted flour and baking powder and process for 15 seconds until combined.
  6. You don’t want to overdo it but you do want everything combined. Scrape down sides of bowl once inbetween too as flour tends to rise up the sides when you first add it in.
  7. Pour into a lined loaf tin and bake for about 1 hour - 1 hour and 15 minutes in a 170 degrees oven until a knife comes out clean.