it’s his birthday

Today is retro daddy’s birthday. He turns 36 and isn’t he a lucky boy getting an iPad for his birthday. He works very hard and is always on his laptop but I thought it would be great if he could read his newspapers, read my blog (ha ha), get family photos and have online time away from his work laptop.
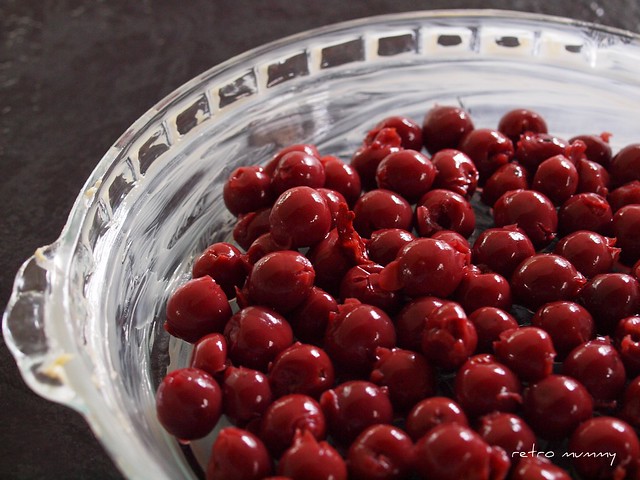
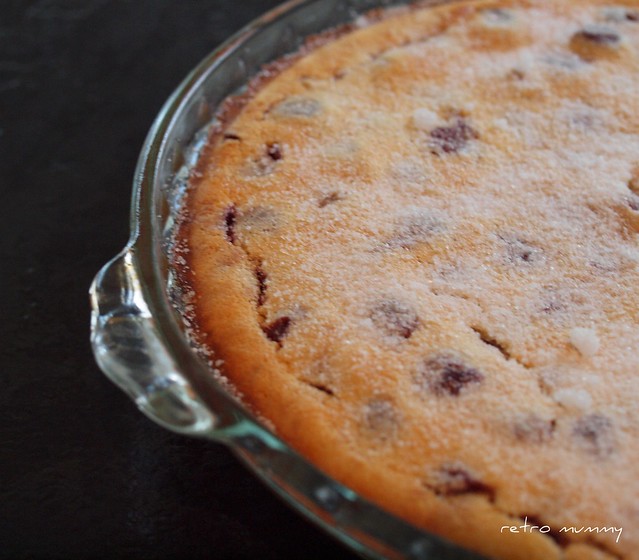
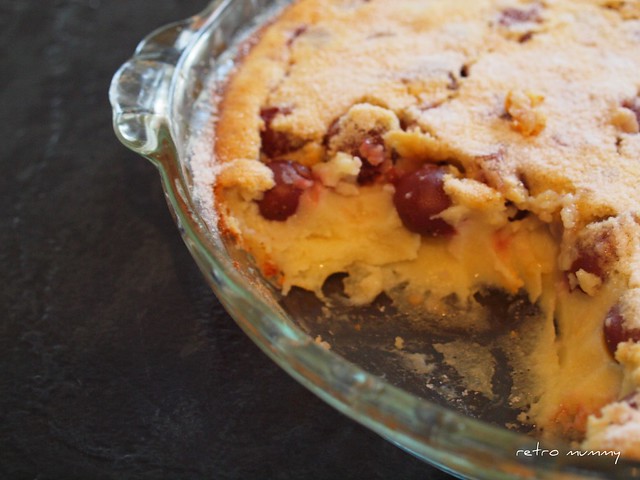
He is a very indecisive present recipient come birthday or christmas time so I had to twist his arm that he needed one (can you believe it!) but I know he’s going to love it! Just like his favourite chocolate, Cherry Ripe.
So happy birthday retro daddy! We love you!

it’s not you, it’s me

Well never underestimate the power of a 3 year old. Finn is known to take my iphone and play games, look up things on the internet (I know, don’t ask me how) and play previews of movies and songs. Then there was the time he took pictures of himself and posted them on a lovely lady’s facebook page. Somehow and again I don’t know how he added a few apps to my phone and by using the wifi has used up my home internet access for the month. So trying to do anything on the laptop takes me forever. F-o-r-e-v-e-r.
I’ve upgraded my internet package today but of course that takes time so I hope to be back to normal blogging, facebooking, tweeting in no time. Just opening up flickr took over 10 minutes and still didn’t open for me.  So I’ll be a little quiet and it’s not you, it’s me!

I love a pregnant belly

Over the weekend I had to go through my photos for a magazine story I’m participating in. It was fun, embarrassing and a trip back in time to go right back to school photos of myself. I also wish everything was digital so I could do it from the comfort of the couch. But my favourite photos just have to be when I’m sporting a huge belly. I love a rock hard pregnant belly! I could skip the jelly belly I get in the early months but the big full on belly – I just love.

This is the day I went to hospital to have keira – I have no idea what is in that plastic bag that I’m holding. I love this photo because I had absolutely no idea of the journey ahead of me or the family we’d grow to have! Love it. I was so clueless.

off to the hospital
And isn’t it funny how when you are pregnant you think you are the biggest pregnant lady ever (ok, well I do) and then you look at the photos and realise that you weren’t that big. Well…..actually……I was only 5 months pregnant with twins in this shot. I was matron of honour at my sister’s wedding and thankfully had seen these dresses on the Martha show and ordered them from the states. Pretty handy since bridesmaid dresses for lady pregnant with twins in Australia aren’t easy to come by.
And whoa! This is the day before the twins were born. Sorry bad quality photo but you have to just see that belly. It measured almost as tall as I was!
And here is pregnant with elodie
the belly shot
And in labour with Elodie – that short little but oh so painful spell of labour that I did! 
labour
And of course those of you who know me or have read this blog long enough will also know that I look at these photos longing for just one more pregnancy. Retro daddy is still standing by his no but the heart wants one more. Just one more.  So do you love a pregnant belly as much as I do?????

Quilts for Queensland day this Sunday!

Just a friendly reminder that this Sunday is our Quilts for Queensland day! That’s this sunday, 21st August from 9am to 5pm at North Balgowlah Community Centre. I’ve booked the room and will have coffee, tea and lots of sweeties to keep us going. I’d love it if you bought a plate of something nice to share. You’ll also need your machine and sewing supplies as we’ll be making quilt tops, joining those quilt tops to polar fleece/flannelette/suitable backings, quilting small quilts, binding and getting as many quilts made as we can.
quilts for qld mosaic 1
I have 5 boxes, yes that’s right, 5 boxes of quilt tops and blocks to work on! I have about 10 helpers so far but desperately we need more hands. Even if you can only spare a few hours we’d love to have you with us.
There is plenty of parking and if you have any questions just ask in the comments and I’ll get back to you here! We’d love to see you and hope you can help us finish off this project and get these blocks turned into quilts.
Thank you and spread the word!
Corrie
xxxxxxxxxxxxxxxxxxxxxxxxxxxx

honey, fruit + muesli balls

Sometimes, just sometimes, I like a treat that is good for me. It’s generally the days I’ve been to the gym and want something sweet but know I shouldn’t eat chocolate since I’ve just sweated myself silly jumping around for an hour. We’re all sweet tooths in this house (with the exception of Finn) so this recipe hits the spot as it’s sweet, healthy and easy. Easy as in you don’t need to bake it easy. But since I need a bit of chocolate in my day I did add a teensy bit to the recipe but it’s totally optional.

fruit + muesli balls
2 cups toasted muesli

1 cup dried fruit (apricots, raisins, pears or peaches  – whatever you like)
1/4 cup white choc chips (like I said, optional)
1/4 cup honey
60g butter
3/4 cup shredded coconut

Just pop your muesli, apricots, choc chips, honey and melted butter in a food processor and process for two to three minutes. Roll mixture in balls, coat in coconut and refrigerate for at least an hour.  And that’s it. Put the jug on and enjoy a few when they’re ready. A real no brainer. If you have a Thermomix then put your butter in the TM bowl and melt on 100 degrees for 1 minute and 40 seconds on speed 1. Add in the rest of the ingredients except for the coconut and process for 2 minutes on speed 3. Roll into balls, coat in coconut and refrigerate. I just put them straight in a tupperware container and eat them when I get pecky! 
p.s If you want to make these for school just remember to go for a nut free muesli!

easiest frittata for kids

A few of you have asked me on facebook what my little ones eat for dinner! And I have to tell you  that they like their food simple. Nothing remotely spicy, saucy or too green. One of their favourites (and mine too because it’s so easy) is this simple frittata. It doesn’t get easier than this and I often toss in some smoked salmon, fresh herbs or a small can of tuna every now and then. Enjoy.

easiest frittata

8 eggs
1 cup fresh or frozen vegetables (whatever you have)
2/3 cup cream
1 cup cheese

Get your kids to make this as they love cracking the eggs but just get them to crack into a cup and tip each egg into the mixing bowl one by one. This avoids fishing out any shell from your mixture. So crack your eggs, whisk them and add in cream. You  can season with salt and pepper but I leave it out for the kids and season my own serving. Whisk again then pour into a lined square tin. Sprinkle vegetables evenly over the top and spread them out before topping with cheese. Bake in a 200 degrees oven for 25-30 minutes until golden on top. How easy is that!
easiest frittata

quiche maraichere in the thermomix

Well it’s Friday and if you’re thinking about the weekend and thinking about baking – well add this to your list. This is a simply delicious quiche and makes for a perfect weekend lunch or dinner. I just love quiche so much. Even if I have to spend a couple of hours in the kitchen getting flour everywhere. It’s also so worth it and oh that feeling of satisfaction when you’ve made your own pastry. The thermomix makes light work of this quiche as it makes your pastry, dices the vegetable filling, cooks the filling and grates your cheese. Now it doesn’t bake your quiche but boy it comes close to doing everything for you.

golden cheese on top

But you don’t need a thermomix for this recipe as I’ve included instructions for both. The recipe comes from my new favourite cookbook, Around my French Table by Dorie Greenspan. Such a fabulous book full of recipes you’ll want to cook for your family and keep an eye out on amazon as I picked it up for about $26 including postage so a real bargain. Now you’ll need to set aside some time either way as there are several steps for the quiche and time needed to make and bake your pastry shell and cook your filling. This really is delicious and the kids love it. They are not really vegie lovers so I love that they gobble this up.

pastry

shortcrust pastry shell, prebaked
200g plain flour
100g butter or margerine chopped in pieces (cold)
1/4 tsp salt
50-60 g/mls cold water

Place flour, butter and salt in TM bowl and mix 10 seconds on speed 6 till resembles breadcrumbs. Set dial closed lid and add water and knead 20 seconds interval speed . Add a bit more water if necessary to bind together. If you don’t have a thermomix then you can do this in your food processor using the same steps and allow mixture to come together to form a ball. If you don’t have a mixer then you can go old school and rub your butter using your fingertips into your flour and salt until it resembles breadcrumbs, add in your water till it all comes together and knead using your hands. Turn your mixture onto a floured surface and knead lightly. Roll into a ball, slightly flatten into a disc and wrap in gladwrap and chill for at least 15 minutes. Then roll out on a floured surface and lay into a well buttered tart tin. Prick with a fork all over. To prebake you want to lay some greaseproof paper over your pastry in the tin and pour in dried beans/rice/baking weights and bake in a 190/200 degrees oven  for 20 minutes, remove paper then bake another 5 minutes. Remove from oven and cool.
Now a little tip don’t do what I’ve done with my pastry there. Leave yourself some excess at the top of the tin as your pastry will shrink a little. It’s a good idea to chill your pastry shell once it’s in the tin and before it goes in the oven to prevent shrinking and give youself a bit of excess too.

before the oven

Filling

1Tbsp butter

1 leek, cleaned and white & light green part only

2 celery stalks

2 carrots, peeled

1 red capsicum

2/3 cup cream

1 egg

1 egg yolk

2/3 cup grated cheese (I use a light vintage)

Now place your roughly chopped vegetables in your TM bowl in 2 lots and dice by pressing turbo 2 or 3 times. Be careful not to overchop. Drain off excess liquid from vegetables and set aside. Melt butter in TM bowl at 100 degrees for 1 minute on speed 1. Add in vegetables and saute at 100 degrees for 5 minutes on speed 1. ** I drained my vegetables a little of excess liquid (not all) then spoon vegetables into bottom of the tart shell and spread out. Whisk egg, egg yolk and cream together. Season and pour over the vegetables. Allow the cream/egg to fill out in between the vegetables then top with grated cheese and bake 30-40 minutes in 180 degree oven until golden and puffed on top. Serve and enjoy.

Now if you don’t have a thermomix, you’ll need to finely dice your vegetables. Melt your butter in a frypan/saucepan and saute the finely diced vegetables for about 10 minutes. Keep stirring them as they cook. Leave to cool. Follow from ** above.

taste testing the quiche

Green with envy

Don’t worry this is just a post about green yarn, nothing more juicy than that. I’ve always been a pink girl but when you knit or craft you find yourself experimenting with new colours and combinations. And I’ve learnt that the right shade of green can look amazing…..even when you’re a pink girl at heart. So when I saw some new yarns at Suzy Hausfrau I jumped at the chance to buy them. Aren’t they gorgeous. ‘Suzy’ packages them all up in brown paper and twine and they are on your doorstep before you know it.
new to the stash

And then I saw on twitter that @buttontreelane was having a little personal destash so I quickly popped over to ravelry and picked up 3 skeins including this gorgeous one. If you’re not on ravelry or don’t know about destashing then check it out. It’s a great way to pick up yarn, books and magazines when people have their clearouts.  I like the destash page on the Australia Knitters group and also on people’s yarn stash you can find what they have for trade or sale.

new to the stash

Look at me. Always helping you spend more money on your crafts. The pleasure is all mine! Just don’t tell your husband (or mine!) that I sent you.

BlogHer 12 New York City

New Yooooooooork!  Concrete jungle where dreams are made of. And next year I’m going to be there. You see for a couple of years now I’ve watched from afar as bloggers have gathered for the annual BlogHer conferences. This year some lovely aussie bloggers I know got to go and I’ve decided that next year it’s my turn to head over and be a part of the fun. The beauty of blogging conferences is that everyone can go – super duper popular bloggers to people thinking about starting a blog. That’s the beauty of them. It’s not just for the pro’s!
And it’s in New York. NEW YORK! One of my all time favourite cities in the world. When retro daddy and I visited NYC I couldn’t sleep. I was just so excited to be there. It was my first time in America and it just blew me away. We were staying in a hotel opposite madison square gardens and loved every minute of it. Every minute! We ate in little italy, korea town, chinatown, we saw the sights, walked and we shopped. Oh we shopped, yes we did! Top of my list this time around would be JCrew, Anthropologie, Purl Soho, Gap, Sephora and of course FAO Schwartz and American Girl for my little ones.

My hope is that we can all go as a family so that the little ones get to be a part of the fun and excitement that is NYC. Unfortunately, BlogHer 12 coincides with retro daddy’s busiest time of year  – year end  – which means taking the whole family might not work. But he’s talking about making it work which means we can all go together and solves my hugest issue of leaving my babies behind. And my other huge issue of luggage allowance.

Anyway I decided that the 20% discount combined with the early bird rate was too good to miss so I bought my ticket. Oh yes I did. I bought my ticket. Can you believe it? I can’t. It was a little impulsive considering that I live on the opposite side of the world. And I will be saving my little butt off to get myself there next August. And if your name is Qantas, V Australia or you’re a lovely big Australian corporate looking to sponsor a sweet mummy blogger to go then of course email me and my people will talk to your people (ha ha, my people!). A couple of sponsors might just make the trip a little easier.  And Qantas, could I have extra baggage allowance for you know, the shopping.

So are you going to BlogHer 12? It’s so exciting to see some other aussies have bought their tickets too. But tell me how are we going to save? How much do I need to put away each month? Tell me! I’m a terrible saver. And if you’re not going please rest assured that I will share every moment of the trip with you all – from the breakfast buffet, to the shops, the craft shops, the conferences and activities, the freebies, all that is NYC.

p.s All pictures of NY from here and no I’m not a Jay Z fan but the kids were pulling out all their moves dancing to the clip!
p.p.s The discount code you’re after is AUGUSTHOLIDAY to save 20%
p.p.s I’m not doing pathfinder day as that would seriously cut into my shopping and sightseeing time!

cherry clafoutis

I actually have 4 french recipes to share with you this week. Sunday was dreary and retro daddy went into the office all day.  I was not impressed. I have replaced 4 letters of his employer with ‘crap’ when referring to it because we never see him. So to make myself feel better I decided to stay in my own ‘office’ and bake some yummy things.

And desserts don’t come yummier or prettier than cherry clafoutis. And actually they don’t come easier. This really is a simple dessert that can easily be made for a weeknight dessert or a fancy dinner party. It’s very popular here and I made this one after lunch so I could photograph it and it made for perfect afternoon tea. You can use a variety of fruit but I love the look of the pretty cherries. I just buy a large jar of morello cherries in the supermarket and they are perfect. This recipe comes from Around my French Table and has been adapted for the Thermomix.

a pie dish of cherries


1 jar cherries, stemmed and pitted
3 large eggs
1/2 cup sugar
2tsp vanilla
1/2 cup flour
3/4 cup full cream milk
1/2 cup cream
extra icing/caster sugar to serve

before the oven
Drain cherries and lay out in the bottom of a well greased pie dish. Place sugar in TM bowl and process for 5-6 seconds on speed 8. Set aside. Add eggs to TM bowl and process for 1 minute on speed 3. Add sugar and whisk 30 seconds speed 3. Add vanilla, flour and whisk 1 minute speed 3. While machine is running add in milk and cream and process 30 seconds speed 3. Tap bowl on counter to remove some bubbles then pour over the cherries. Bake 35-40 minutes in a 180 degrees oven until slightly golden and cooked in the centre. Top with icing or caster sugar sprinkled over the top. This does not last long in our house and is delicious.

cherry clafoutis

If you don’t have a thermomix then whisk eggs until foamy, about 2 minutes, add in sugar and whisk for a further minute. Add vanilla, flour and whisk for a further minute or two. While mixing pour in the milk and cream and whisk for a further minute. Tap bowl on counter to remove some bubbles then pour over the cherries. Bake 35-40 minutes in a 180 degrees oven until slightly golden and cooked in the centre. Top with icing or caster sugar sprinkled over the top.

clafoutis after my afternoon tea

This was after I had my afternoon tea! I just can’t say no to this warm from the oven!

Paxton jacket

There is no better feeling than finishing off a little craft project. I have just finished sewing on the buttons on this dear little cardigan and am just loving it so much. I also love how the buttons came from my stash and didn’t require a trip up to spotlight where I would definitely come home with more than buttons. I know you’d do the same too.

cute buttons


Ravelry details on this little project are here. It’s the paxton baby jacket and is knit all in one piece in 8 ply. It was a super fast knit and took me a couple of nights on the couch. The sleeves are done with the magic loop method which I’d never done before. I think I need a bit more practice with it and hope a couple of dodgy stitches aren’t too noticeable on the sleeves.
before blocking
I wish you could all feel how soft this little cardigan is. Soooo soft. I used an 8 ply from Bendigo’s back room called Shetland. It was gorgeously soft to knit with and this hardly made a dent in the 200g ball. If you get to the backroom pick yourself up some as it’s just gorgeous.
love the front!
Oh I think I’m going to be admiring this one for a while. I’ve held it up and showed retro daddy a few times and really I think he just needs one viewing and says that’s cute and that’s all he needs. By the third time of me showing him how cute it is he really is over it. I just can’t help myself. I get so proud of finishing things off and seeing them all ready to go.
sleeve
Anyway if you need a pattern for a premmie or newborn then give this pattern a go as it’s fast, easy and cute! And it’s free on ravelry too. And I’m going to practice my magic loop technique before the next one. Here is a little vid that helped me with my magic loop.

chill your madeleines

OK, well when the recipe says you should chill your madeleine mixture for 3 hours, they mean it. They look and taste so much better. So do it. Chill your mixture. I left mine in a mixing bowl in the fridge overnight.

madeleines out of the oven

But don’t let bits of mixtures drop outside your moulds will you. I just did that to show you what not to do, of course! And I got to enjoy one of these before the twins finished the lot. It’s my weight loss secret – have lots of kids so you can bake and they will eat it all up before you get to have seconds. Genius.

honey, orange and cinnamon madeleines

I love my madeleine tin. It brings back all the memories of retro daddy living in paris and our saturdays spent shopping. I was living and working in london and the highlight of the month was always when I got to go to paris and shop – and see retro daddy of course. We’d walk everywhere, have a baguette for lunch, stop in for a little wine or kir royale in the late afternoon and eat out for dinner. That is what I call living. Fun times back then. We were both in our mid 20’s, working hard during the week and just living a good life. This is me enjoying a kir royale in those days. Oh to be young and pretty again.

Corrie in Paris
Anyway back to the Madeleines. Yes what was I talking about. So I picked up this tefal Madeleine tin in my favourite department store Printemps. The best department store if you ask me although my mum was more of a galleries lafayette lady herself. For years the tin stayed in it’s packaging because I was a bit precious about using it. Now I love using it and this recipe comes from Around my French Table and I’ve adapted it for the Thermomix.
madeleines before

If you don’t have a madeleine tin don’t worry. these would make great mini muffins too. Just give them a go.

3/4 cup plain flour
1/2 tsp baking powder
1 tsp cinnamon
1/3 cup sugar
grated zest of 1/2 orange
2 eggs
2 Tbsp honey
1 tsp vanilla extract
6 Tbsp butter, melted and cooled

Process orange rind and sugar for 10 seconds on speed 8. Add in eggs and beat for 1 minute on speed 3 until light and fluffy. Add honey and vanilla and mix for 10 seconds on speed 3. Add in flour, baking powder and cinnamon and process for 10 seconds on speed 3 then add in melted butter and process for another 10 seconds on speed 3. **Now the recipe suggests cooling the mixture in the fridge for up to 3 hours but I baked a batch straight away for hungry little tummies and refrigerated the rest. It’s up to you.
mmmm waiting to be eaten
Grease your madeleine tray well with butter then tip in some flour and tip out the excess. Really grease it well because you can see some of mine didn’t come out perfectly.  Spoon mixture into each mould until full. Bake in 180-190 degree oven for 10-12 minutes until golden on top. Tip out tray onto cooling rack and madeleines will pop out. Leave to cool slightly, dust in icing sugar and enjoy. The first batch disappeared in 5 minutes. Success.
If you don’t have a thermomix then grate your orange rind and add your sugar and stir to combine. Add in eggs and whisk for 2 minutes until light and fluffy. Whisk in honey and vanilla and then swap to a spatula and gently fold in flour and dry ingredients and gently combine. Add in butter and stir gently. Now follow from ** above.

I love knitting for newborns

I love knitting for newborns. And my sweet, sweet friend Francine has just had her 3rd baby. A little boy born yesterday and he weighs 2 kilos. So tiny. I love hearing baby news and I love to crack out the knitting needles and make a few things. Francine’s two girls were also little premmies and the first time I went over to their house to introduce myself was when their 2nd daughter was born 4 years ago and I came bearing premmie hats that I’d knitted up. And this is one of the hats I made. I love how flickr and ravelry mean that I can quickly look up what I’ve knit in the past.

little debbie bliss baby beanie


And while I’m madly knitting away here I thought I’d share some of my favourite knits for new babies.

5 hour baby cardigan

5 hour baby cardigan. I’ve made this about 4 times and it’s a great quick knit. You can knit it in a 4 ply or whatever ply you like. Easy peasy and suitable for a beginner. Find the pattern here.

5 hour baby sweater again!

February baby sweater. Well this is one of the most popular baby patterns on ravelry. It comes from Elizabeth Zimmerman and I bought this little book for the pattern. It’s very sweet. Not too hard but it does require some concentration with the lace knitting. In other words little kids running around at your feet means you lose your place and lose concentration. That’s me anyway. Ravelry details are here.

february baby sweater

maile. knit all in one and I think I need to make this too. My lovely aunty debbie, another knitter in the family, made this for Elodie and it was on high rotation in her wardrobe. I think every baby needs a white cardigan as it goes with everything. The pattern is free and can be found on ravelry here.

elodie wears handmade

the hat details are here

Paxton –  love this little simple one because it’s a little bit different and comes in newborn and premmie size. I’m knitting it at the moment in the small newborn size as I started before the baby was born. It’s really easy and knit top down, you leave the sleeves on some scrap wool and come back to them. Ravelry details are here.

Debbie Bliss baby shrug. This is another great pattern and I’m pretty sure I’ve made it over 7 times as it’s knit all in one piece and is super easy. The pattern is now free and can be found here. Ravelry details are here.

tillie models the baby shrug

Springtime in hollis – I haven’t made this one but I love it! Go check out posie gets cosy’s version here. Heaven. I want one. Ravelry details are here.

Anyway, they are a few of my favourites but I’d love to hear your favourite newborn knit!

Violette Field Threads giveaway

Ok, well I love a good giveaway and I also remember what it’s like to be a mummy in small business. Starting out. So when I got the chance to giveaway some gorgeous sewing patterns for a new pattern brand, Violette Field Threads, started by two mummies over in the states, well I jumped at the chance. Look at their dresses. Amazing. So much detail. So pretty. So cute. Would you believe this is suitable for a beginner sewer? I’m not kidding.


Now you all know that we are home of the girly girls here so keira was all over the computer when I showed her this dress. All over. Jumping around like crazy wanting me to make it now. And then I had some crazy idea that I was going to sew a dress for each of my girls, get them to model the gorgeous dresses and share the pictures when I ran the giveaway. Um, that didn’t happen. I will definitely make this dress for my girls but just haven’t stepped into my sewing room lately.

The good news is that the pattern instructions are really easy to follow. Suitable for a beginner because there are lots and lots of photos (perfect when you are starting out or doing a new technique) and full size pattern pieces. And if the pattern pieces don’t fit to an A4 page there are clear instructions how to tape together. Perfect.  And don’t worry if you don’t have an overlocker. You don’t need one. Just a sewing machine. Yes you will need a sewing machine to make this dress.

The lovely girls at Violette Field Threads have given me 5 Stella patterns to giveaway. You can find the pattern details here in their etsy shop. Just leave a comment and tell me what fabric you have in mind for these dresses. I’ll pick 5 winners next weekend. And best of all since their patterns are PDF you can enter wherever you live in the world. Love to include everyone.

Next pattern I want to make after Stella might have to be Viola – honestly I’m thinking Christmas Day, all my girls. Too cute. And can I just say do they have the most stunning models or what. Gorgeous. So pop over to etsy to check out their store and show them some love on their facebook page where you’ll find their latest pattern releases and news. And thanks to the lovely ladies at Violette Field Threads. They were looking forward to me running the giveaway but I know my lovely readers will love seeing these gorgeous designs and sewing with them. I say that’s win win. Happy sewing………….