holy vignette

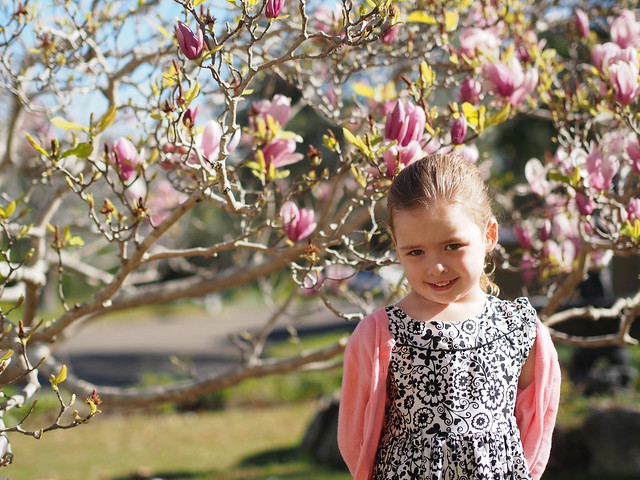
Yesterday, keira and I had a few hours together. Anyone who has a few little ones knows that one on one time is pretty special and keira loves it. We did mass then her confirmation group – of which I am the leader. Nervous? yes. Thankfully it went fine, we finished earlier than expected which probably has to do with my motor mouth speed talking and didn’t bother anyone. One of the things that I did have to do was set up a prayer table for our little group.

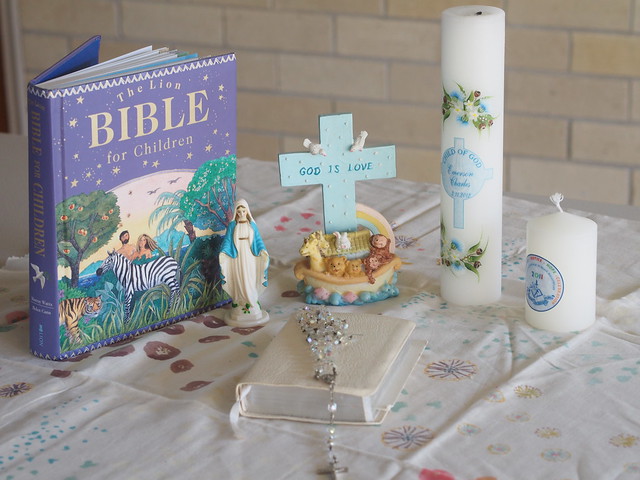
I was trying to find just the right fabric to go under it that morning…………….lucky for me one room of my house is fabric city so I settled on some nani IRO gauze to give it a natural touch.

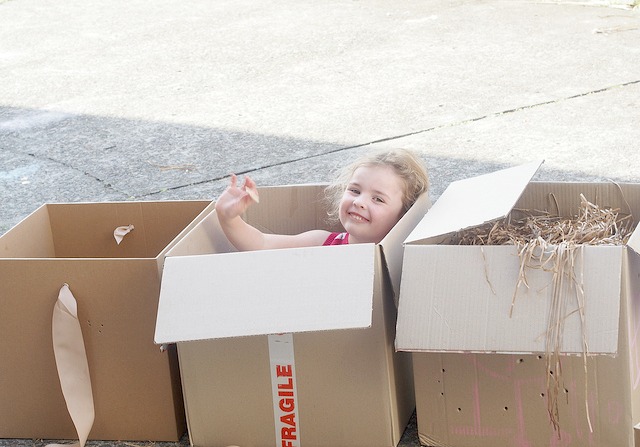
And the idea is that the little ones then go home and set up their own prayer table to help them prepare for their own confirmation. I also said to the group that I knew my keira would love setting up a prayer table and have fun with it but I wasn’t so sure that the boys would be as enthusiastic. Perhaps they were going to be more interested in looking up saints and some of their not so happy endings. No sooner had we arrived home after lunch than keira was upstairs, rearranging the furniture (yes the furniture) in her room to make her bedside table into a prayer table.

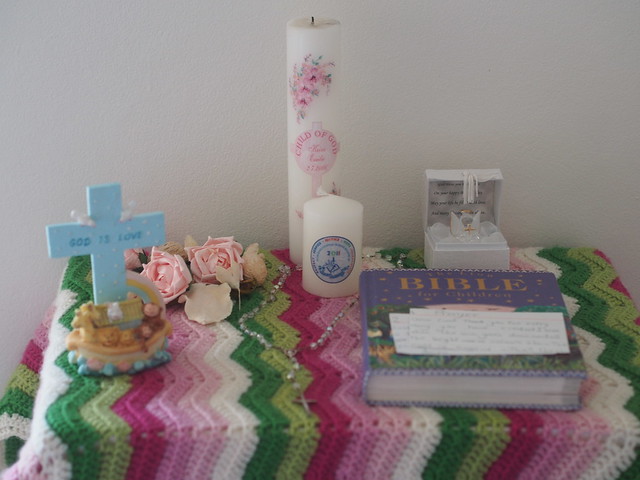
Please take note of the pottery barn pot pourri ‘borrowed’ for the prayer table. Keira is very much a girly girl so of course it had smell just right. The crocheted blanket made by yours truly which was borrowed from elodie and emerson’s room.

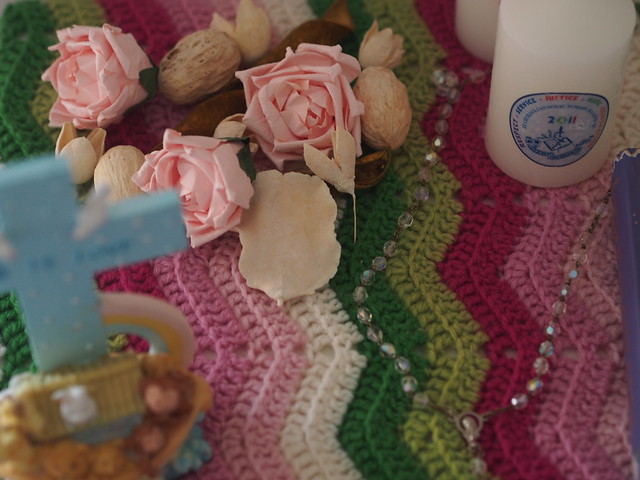
The rosary beads are mine from my first holy communion – unfortunately the medal that I have saved all these years from my communion has been lost somewhere in the house in the last 2 weeks when one of the kids found my jewellery box. Here’s hoping it hasn’t been vacuumed up accidentally. I’ve had a lot of my jewellery go walkies recently and I’m just hoping that there is one secret hiding spot in this house where someone is stashing it all…………………………thankfully I do have my confirmation badge that I received which keira will be able to wear on her own confirmation day.

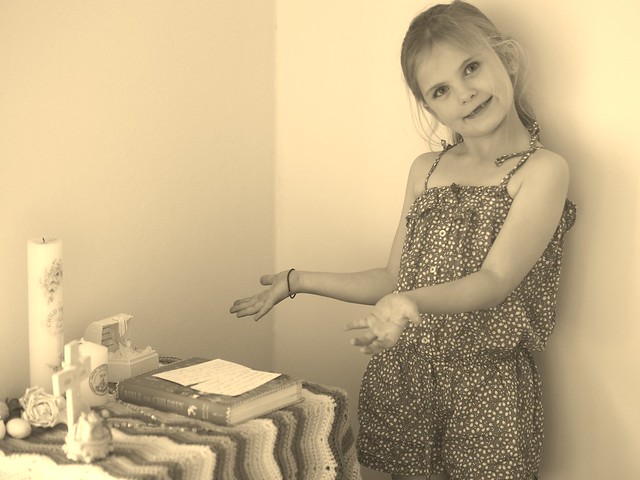
and here she is proudly showing me. She had so much fun she then went on to make a prayer table for tillie and I’m expecting my own one any day now. I’m just loving that keira is still my little girl……I know that girls are growing up faster these days so I’m treasuring it all now and hoping she continues to be the sweet little thing that she is.

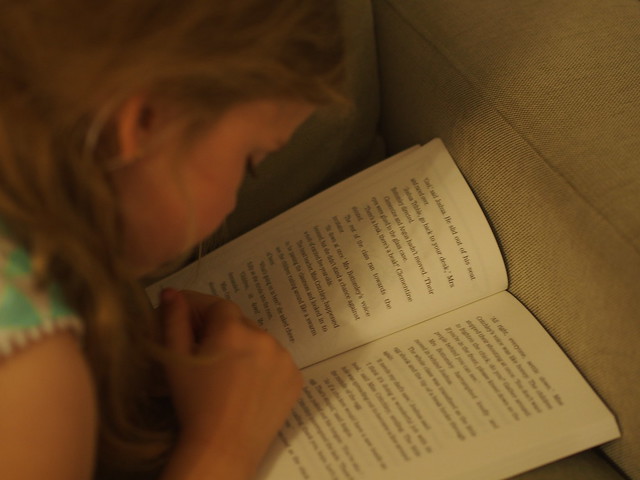
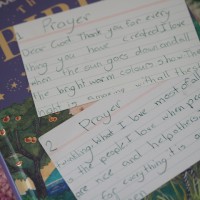
And when she’s not creating holy vignettes in the house then you’ll find her reading………………….

The Spunky Coconut Cookbook – a review

Well I decided that if I was going to try a gluten and dairy free diet (background here) then I’d need a few books because I have one gluten free cookbook in my little library of cookbooks. And that is my thermomix one and there aren’t many pretty pictures. And I love pretty pictures and baking and cookbooks. So it was time to order a few. First one that arrived in my mailbox and first cab off the rank to be reviewed is The Spunky Coconut Cookbook – 2nd edition. I decided that a mother of young girls would have family friendly recipes and that is what my cooking is all about. Oh and she also has a blog, The Spunky Coconut.

Now the book is very easy to read, there is some great information on lunchboxes, making your own almond milk, what you need in your kitchen and some basic ingredients. Now will just let you know that the recipes tend to use vanilla stevia liquid instead of sugar in most of the baking. I’ve never heard of this but am sure I will substitute with something else and I like to improvise anyway so that doesn’t bother me. If you’re a stickler for following a recipe to a tee then you might like to use a stevia liquid or something like that.

There are some great recipes that I really want to try and the food is really what kids like to eat so homemade tortillas, chicken meatballs, lasagne (there is a mock ricotta lasagne as well as a butternut squash lasagne which I’ll definitely have to try), baked stuffing recipe (think thanksgiving) and good old mac n cheese to keep the kids happy. And for the adults some delicious salad dressings, soups and more meat dishes. But the book really shines in the baking department.

If you’re new to gluten and dairy free (hello, me!) then some of the ingredients might really be a bit new to you – coconut oil, coconut flour, stevia, dairy free choc chips- but the majority of ingredients are things that you will have. And by the way retro daddy picked up coconut oil and flour from our local supermarket and the dairy free choc chips are by Sweet William (thanks to my lovely facebook readers who helped me out with my chocolate dilemma) and also found at the supermarket in the health aisle but were hiding on the bottom shelf.

Ok so the baking – well how about brownies, blondies, custard pie, lots of cookies recipes including my favourite – jam drops! There is pecan pie, chocolate pie, key lime pie, strawberry cheesecake and more. The baking section really is fabulous and a great way to approach baking without wheat, dairy and sugar.

Now it wouldn’t be a review if I didn’t make a recipe so while the little ones were playing after shower time I quickly made the blondies. I substituted the honey for maple syrup which I had, left out the stevia which I did not have and made the blondies in a loaf tin because the mixture wasn’t big enough for my square tin. The recipe also called for almond butter but I have a thermomix which quickly turned some raw almonds into a lovely almond butter in no time. And I used sweet william choc chips which are gluten, dairy and sugar free. They kind of melted when the brownie baked but not that anyone minded in my house.

And???? A winner! This was really good. I tested it out on our helper for the night who loved it and retro daddy thought it was great too. Nothing came back on the plate from the kids and excuse the late night photo. Retro daddy demolished most of it and it’s actually quite dense and filling. Not too sweet and might take some time for some people to adjust to the no sugar but it was a delicious dessert.

So all in all I really like this book and think it’s great if you are after traditional family recipes that are converted to gluten and dairy free (oh and sugar free). These are the things that kids like to eat and they are aren’t too fussy. Be prepared to shop for some new ingredients but I think if you’re on a different diet or trying something new then that is expected.

And just a little note that the introduction does talk about not vaccinating your children. This did throw me a bit as it was first page of the introduction and not what I expect in a cookbook. I hadn’t read Kelly’s blog or facebook page but have since learnt more about her family. This is a hot topic that everyone has an opinion on. But I just wanted to let you know because if you do buy the book then I didn’t want you coming back to tell me that I didn’t mention it. So there. Mentioned it.

bacon, lentil and vegetable slice (gluten + dairy free)

Now for me, eggs and cheese just go together. Omelette and frittata always need cheese in them but since I’ve been doing a few recipes without the cheese I haven’t missed it. Too much. OK, give me a while and I’ll be hanging out for some danish feta or vintage cheddar.

I’m not trying to reinvent the wheel with this recipe, yes this is a variation on a zucchini slice with bacon but I wanted to make it a bit more substantial and the lentils do that perfectly. This is really delicious and reminded of pea and ham soup………….in a slice. Great for lunch, dinner or lunchboxes and keira was excited to have it for her afternoon tea today…..and that is saying something. Retro daddy enjoyed two big slices for dinner and said I must tell you all that he really loved it and it’s very good! So there.


5.0 from 1 reviews
bacon, lentil and vegetable slice
 
Prep time
Cook time
Total time
 
Recipe type: Gluten Free, Dairy Free, Dinners
Serves: 6-8
What you'll need
  • 3 garlic cloves
  • 1 zucchini
  • 1 capsicum
  • 1 carrot
  • 3-4 rasher bacon (rind and fat removed)
  • 4 eggs
  • 1 can lentils, drained
  • ½ -3/4 cup gluten free flour
  • handful flat leaf parsley
  • handful of cherry tomatoes, sliced
Instructions
  1. Peel garlic cloves and place in thermomix or food processor with bacon. Process until finely chopped. I do this in my thermomix for 10 seconds, speed 6 and scrape down.
  2. If you have a thermomix then saute for 3 minutes, 100 degrees and speed 1.
  3. Add in vegetables roughly chopped and process for about 8 seconds speed 6.
  4. Add in eggs, lentils, flour and parsley and process 10 seconds speed 3. You don't want to go higher than speed 3 or you'll start chopping the lentils.
  5. **Pour into a lined round cake tin, top with the cherry tomatoes and bake about 35-40 minutes in a 200C/400F oven.
  6. If you don't have a thermomix then finely chop/crush the garlic and saute with bacon in some oil for a few minutes. Add in grated zucchini, capsicum and carrot and combine. Add in beaten eggs, flour and parsley and mix well. Follow from **
  7. If you're vegetarian leave out the bacon and enjoy.


What to make with canned pineapple

This post is brought to by Woolworths Select

I don’t know what’s going on with the weather where you live but here in Sydney it’s warming up! And I’m thinking summer holidays, trips to the beach, salad and ice cream. Pineapple also makes me think of warmer weather for some reason. And canned pineapple is one of those foods that I always have in my pantry. Are you one of those people who always has chickpeas, tuna and beetroot cans in your pantry. Well pineapple is usually there too because it’s so great in fried rice, on homemade pizza and in cakes. Growing up my favourite dinner was ham steaks and pineapple rings…….mmmmm. So retro.

Woolworths Select are now using Australian fruit in their canned fruit ranges and this is good news….for everyone. I do read labels and try to buy Australian products where I can and when it comes to fruit why wouldn’t you. We have great fresh produce here in Australia and the fruit that goes into the Woolworths Select canned fruit range is picked in summer from some of Australia’s best fruit producing regions including the Goulburn Valley.

I’ve got two fabulous pineapple recipes to share with you today and both got the big thumbs up in our house. First up is a deliciously fresh pineapple granita that is great for people who love iced desserts, don’t have fancy ice cream makers or kitchen gadgets and it’s especially great for those watching their weight or who don’t like heavy desserts. I told the kids it was a slushie and it’s not as sweet as what they are used to but they enjoyed some. This is a great summer dessert and can easily be made on a weeknight and then eaten for the rest of the week.

Now the other pineapple recipe I made isn’t so healthy but oh it is good. Pineapple upside down cake with maraschino cherries. Now this is something that I was really nervous about but I shouldn’t have been.

It’s basically a basic butter cake and the base of the cake tin has pineapple rings, cherries, butter and brown sugar and it all cooks itself beautifully in the oven. I think this is a great one if people are coming over and you want a show stopper or if you want to surprise the family with something a bit more special than a bowl of ice cream or some fruit for dessert. And the crispy caramel sides of the cake are the best bit. Definitely a winner and one I’ll be making again……


pineapple granita
 
The great thing about this recipe is that you don't need a fancy machine to make this delicious dessert.
Author:
Recipe type: Desserts
What you'll need
  • 2 cans Woolworths Select pineapple pieces in juice, drained
  • (reserve a few tablespoons of juice from the can)
  • a handful of fresh mint leaves
  • juice of 1 lemon
  • 2 - 4 Tbsp raw sugar
Instructions
  1. Place pineapple pieces, mint leaves, lemon juice, a few tablespoons of juice from the can and sugar into your food processor and process for a minute until finely chopped. You can do this in the thermomix for about 20 seconds speed 5
  2. You can also do it with a hand blender. Whatever you have.
  3. Pour into a shallow plastic container (a rinsed out ice cream tub would work well too) and place in the freezer.
  4. After about an hour check on it and as it starts to freeze you are going to get a fork and grate it up. Do this a couple of times.
  5. Serve.....enjoy.

 
pineapple upside down cake
 
Prep time
Cook time
Total time
 
Recipe type: Baking
Serves: 8
What you'll need
  • 1 can Woolworths Select pineapple rings in juice/syrup
  • 6 or 7 cherries (glace or maraschino)
  • ¾ cup brown sugar
  • 75g butter, melted
  • ¾ cup caster sugar
  • 125g butter, room temperature
  • 2 eggs
  • vanilla essence/extract
  • 2 cups self raising flour
  • ½ cup milk
Instructions
  1. Melt butter and place in bottom of round or square cake tin
  2. place brown sugar over the top of the butter and gently combine so that it's evenly distributed over the bottom of the cake tin
  3. place pineapple rings over the bottom of the cake tin and pop a cherry in the middle of each. Cute.
  4. Now make your cake batter by creaming the butter, sugar and vanilla. I do mine in the thermomix for 20 seconds on speed 5. You could just use a good old wooden spoon for this
  5. Add in eggs one at a time then milk and self raising flour. 20 seconds on speed 5 will do it in the thermomix then add the flour and milk and mix for another 20 seconds.
  6. Again just use a spoon or whatever you use for baking to mix if you don't have a machine.
  7. Gently pour over the top of the pineapple rings and very gently spread evenly without moving those precious pineapple rings
  8. Bake in a preheated 180C/350F oven for about 35-40 minutes until the cake is cooked right through
  9. Remove from the oven and run a knife around the edge of your cake tin. Using a plate on the top of the cake tin, tip it over and leave the tin suspended for all the goodness to come out. Now at the same time take a peek and check that nothing is stuck to the bottom of the tin.
  10. Serve warm and enjoy.
  11. Now I know it doesn't look it but this cake is quite forgiving and even if everything sticks to the pan you could slide them out, assemble the cake. I had a few pineapple rings stick. If I was serving for guests then I could have melted a little butter and brown sugar and drizzled it over the top! Or my old friend.................a dusting of icing sugar.....saves everything!


just keep knitting….

Well it’s been a bit quiet here on the old blog as we’ve got our second case of tonsilitis and when elodie gets sick she really knows how to go down in style. We do the panadol and nurofen around the clock so that she always has something on board which has helped us keep convulsions away. And with some nasty tonsils she is getting lots of ice cream. Luckily I was easing myself into the gluten and dairy free with her because it’s all she will have.

When the little ones get really sick I pretty much camp out on the couch with them so I can keep an eye on them in case they get worse. We watched a few disney movies and napped until I had to be up this morning for a meeting. Because something I do know since having children and trying to work from home. The one, THE ONE, time that you need to be somewhere……..there is a very good chance that someone will get sick. I know this because I’ve flown home from a conference early when elodie needed to go to hospital and I’ve left little ones with medicine and instructions with daddy. The thing is that I only have a meeting or something to go to once every 2 months or so but it’s just the way it always goes.

Thankfully daddy is the fun machine so he rejigged his morning meeting for me, turned some delivery boxes into cubbies, took them for a walk to the park and kept them all happy and entertained (and medicated) while I went out to Woolworths HO for my meeting. And I did have a little laugh when he rang me just before I went in to tell me that the big kids were telling him that they hadn’t had any breakfast yet………….men and women, we do things a little differently.

But this morning’s meeting made me realise that I can’t do it without him. It is a true blessing that I get to work from home, pay for all of the kids activities, all of elodie’s medical bills and day to day expenses for our family. I feel so lucky that I get  to work from home (even if it means that sometimes I’m up till all hours to get things in on time) but I absolutely love what I do. And when it comes to the crunch and I do need to be somewhere it’s nice to know that I have my co-pilot who can pick up when I need him.

And when everyone gets sick, when the washing machine is working overtime to clean the sheets, towels and quilts and when you’re running back and forth getting things and making sure that medicine is given at the right time…………well there is nothing better to do than just take 10 minutes or whatever you can get, sit down and knit quietly. Sometimes I think to myself – just keep knitting, just keep knitting – (inspired by Finding Nemo) as it’s such a great way to de-stress and just take a little time to yourself.

hope things are a little quieter at your house……….I am seriously kicking myself for telling another mum last week that we managed to get through winter without anything major! I jinxed myself………………………

almond crescents (gluten + dairy free)

Well I hopped on the scales this morning (generally I don’t do the scales unless I’m trying to lose baby weight or it’s the end of winter). But today I’m a kilo down and just feeling better all over. I’d say giving the cookies, tiny teddies, lollies, bread and chocolate a miss this week has paid off. But it hasn’t been easy. I won’t lie…some headaches and feeling a bit ordinary on the days I had no sugar. So then what did I do? Bake some cookies. Of course I did. Crazy. You don’t have to tell me that because as I write it I realise how crazy it sounds. But truth be told I’m quickly trying to increase my repertoire of gluten free goodies since there are no biscuits in the house.

I’ve converted the delicious almond crescent biscuit recipe from Little Kitchen Around the World by Sabrina Parrini (fabulous family friendly/kids cookbook) to the thermomix and it was a winner. There are a few differences because you’re using whole almonds and raw sugar rather than almond meal and caster and icing sugar. And when I do my almond meal in the thermomix I go for the rustic look which is something like this…….

These are really tasty and I like that my almond meal is a bit more rustic than store bought which makes my cookies look a bit more homemade – that and the misshaped crescents just adds to the whole ‘I made it myself’ look. After I made them I thought to myself that some orange or lemon rind would have been amazing and perhaps a little vanilla too. Next time.


5.0 from 1 reviews
almond crescents (gluten + dairy free)
 
Prep time
Cook time
Total time
 
Recipe type: gluten free, baking
Serves: 20
What you'll need
  • 300g raw almonds
  • 140g raw sugar (or raw caster sugar)
  • 2 egg whites
  • extra raw sugar or icing sugar for dusting
Instructions
  1. Place almonds in TM bowl and process for 10 seconds on speed 9. Set aside
  2. Place raw sugar in TM bowl and process for 10 seconds on speed 9. Add in almonds and process 5 seconds speed 4 to combine.
  3. If you don't have a thermomix then combine almond meal and raw caster sugar together in a bowl.
  4. Meanwhile whisk those egg whites until stiff peaks form. I do this in my kitchen aid but you can do it however you usually do your egg whites. Whatever works.
  5. Tip out the sugar/almond mixture to a large bowl and add in the egg whites. Be a little gentle but you want everything combined.
  6. Take a small amount of mixture (say a tablespoon) and roll into a little log and then bend into a crescent and place directly onto lined baking trays.
  7. Bake in a 170C/340F oven for about 12 to 15 minutes or so until they are golden on the bottom (my oven always does the bottoms first so be careful) and cooked through but not overcooked. You're not looking for golden all over just cooked.
  8. Cool on a rack - I do this just by sliding the paper onto my cooling rack with the cookies on it and then leave for about 10 minutes. You might want to taste test one or two
  9. Now make some icing sugar by placing a few tablespoons of raw sugar in your TM bowl and process for 25-30 seconds on speed 9. If you don't have a thermomix just use some icing sugar.
  10. Roll the crescents in the icing sugar and serve. Delicious with tea or coffee and when people come over.
  11. Just watch if you are taking these to church or parties because of nut allergies these days. These might be gluten and dairy free but they have nuts in them:)


a kina for keira

Those of you new here might be wondering what a kina is? Well it’s just my very favourite knitting pattern. Not sure if this is my 6th one but it’s an easy pattern, once I’m on the home stretch after the sleeves I can just take it anywhere and knit it without needing the pattern and it lasts you a year or two. It goes with everything, you can wear it all year round and it’s just a winner. It never lets me down.

I had always used the baby pattern in the past so this was my first time using the kids pattern and this is the size 6 knit in Bendigo 8 ply cotton (colour is parchment) on 3.75mm needles. A word on the Bendigo cotton is that it’s super soft and lovely to use but it does stretch a bit and although the ball band says 4mm needles I always go down to a 3.75mm. And another hot tip is once you’ve washed it just chuck it in the dryer for a bit which helps with the shape.

Keira is a small 7 year old and it looks cute on her but it does have more drape on tillie who has just turned 5. Perhaps I should have made keira the size 8. I was actually tempted to give it to tillie but keira told me I never knit anything for her so I took that as a sure sign that we’d stick to the original recipient. Photos to come this weekend of her modelling it…

If you’re going to knit one of the bigger kids sizes get ready to put some hours in for the body. I lost a bit of interest and then last week just decided I was going to finish this baby. And I did. Partly because I really wanted the needles and cable to cast on a baby kina.

All up this project cost me about $12 in yarn, it’s perfect for summer, being cotton means it can go in the washer and dryer and will get better with age. So all in all a successful knitting project.

Ravelry details are here. Pattern link is here.

banana bread (gluten + dairy free)

Following on from yesterday’s recipe I thought I’d share something else that I baked straight after the slice. I’m experimenting and having some fun but also very new to the whole gluten free way of cooking. For a bit of background, I’ve been doing a lot of reading for the benefit of Elodie (oh have I been reading) and one of the things that has come up a few times is diet. And one of the things that is recommended is trying a gluten and dairy free diet. It’s just something we can do to see if it helps with concentration, moods and overall well being. I don’t know about elodie but day 3 and I’m feeling great….except I’m still having milk in my coffee each day.

So I’ve eased myself into it and waiting for two books to arrive from Amazon and help me get on board a bit more. I will say though that the kids are absolutely loving having eggs or sausages for breakfast. And I quite enjoy taking the time to cook them a hot breakfast………..but don’t ask me to do it every day or on those days when I might sleep in a little. They don’t miss vegemite toast but I will have to try to get my head around baking a gluten free loaf soon.

Anyway, I had 3 very brown bananas staring at me from the kitchen counter and I did want to try banana bread so I just chucked this lot in the thermomix, whisked an egg white on the side and was really happy with how this turned out. I think it could be a bit sweeter (but I have a major sweet tooth) so I’ll work on that but for a first time gluten free banana bread I’m pretty happy with this. And the kids demolished the lot. I quickly cut one piece for elodie to take to playgroup and the rest was gone.


banana bread (gluten + dairy free)
 
Prep time
Cook time
Total time
 
Serves: 8
What you'll need
  • 3 very ripe bananas, peeled
  • ¼ cup maple syrup
  • 2 Tbsp vegetable oil
  • 1 egg
  • 1 egg white
  • 250g gluten free self raising flour
  • 2Tbsp Crio Bru/cacao grounds (totally optional, I have a huge bag of it here)
Instructions
  1. If you have a thermomix then place the bananas (whole), maple syrup and oil in the bowl and process for 20 seconds on speed 5.
  2. Add in egg and process 10 seconds on speed 5.
  3. Add in flour and cacao and mix for 15 seconds speed 5 and scrape down bowl. Tip mixture into a new bowl.
  4. **Whisk egg white on its own until peaks form and fold into the cake mixture in 2 additions.
  5. Pour into a lined loaf tin and bake in a 170C/340F oven for about 35-40 minutes until the top is golden and the loaf is cooked right through. I found this cooked faster than my regular banana bread recipe.
  6. If you don't have a thermomix just mash up the bananas, add maple syrup, oil, egg and combine. Add in sifted flour and cacao and mix until all combined. Follow from **


bacon, carrot and red onion slice (gluten + dairy free)

Lunch for me is usually a piece of toast, a ham sandwich, a sushi roll or some cheese and crackers. I know. Not very original. And I had been out at the dentist all morning, raced retro daddy up to the train station and wondered what on earth I was going to eat for lunch because it was already 11.40 and I couldn’t do sandwiches! I’m trying to adopt a gluten free (and dairy free) diet for elodie (and everyone) and I wasn’t sure what to make.

So in the car I thought about making a frittata but it ended up more like my usual zucchini slice but whatever you call it……it was delicious. Usually I have loads of cheese when I make this but I didn’t miss it. Kind of. Herbs would be great in this too and so would sweetcorn but I was just working with what I had in the fridge. Oh and just leave out the tomatoes if you have hot tomato haters at your house. I’m just a huge fan of cooked tomato but not everyone is.


gluten + dairy free bacon, carrot and red onion slice
 
I usually have loads of cheese and some flour in my zucchini and bacon slice but I've enjoyed this for my lunch today and think it's a winner.
What you'll need
  • 4 rashers of bacon
  • 1 red onion
  • 2 Tbsp vegetable oil
  • 2 carrots
  • 6-8 eggs
  • 1 tomato sliced
Instructions
  1. Place bacon and onion into thermomix bowl and process on speed 5 for about 20 seconds. Scrape down the bowl and if any bits need a bit more processing just do it again for a few seconds on speed 5.
  2. Add in oil and saute for 3 minutes, 100 degrees and speed 1. Scrape down bowl.
  3. Add in the carrots (roughly chopped) and process on speed 6 for about 10 seconds until finely chopped.
  4. Add in eggs and mix for 10 seconds on speed 5.
  5. **Pour into a lined cake tin and top with sliced tomato.
  6. Bake for about 30 minutes in a 200 degrees oven and enjoy. I loved this with black pepper on top.
  7. If you don't have a thermomix just chop the onion and bacon, saute in a frypan for about 5 minutes. Remove from the heat, whisk in the eggs, finely grated carrot and follow from **.


another knit off the needles

Nothing like the feeling of finishing a little knit. This one is a real cutie and worth the hour or more of seaming that is required to get it all together.

I sat outside the library yesterday afternoon sewing on the buttons and getting excited to see it finished. And let me introduce you to my buddy….Bingo. An elderly lady came by and asked if she could tie the dog onto the chair I was sitting on. I started to stand up and said of course please sit down and she said oh no I’m going into the library. So people were walking by, admiring the dog and one little girl even asked if she could pat my dog. He was very well behaved and I quite liked having him there at my feet for a little while.

So I finished the last button when I got home but had sadly missed the good light to photograph it so ducked outside this morning with a quilt I grabbed off the couch and set to photograph it.

The pattern is a bit of an oldie, raglan sleeved cardigan with full fashioned shaping from Debbie Bliss Baby Knits for Beginners but there is something sweet and special about classic knits for babies. I love it so much I’d almost cast on another one………….

The wool is Bendigo Woollen Mills Allegro and a really lovely mixture of pinks. Buttons were a couple of dollars from Spotlight and considering I have 1/3 of a ball of wool left I’d say this project cost me less than $10. Nice.

Ravelry details are here…meanwhile I’m going hell for leather on the size 6 kina and am determined to get it finished so I can cast something else on. It’s warming up so I’m about to enter my cotton knitting phase and I might even think about knitting a few things for Christmas. Think, I did say think….it’s good to aim high for a few handmade christmas presents.

how I’ve been taking photos lately

Thanks so much for those lovely comments coming in about my photos! I’m not sure who to thank – Tim Coulson for showing me how to get my camera off auto for good. Olympus for the OM-D which is just taking the loveliest photos or my dad for lending me his 50mm lens that I’m using all the time. Hmmmmmm.

Let’s start with using manual on your camera. It was only a few months ago that I started taking photos in manual for the first time. Until then I was either auto or macro for photos. Using a better lens on macro helped but using manual lets you adjust the light (as well as other things) and has just made a huge difference for me. When I learnt about the light meter it was a light bulb moment. I saw the light………….meter (ha ha). Now I’m still working on shutter speed and aperture but man oh man I’ve got that light meter working in my favour.

I had been using the Olympus E-620 for a few years which is a great DSLR….but after Tim’s course I wanted something new. My Dad kept telling me about the OM-D and I was like no, can you look up Nikon or Olympus for me. He was like OK I will but really why don’t you just try my OM-D and I was like no then ok and then he just came over with it and lent it to me for a few weeks with all his lenses. And I was impressed and then I was sad when I had to pack it up and give it back. I started to miss having that little camera coming around with me so I decided that was the one that I’d buy.

And then I put that message out to the universe (well I announced on Facebook that I had decided which camera to buy) and the universe got back to me and Olympus kindly lent me the OM-D for the next year. Thank you universe (and Olympus).

And I’m loving the camera and the picture quality. One of the things I love best is that when I adjust the light meter it adjusts it in the screen display as I’m doing it which makes it soooo easy to get the light right first time or so. I also love how easy it is to use and how light and potable it is. I walked around the craft show for half a day with it on and it didn’t get in the way or get too heavy. It’s easy to pop in your handbag and just keep on you at all times.

And then the other thing I’ve been using lately is a 50mm lens which gives me those nice soft backgrounds when I take photos. It has a 1.8 aperture and I just love using it. Thanks to my Dad for lending it to me. Cameras generally come with a lens or two but I’m loving this one….and I guess my Dad will want it back at some time.

And that’s that, hope it answers a few questions for you. One of the things about taking photos in manual is that there is so much to learn and I’ve just scratched the surface but I’m enjoying it. And practising means I’m also taking lots of photos of the little stuff that is going on around at our house and keeping it forever. Awwww.

the secrets to dressing my family

This post is brought to you by Big W

With a family of 7, there is a fair amount of shopping involved to keep us stocked with everything we need. Babies need things, they grow, they keep growing, seasons change, and that means new clothes, socks, underwear, pj’s, shoes and more. For everyone. And it’s not hard to write a post about Big W because I’m a regular there….and I love their online shopping here too.

I especially love Big W for the babies of the family – formula, nappies, singlets, Bonds gro-suits, muslin wraps, baby bottles, sippy cups, cot sheets, bibs, toys and clothes. It’s pretty much my one stop shop as I can also get a novel for keira, a cooking book for me, socks for school, presents for a kids birthday party and more.

I was given the chance to spend $100 in the baby and kids section of Big W and it was easy to get some clothes that suit my style and budget. I often get asked how do I dress a family of 7 and where I shop. And I shop at a few places because I do buy a lot of clothes for the little ones but I don’t have unlimited funds. So I’ll let you in on a few of my secrets that keep my family looking well dressed and save me money too (which is important when you’re married to an accountant…and a saver!).

You will never fail with navy because it’s such a great classic colour. It holds up well in terms of style and wear so it can always be passed down to the next little person. And I love passing things down to the next little person in this family! I have a lot of navy in my own wardrobe too as it’s just such a great colour.

Girls will always look pretty in florals so they are a great buy and go well with clothes in solid colours! This cute t-shirt from the baby section at Big W makes a perfect match with these cute coral jeans which I picked up for $7 in the kids section. Plus I just adore a little hand knit or cotton cardigan over florals. Love.

Always have a few things that are just for parties, church and special occasions. These clothes don’t go to preschool, playgroup or around the house. If you can do this then you’ll always look fabulous at special occasions. And if something good gets worn to preschool then just cross your fingers it’s not painting day.

I keep the licensed gear for undies, socks and PJs (Finn has a thing for Ben 10!) as it dates so quickly and chances are the next little person won’t be a fan and it could be a few years between your babies!

You can still have a bit of fun with colour. These coral shorts and striped t-shirt will be perfect for the beach, playdates and playgroup!

Polo shirts are brilliant for boys (and girls) as they are no iron and look smart for going out. They also wash and wear really well. I’m a big fan of the polo shirt. Big!

You can’t beat Bonds for jumpsuits and PJs and they always bring out new styles, colours and designs each season! Oh and they are priced really well.

I also try to keep to my preppy style for boys and pretty styles for girls when I make purchases so that they go with what is in the wardrobe at home. It also just makes it faster to choose clothes when I’m out and about. Gone are the days when I’d just wander around the shops looking at clothes. It’s all about the in and out shop and I took advantage of the 7pm closing time at my nearest Big W to pick out these clothes last week.

So I think you can see from these pics that I chose to spend my $100 well. I came home with 4 outfits and didn’t compromise on style! You can find all of these outfits at your local Big W and they are available in the current baby & kids sale that runs from 8th August until the 17th!

And it wouldn’t be any fun if I didn’t get to share a $100 challenge with you. I have 3 x $100 Big W gift cards to give away. Just tell me what you’d buy for your little ones or perhaps why you love Big W for babies.

I’ll pick 3 lucky winners next Friday 23rd August. Full terms of my giveaways are here and this giveaway is open to my Australian readers only.

and with that emerson would like to say bye bye as we climb the stairs and head off for his afternoon nap.

knitting progress

There hasn’t been much in the knitting department lately. I do have 2 projects on the go at the moment……………..but progress is slow. I’ve been doing the bands on this little raglan sleeve cardigan for a baby. Not my baby, you haven’t missed any news, but my favourite zumba teacher and I better get it finished soon!

Mind you I haven’t managed to fit a zumba class into my schedule lately. Retro daddy and I are hoping to add an exercise bike and rowing machine and create a little home gym here at home with the x-trainer and treadmill as that really is the best way for me to squeeze any exercise into my day….but I actually don’t think I’ve done any exercise since last summer.

The pattern is a fabulous one but makes me appreciate seamless knits and knitting in the round because each piece of this cardigan is knit separately. This had the advantage of each piece being rather quick to knit but there are lots of ends and picking up of stitches but it’s really worth it because when it is all finished it looks perfect. The raglan sleeve pattern is from one of my all time fave knitting books, Debbie Bliss Baby Knits for Beginners. The wool is Bendigo Woollen Mills (no surprises there) Allegro (sadly discontinued but see if anyone is destashing on ravelry) and it’s come up beautifully so far.

And then there is the kina for keira which will probably end up going on tillie at the rate I’m going. I’ve just lost the motivation with this one but am kind of hoping to get it done before summer. Everything is crossed…..I’m knitting this in a size 6 in Bendigo 8 ply cotton on 3.75mm needles as the cotton does tend to lose it’s shape a tad.

And that’s the knitting!

I made the front cover

Here I am posing on the front cover of the latest IKEA catalogue which comes out next week………….but I’m not really on the front cover, this is just a clever backdrop that I had my photo taken in front of!

Last night I was out for the launch of the new catalogue which I took as a great opportunity to go shopping…………I mean a night without kids at Ikea doesn’t happen very often! And hot tip, they are open till 9pm so shopping at night means no queues….I can’t guarantee you won’t lose your husband or have an argument over something but it was a great time to shop!

The new kitchens look fabulous and I was very impressed to find taps, handles, pulls, light fittings and blinds that are all hamptons style………..I may or may not have ducked out of the official tour of the kitchens to find my favourites and go shopping. Shhhhhh.

and funniest photo of the night would be me when I realised I didn’t want my name tag in the photo and I went to take it off!

how the twins spent their birthday

Oops I realised that I had forgotten to share some cute photos from the twins birthday! We had such a great day without a party but I have promised them a big party next year when they’ll be at big school and of course I’ll have to invite everyone in the class or have 50 million kids running around……mind you I get good practice with lots of kids running around without having to invite anyone over these days.

The twins were up early for birthday hugs and telling each other that they were definitely taller! Then they had some very important business to do spending birthday money and having a happy meal and some ben & jerry’s. All those special treats that we just don’t do very often. I say this because a trip for ice cream for 7 people is no cheap outing plus there is the sugar high. So ice creams to finish off a fun outing with daddy were a big hit

we did some birthday posing

and then when I asked them to pose together, well it kind of went like this

and when asked to kiss each other?

The cakes I blogged about here………….we gave everyone a chance to blow out the candles……………some especially cute little people like elodie got a few goes

and that was the twins 5th birthday…..some of us enjoyed the birthday cake more than others

And I get all the fun jobs like cleaning up……………….