3 hour meatballs

Ok, last recipe for the week. Promise. Now technically the name for this recipe is Italian meatballs. But I’m calling these 3 hours meatballs because that is how long you need to set aside to make these babies. Definitely a weekend meal but so worth it. I can honestly say that this was the best pasta sauce I’ve ever had and if I had an italian nonna (and I don’t! I have a scottish grandma and an australian nana) then I’m sure she’d be proud. All the kids including elodie loved these, retro daddy just liked them and I adored them and couldn’t stop eating them. The other great thing about this recipe is that I got 2 dinners out of it. We ate ours with salad and crusty bread and the next night I reheated the sauce, added some grated cheese and mixed in spaghetti. So good.

start of the meatball sauce

This recipe comes from Monday Morning Cooking Club but I made some changes because I thought 5 onions in one dish was a bit too much!!!!!

meatballs

1kg mince

1 onion, finely chopped

2 eggs, beaten

2 slices bread made into breadcrumbs

1/4 cup water

1 bunch flat leaf parsley (or use whatever herb you have going, basil would be delicious)

sauce

about 17 roma/plum tomatoes (make sure they’re ripe)
10 cloves garlic, peeled
1/2 cup olive oil
1 onion chopped
1 1/2 cups white wine (optional, replace with stock if you prefer)
3 cups stock ( I used chicken)

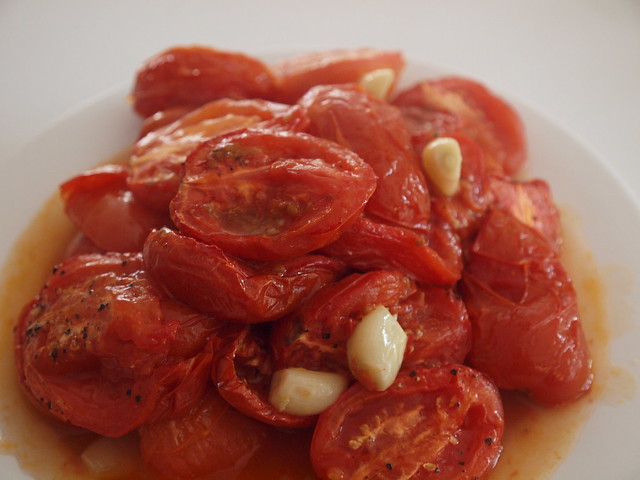
OK, first we’re going to make the sauce. Wash and halve the tomatoes and lay cut side up in a roasting dish, add in the peeled garlic cloves, pour over 1/4 cup olive oil, season well with salt and pepper and roast in 160 degree oven for 1 hours. I moved my tomatoes around a couple of times during the hour to make sure they were all cooking.


the slow roasted tomatoes + garlic

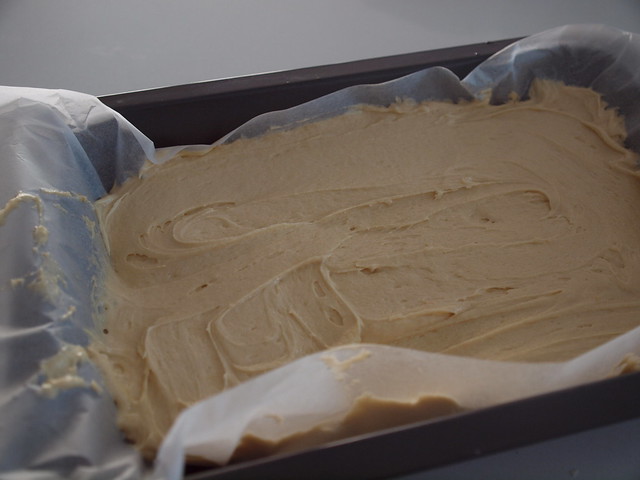
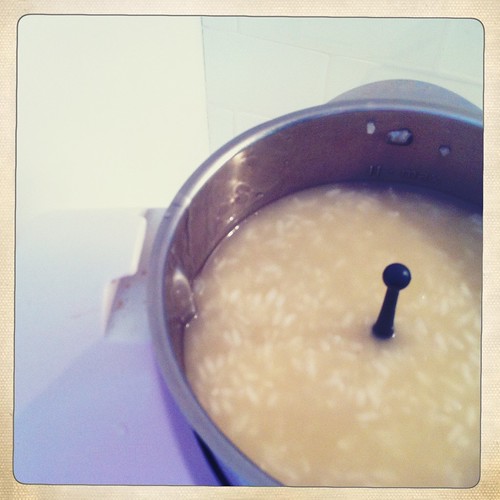
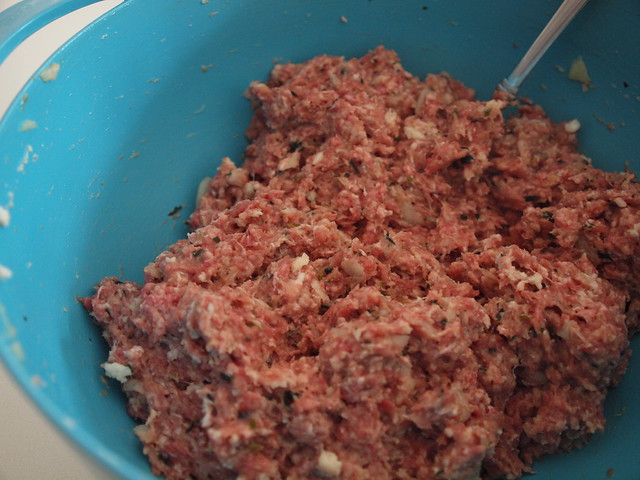
Now in a large bowl combine your mince, parsley, onion and eggs. Make the breadcrumbs from bread and soak in the water for a few minutes. Add into mince mixture, season well and set aside while you make the sauce.

the meatball mix

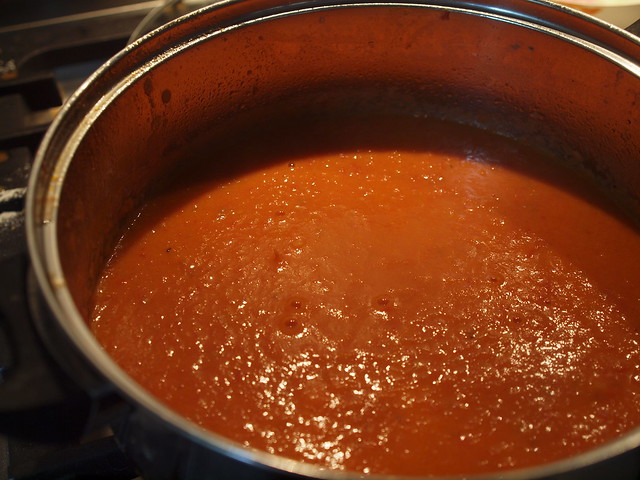
In a large saucepan cook the coarsely chopped onion in olive oil until soft. Add in the raoasted tomatoes and garlic. Add in wine and bring to boil for about 5 minutes. Add in the stock then simmer for 1 hour. Now puree your sauce with a hand stick blender or food processor. I did mine in 2 batches in the thermomix on speed 5 until completely pureed. Return the pureed sauce back to the saucepan, bring to the boil again and then simmer for 10 minutes. You want to stir it a few times. Season really well (trust me you can’t stop eating the sauce by this time).

the sauce is cooked - 2 hours later

Now your sauce is ready for meatballs. So wet your hands and roll your mince into little meatballs about the size of a walnut. You don’t want them too big. Drop them into the tomato sauce (carefully!) and bring the sauce back to the boil. Now cover the saucepan and simmer for about 30 minutes. Check that the meatballs are cooked through and serve with salad and crusty bread or spaghetti with lots of cheese.

3 hour meatballs

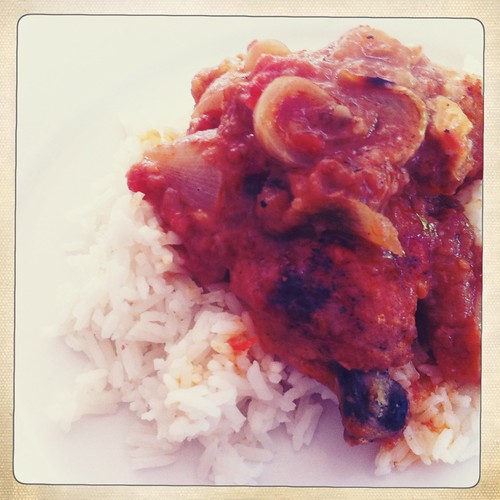
And this is what you end up. Very delicious homemade meatballs in a rich tomato sauce. I loved it with a simple salad and the crusty bread. The bread soaking up all that delicious sauce is to die for and is my preferred way to eat it whereas the kids preferred theirs with pasta. Either way I promise that you will not be disappointed and I’ll definitely be making this again soon.

red chicken

One benefit of the school holidays is that I’m not rushing around doing school pick up in the afternoon. So I’m spending a little longer in the kitchen on dinner. And everyone is enjoying the benefits since it means trying new things. And if is there is one thing my little ones love for dinner – it’s chicken. I found this recipe in Monday Morning Cooking Club and knew I had to give it a go. I had no idea how popular it would be. Finn had 3 bowls – yes 3! It’s economical, easy to make and super tasty. And once you’ve got all the condiments in your fridge and pantry then you can make it again and again.
HIP_348387913.640758

1/2 cup plain flour
1 tsp smoked or sweet paprika
2 medium chickens
oil for frying

sauce
1 Tbsp brown sugar (2Tbsp if using canned tomatoes)
1tsp tabasco
200ml tomato sauce (or 300g canned diced tomatoes)
2 tsps worcestersire sauce
1 cup water (use slightly less if using canned tomatoes)
2 tsp dijon mustard
1Tbsp soy sauce
1/2 cup white vinegar (I used apple cidar vinegar)
1 onion finely sliced

2 Chickens
Preheat the oven to 200 degrees. Cut each chicken into 6-8 pieces. Mix the flour, paprika, salt and pepper and pour over the chicken and coat the chicken well. You can do this in a bag. Heat oil in a large frying pan on high and fry your chicken. Mmmmmmm make sure it’s crispy on each side. It starts to smell good and the kids will be asking if it’s ready yet. It’s not. Now you’re not cooking your chicken completely just getting each side nice and brown and crispy.

Red Chicken

Place chicken in an ovenproof dish. Make up the sauce in a small bowl and pour all over the chicken. Cover the chicken with foil or a lid and bake for 30 minutes. Remove foil/ lid and bake a further 30 minutes. I boiled some rice during the second 30 minute cooking time. Your chicken should be cooked right through and your sauce will continue to thicken up once removed from the oven.

Red Chicken
This makes a huge dish with 12-16 pieces of chicken so you might get some leftovers…..if you’re lucky! But definitely give this a go as I know you’re going to love it.
p.s sorry for the photos! Just as I went to photograph my lovely crispy chicken I realised that my camera was out of battery!

german cherry crumble cheesecake

Well I just had a very relaxing weekend offline. I spent hours cooking, having afternoon naps, we went to the movies as one big happy family (the muppets – we loved it!) , watched a few movies at home (girl with the dragon tattoo, the girl who played with fire and dinner for shmucks), did a spot of knitting and retro daddy emptied the house of boxes of clutter and stuff as we continue to get the house ready for sale. It was a great weekend.

dessert

One of the delicious things that came out of my kitchen over the weekend  was this delicious cheesecake. But I’ve added more sugar if you have a sweet tooth. Because this was not sweet enough for me. I need sweet desserts. But Grandma betty assures me the way I made it as per the recipe was the correct way. So either way choose your sweetness level and decide how much sugar to add. The recipe is from the Everday cooking book for the Thermomix

sliced ready to eat

crumble ingredients
300g plain flour
1tsp baking powder
dash of salt
150g sugar
100g butter softened
1 egg

filling ingredients
rind 1/2 lemon
3 eggs
100g sugar (or 200g if you’re a sweet tooth like me)
1tsp vanilla essence/extract
500g ricotta cheese
30g semolina ( I just used flour)
700g jar cherries (drained)

Preheat oven to 175 degrees. Sift flour, baking powder and salt together. If you have a food processor then tip in flour mixture into bowl of processor, add in butter, sugar, egg and puse a food times until it makes a crumble mixture. In the thermomix process for 5-10 seconds on speed 6. Press 1/2 the mixture into a lined springform round tin and save the other 1/2 of the mixture for the crumble on top.

cheesecake base

To make the filling, place lemon rind in your thermomix and process for 10 seconds on speed 8 or grate the rind yourself. Add in eggs, sugar, vanilla and beat for 2 minutes on speed 4. You can do the filling mixture in our kitchen aid or thermomix or food processor. Add cheese and semolina and mix for 30-40 seconds on speed 5-6. Layer cherries on top of the cheesecake base.

cherries

Pour cheese mixture evenly on top and adjust any cherries to distribute them evenly as they tend to move once the cheese mixture goes on top. Now sprinkle the top with the leftover crumble mixture and bake for about 45 minutes in the oven.

keira the model/poser in the kitchen

 Remove from the oven and leave to cool in the tin as long as possible.

out of the oven

Don’t worry that the top of the crumble may not be really brown. Mine wasn’t but was very well cooked.

cherry crumble cheesecake

And there you have it. Serve when it’s cool then store it in the fridge and you’ve got enough cheesecake to serve quite a crowd! And it looks fancy too which I love.

the inside....mmmmm

another maternity outfit

Well the tummy is growing……and fast! So here is another maternity outfit that I’m loving. But can you believe this is the first time for as long as I can remember that I’ve worn white pants. Being big on the thighs and a pear shape means I stay away from white pants. And they aren’t that practical when you have a 1 year old with biscuit fingers pulling herself up on you. The pants are Pea in a Pod and kindly given to me by a school mum who has just had her last baby. Lucky for me she’s my height so they fit perfectly.
today's maternity outfit!
And I really like how the pants work with this top. One of my favourites when I’m pregnant. I wore this to death while pregnant with Elodie. It’s a L shirt from Trenery, not a maternity shirt but I’m usually an XS/S there so went up a few sizes and it’s great in winter too.
the bump
My birkenstocks matched perfectly and that is what I wore yesterday!

baby’s first photo

Well yesterday I saw my OB for the 1st time (well for this pregnancy since I know him, his secretaries and his offices pretty well by now) and I’m happy to report that baby number 5 is growing and doing well. I’m measuring spot on for my dates and even got a little photo of our newest addition. Awwwwww. I think little one has it’s back to me.
baby's 1st photo
I hate to tell any first time mothers out there but the nerves and worry don’t go away the more babies you have. Sometimes I can make myself feel sick in the stomach worrying if there is a heartbeat and is the baby ok and will it be ok and has anything happened since my last appointment.
keira baby
keira
But I never take anything for granted. I felt the luckiest girl in the world yesterday knowing that my baby was doing well. For those of you who haven’t been on this blog for long then let me tell you that the road to having our family hasn’t been easy. As a newlywed (I love that word) it was discovered that I didn’t ovulate and wouldn’t be able to fall pregnant on my own. For someone who wanted to fall pregnant on their honeymoon (me, not retro daddy as he wanted to wait a year) it was devastating. I took Chlomid and fell pregnant with keira on my 5th month. There were so many tests and scans in between.
I love you
the twins (tillie on the left and finn on the right)
When Keira was 6 months old we started trying again, on the 4th month we fell pregnant but a few weeks later we found out it was an ectopic pregnancy which was sadly removed with one of my tubes. Another devastating blow. I cried and cried and cried some more. The kindest words that were said to me at the time were by our priest. The gorgeous Father Jim. He said, it’s ok to go to God and be angry in prayer. It’s ok. It’s normal. That is how I felt. Why me? Why did you do this to us. I knew I wanted a large family and after that I just thought it would never happen. My OB told me that it would happen and I could easily fall pregnant with one tube. Turns out he was right.
not interested
Back on the fertility drug again and on our 3rd month we got a positive, on new years eve 2007 we found out it was twins. Some people cry in shock when they find out they are having twins. We were both overjoyed. It was the best news we could receive. If the ectopic pregnancy hadn’t happened then I wouldn’t have fallen pregnant with the twins. Then when the twins were almost 2, I just knew I wanted another baby and couldn’t bear to think about using contraception. I had a regular cycle and just left it to nature. We fell pregnant but miscarried a few weeks later. I was sad but realised that we could do this on our own. The next month I fell pregnant with Elodie.
can't stop looking at her
dear little elodie
And then look, it happened again. I love Elodie so much and when we weren’t trying or thinking about baby number 5 another little miracle came along. So you see, I don’t take anything for granted. I will always feel that I have been blessed with babies. It hasn’t been an easy journey and my heart always goes out to anyone trying for a baby because I know it’s not easy. And my journey is nothing compared to some of you. But never give up!  However it happens, whatever paths you take and however it long it will take to have a family, it will always be worth it.

apricot cake for a crowd

I love this cake so much and as I was making it yesterday I realised I hadn’t shared the recipe with you all. And I love baking in my new kitchen so much. I love that the oven is fan forced and has a light! I love that the island is so big I can spread out along it. I love how big the sink is to fit all the big bowls and dirty dishes till I’m done and ready to wash. And I love that I can look out and watch the little ones play. Those of you who can’t believe that I’m leaving my lovely new kitchen, don’t worry. I’ll be recreating something very similar in the next house.

baking in the new kitchen

Now the reason I love this cake so much is because it makes a huge cake. I use my largest baking pan and get about 20 slices from it. But I have to admit that my apricots always sink to the bottom. Maybe one day they’ll stay at the top. The recipe comes from one of my favourite cookbooks, Monday Morning Cooking Club and I share the recipe as I make it.

4 eggs

330g (1 1/2 cups sugar)

250g unsalted butter (softened)

1Tbsp vanilla extract/essence

300g (2 cups) self raising flour

large (800g) tin apricot halves

Preheat oven to 180 degrees (I do 160-170 in a fan forced oven). Line a large rectangle baking tin or laminton tin.  Seperate the eggs and beat the egg whites until stiff peaks form. I do this in my kitchen aid so I can do the rest of the cake mix in my Thermomix but you can always make the main cake mixture in the kitchen aid after your egg whites by washing out the bowl well and putting the egg whites in a separate clean bowl.

before the apricots

Now beat egg yolks, vanilla and sugar until light and creamy. I firstly place my raw sugar in the thermomix and process on speed 9 for 10 seconds and add egg yolks and vanilla and process 20 seconds speed 4. Add in butter and process for 20 seconds on speed 3. Add in the flour. I do this for 20 seconds on speed 3 and scrape down the bowl halfway if necessary. If you don’t have a thermomix, you are just creaming the butter, sugar and vanilla then adding in the sifted flour. Then I place my butter cake mixture in a large bowl and add in a large spoon of the egg whites and gently mix in. Fold in the rest of the egg whites and spoon the mixture into the lined tin. Place the drained apricots cut side up on top of your cake mix. I always have some left over which the kids eat straight away

apricots are on

Bake for about 45 minutes or so until a skewer comes out clean in the centre. Of course don’t hit an apricot or it won’t come out clean. Lift out the cake by the paper and leave to cool on a cooling rack. It’s also nice with icing sugar dusted on the top.

apricot after

 And here it is ready to serve 6 hungry little people yesterday.

but a delicious cake for morning tea

It went down really well and although I say it’s cake for a crowd. In our house it lasted one day. And I better get used to making cakes this size as our family grows.

green chicken sticks

Well it was a sharp jolt back to reality with retro daddy heading back to work yesterday. He walked in tonight after two days in Brisbane and commented that I hadn’t blogged yesterday. That would be because it’s been crazy here as little people play, then fight, then play, then someone cries, toys and rocks were thrown in the pool, someone’s room would be trashed and I mean cover the entire floor in toys, pull all the quilts and toys off their beds and clothes out of wardrobes. Then someone cries and so it goes on. So there has been zero quilting going on and yesterday was so noisy and traumatic that I took them all to an early movie this morning and a happy meal just to get them out of the house and keep them busy.
But enough of the pity party,  last week I made these delicious spiced yoghurt chicken skewers. Retro daddy, the twins and I loved them but keira told me she doesn’t eat green chicken sticks. But they were really tasty, easy and healthy so I had to share. The recipe comes from Donna Hay’s Simple Dinners with a few modifications to make it even easier.
spiced yoghurt chicken
1/4 cup fresh coriander
1/4 cup fresh flat leaf parsley
1 clove garlic
1 tsp smoked paprika or morroccan spice
1 tsp cumin
1 tsp coriander
1 cup greek yoghurt
dash of lemon juice
600g-700g chicken tenderloins
pita bread and hummus to serve
Put the coriander, parsley, peeled garlic clove, spices, lemon juice and yoghurt in your thermomix bowl and process on speed 3 or 4 for 30 seconds. Season. If you don’t have a thermomix just chuck them in your food processor and blend. If you don’t have a food processor just finely chop all your fresh herbs, crush your garlic and combine all the ingredients with a spoon. Put your chicken on a large plate/casserole dish and pour yoghurt mixture over the top. Rub it all over the chicken, cover with gladwrap and place in fridge for 10-30 minutes. Then thread 2 chicken tenderloins on each skewer (I soaked my bamboo skewers for 30 minutes beforehand) and line up under a hot grill until nice and brown. Turn them over and repeat on other side. Mine took about 15-20 minutes all up and a little tip is get your grill hot first as the second batch of skewers were so much moister. Serve with warm pita bread and hummus.
chicken skewers in the new oven

an almost finished quilt top

Well after church this morning, the best apricot danish of my life (bakery at forest way if you’re a local, wow) and taking some flowers at the cemetary, it was time for retro daddy to get back into painting more of the house. The little ones were happy to play and watch Shrek so I decided to applique the little hexagons on. I started to lose the love a little knowing I had 9 flowers to applique on with iron on webbing. They are not the easiest shape to cut out. But it wasn’t too bad. Not the best part of making the quilt. I’ll put it like that.

appliquing the little ones on

But I kept going. Determined to get them all stitched on. You’d be this happy too if you’d make all these by hand and then appliqued them on the quilt top too.

ta da!

And so that means that the quilt top is almost finished. And I love it. I’m really motivated it to get it finished this week and on a bed. Tillie’s bed since she has decided it’s hers. And then of course Keira has decided that it’s not as fancy as hers and she wants one. But I think my next hexagon project will be something a little more modest. Aka smaller.

the kids get in the act

So all I have to do is add a pink border then a white border all the way around and then I’ll be ready to quilt it. I’m excited about that. And this would be me holding it on it’s side. And not realising it.

holding it up the wrong way around
And I promise to share all the little details about fabrics used, size of hexagons and everything once it’s done. I’m on such a roll to finish it off……

2 down, 23 to go

Oh boy. I thought making the hexagons would take time. How about taking out all those papers, pressing them and appliqueing them. I’ve done 2 and can see this could take a couple of days when you factor in all of the little distractions I have here.

Another Hex Appliqued

At least clearing out my craft room this morning gave me a serious case of hayfever so I’m leaving it alone today and walking between the iron and the machine! The first hexagon I appliqued above (before I took it to the machine) I used an iron on fusible webbing which goes against the pattern but I thought would be a better way

Appliqué
But I actually prefer the softer, puffier (it’s a word!) look of the second one I did just here. I followed the pattern and pinned it down but am using blanket stitch on my machine rather than hand stitching which the pattern calls for. If you haven’t done blanket stitch yet, check out your machine stitches. It looks like a comb and is a really handy little stitch that I use a lot! Ok, well I’ll just keep going………….23 to go.
p.s the pattern is from this lovely book by Rosalie Quinlan and is featured on the cover!

the hexagons are done

When I was pregnant with Elodie (so we’re going back almost 2 years now), I decided to start a grandmothers flower garden quilt. I needed a total of 25 hexagon flowers. It seemed like a huge job that was going to take me forever.

the hexagons are done
But I’ve kept a pink tub in my sewing room and every now and then I’d pull out the pink tub and do some hexagons. I almost couldn’t believe it when I counted them all up and realised I’d finished. It seemed like I was going to be making hexagon flowers forever. And ever. And then some more.
up close
But here they are. 16 large flowers and 9 small. They will be appliqued onto squares of white fabric, the squares will be joined together and then I can get quilting.
one of my favourites
I’m hoping to get it finished and put it on a spare bed before we sell the house so I can make a pretty guest room out of what is now my craft/junk room. It’s looking like a bad episode of hoarders at the moment but everyday I’m in there and clearing out and packing up. And that feels good.

donna hay’s BLT spaghetti

Ladies, you know how it goes. You slave over a hot stove, you’re trying something different or with a few steps and you’re feeling pretty proud of yourself. And then someone comes to the table and turns their nose up at it. Well that is how last night went when I made donna hay’s BLT spaghetti. The recipe comes from her latest book, Simple Dinnners which I picked up at Big W for $20 (man I love a good buy). The book is really good and we’ve made 3 dinners from it so far in a week. I’d say that’s a good cookbook.

making the BLT spaghetti

retro daddy comes over to the island, turns his nose up ‘ Oh. I thought you were making a tomato sauce. Oh. it has little tomatoes in it’

me (unimpressed) ‘ do you know what, if you don’t want to eat it then don’t eat it. Simple. Make a salad but the kids don’t eat salad so we’re having spaghetti and I’m trying something new
And then he decides he loves it and comes back for 2nds and 3rds. so there you go. This is really really good and really easy. Not too many ingredients, super tasty, light enough for a summer meal and there were no leftovers. A sign it was a good meal. Now I’ve made mine more kiddy friendly but with basically the same ingredients but easier to serve and eat than Donna’s very fancy (but very lovely) presentation.
donna hay's BLT spaghetti
 
Prep time
Cook time
Total time
 
Easy and delicious!
Recipe type: Dinners
Serves: 4
What you'll need
  • 400g spaghetti
  • 4-6 slices bacon (rindless)
  • 250g punnet/truss cherry tomatoes
  • 250ml light pouring cream
  • handful basil leaves, torn
  • 1-2 cups of baby rocket and spinach
  • ¼ cup parmesan, grated
Instructions
  1. Bring a large saucepan of water to the boil and cook your spaghetti.
  2. While the water is boiling place bacon and tomatoes on baking sheets lined with baking paper and roast for about 15-20 minutes in a 200 degree oven.
  3. Slice bacon thickly and place into a bowl with tomatoes.
  4. Drain spaghetti and add cream and parmesan to the saucepan with the spaghetti. Mix well and add in bacon, tomatoes, basil, rocket and spinach and combine. Season well and serve with extra parmesan. So good.
  5. And have a play around with it too. I added sauteed red onion the next night and it was delicious.

Keira’s quilt

Well I think making grandma betty’s quilt has got me on a quilting roll because here is my 2nd single bed quilt that I’ve started and finished in a week. This is heading into world record territory for me.

Quilt
This time I decided to make a pretty quilt for keira since she’s moved into a bunk bed. I pulled out some red and pink fabrics and got cutting. 196 squares in total. 14 squares down by 14 across. Added a 9 inch border all the way around in white quilters muslin. She adores it. I think her face tells it all.
up on the top bunk!
she loves it
comfy
one finished quilt
I used a real mix of fabrics. Darla and Delilah (Tanya Whelan), Cherry Fizz (Henry Glass), Hoo’s in the Forest (Riley Blake), Flower Sugar (Lecien) and Colour Basics (Lecien). And I backed it in some Colour Basics too. But of course I forgot to take a pic of the back before I put it on the top bunk bed and tucked in all the edges but I’ll do that soon.
mitred corner
I also took the opportunity to photograph each step of how I do my binding on the machine now. I used to do my binding by hand but doing it on the machine has cut down my finish time by days. Weeks. So I’ll get to finishing the charm square tutorial this week. I hope you’ve been getting some craft done these holidays too.
p.s one of the lovely helpers for Quilts for Queensland has her own project helping out our Aussie soldiers serving overseas. Pop over here and see if you can help out. Jan-maree is a very generous quilter.

giveaway winners

there have been some gentle reminders I need to draw my giveaways. I’ve just finished my 2nd single bed quilt in 2 weeks so that’s my excuse:)

Winner of the Flower Sugar well I’m a softie so it had to go to Christie and her entry:

There is a family at our church that’s having a really hard year – mom and dad both lost their jobs and they’re in danger of losing their home too – so the other families at our church have been making or buying gifts for their little ones. I would use this to make dresses for their two girls.
December 17, 2011 1:42 AM

Winner of the Lecien Colour Basics is Sue who will make quilts for her 3 grand daughters 
 
and winner of the Don’t Look Now patterns (done by random.org) and entry 74 was Quilt Kitty

Phew! Well done ladies and please email me (retromummy@hotmail.com) with your addresses. I’ll be back later today with photos of Keira’s big quilt!

Chicken, lemon and herb risotto

Well it’s been a while since I’ve shared a recipe and that would be because I’d been feeling so nauseous and off my usual food. Baking and cooking were not high on my list of priorities. In fact I often couldn’t make up my mind about what I wanted to eat so would eat toast for dinner. Nice. Well not really. But I’m feeling more normal now and actually started eating fruit again (about time). So here is the first new recipe of the year and it’s a good one. Instructions are for Thermomix way and the regular way.

Lemons

What you’ll need

1/2 onion

2 cloves garlic

50g/big splosh of olive oil

400g arborio rice

100-150g white wine

1L stock + 100ml water (or extra to replace wine)

25g butter

1-2 cups cooked, shredded chicken (I had roasted 2 chickens the day before!)

2 lemons, juiced

handful flatleaf parsley, chopped (or any fresh herb you like or have on hand)

Chicken And Parsley

Thermomix way

Place onion (quartered) and garlic in your TM bowl and process for 3 seconds on speed 7. Add in oil and saute 2 minutes, 100 degrees on speed 1 with the MC Off. Insert butterfly, add rice, wine (replace with stock if you don’t use wine) and saute for 2 minutes, 100 degrees, reverse and speed soft. Add stock and water and cook for 17 minutes on 100 degrees, reverse and speed soft.

Risotto In The Thermomix

risotto in the thermomix is really soupy when it’s done but finishes cooking in your thermoserve

Pour into thermoserve and add warmed chicken, herbs and butter. Put lid on and leave for 5 minutes. Add in juice to taste, season and serve. You won’t be disappointed. I went back 3 times for another bowl.

Chicken. Lemon And Herb Risotto

Old school way

Dice your onion, chop your garlic and heat your stock and water to simmering in a saucepan on your stove. In another saucepan, heat your oil and add in onion and garlic. Saute for a few minutes until soft and add in rice. Cook for 1 minute until grains are coated in oil and then add in a cup of stock. You are going to add in the stock and stir until it’s been absorbed one cup at a time. This will take up to 15-20 minutes and you need to keep watching it so that when the stock is all absorbed you add more. If you run out of stock and your rice isn’t properly cooked then just add in some boiling water. You might not need all your stock. You want the rice to have a little bite to it but be soft and have a nice risotto consistency. Not too soupy and not too dry.

Dash Of Butter

When it’s done and you’re happy with it then add in your chicken (warmed slightly), butter and herbs. Put lid on and leave for a couple of minutes until butter has melted. Add in lemon juice to taste, season and serve.

Dinner Tonight

Thank me later. This is so good. My kids (and retro daddy) didn’t like too much lemon on it but I loved plenty of lemon juice on mine. To make it vegetarian just leave out the chicken. Too easy.

happy new year and a look back

Happy New Year everyone. I hope you had a great night. For the first time in a very long time (i.e. before children) we braved the fireworks last night. And it was lovely. We parked the car and walked down to Forty Baskets beach which looks onto Manly. With chips and lollies to keep little people entertained we had a lovely time. And I think we’ll do it again
P1018616
And I always like to look back on the year that was. But 2011 was always going to be a bad year. I was kind of avoiding doing a year in review post because it brings back all the bad memories of how the year started and my mum deteriorating so fast and then passing away. I don’t think anything comes close to the loss of a close loved one. You just can’t bring them back or make everything better. But we have all of our memories and I have a strong faith that she is in a better place looking down on us.
smile
And somehow we have made it through the year and so many things happened! Keira started school and turned out to be quite the star student that I hoped she would be.
posing

Elodie turned 1
singing happy birthday
the twins turned 3 
HIP_335151167.546862
and Keira turned 5.
the cake
I got a makeover! You can watch it here
we finally got a new car
the bus
and we finally renovated our kitchen (and yes it was an expensive year around here)
day 2
I did some knitting and actually finished a few things….more than two!

the sleeves
smiling

I did some quilting (not as much as I would like to)
on keira's bed

one finished quilt for grandma betty

and with help of so many of my gorgeous readers I co-ordinated quilts for queensland and actually got them out of my house!
in afternoon sun

I did a few markets
after
I got a thermomix
thermomix helped me
I baked
yummy quiche
and I baked some more (and I joined the gym)
oh I can't get enough of these
And to finish out the year, I got pregnant. The best gift of all. And I have to thank you all for being a part of the journey! All of your comments, emails and visits always make my day. I look forward to sharing 2012 with you all……………………………………………..wishing you a safe, happy and enjoyable year ahead too.