not nesting

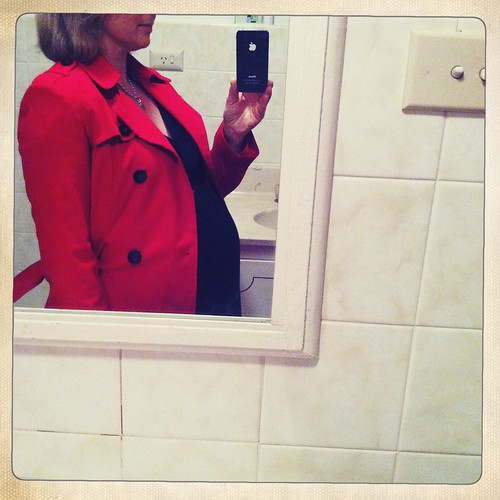
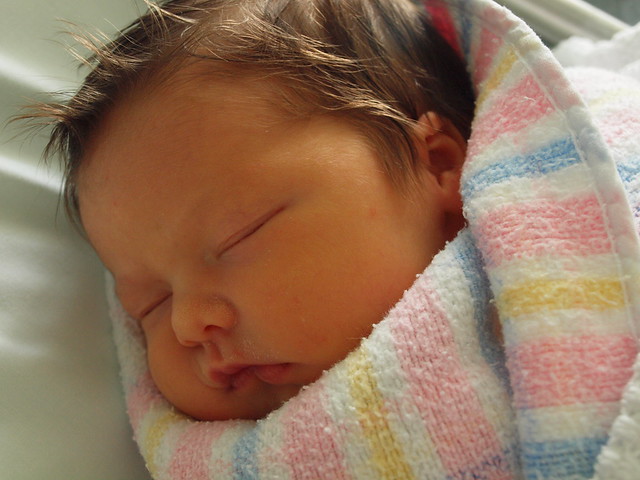
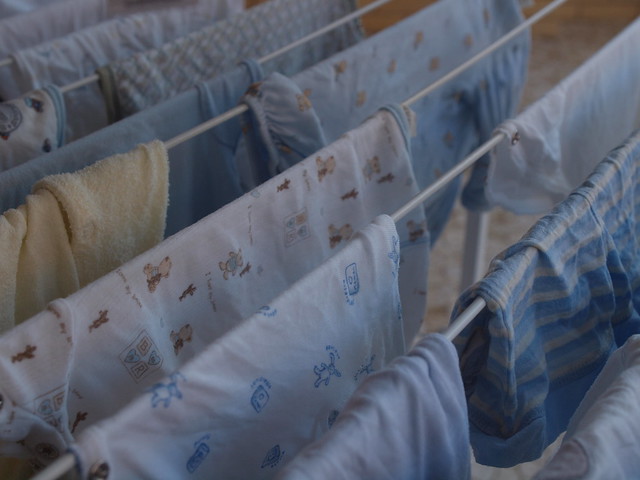
3 weeks today and a little bundle will be in my arms. Am I nesting? Um, that would be a no. I’ve decided that when I hit all the boxes that I still haven’t unpacked and clean like a crazy woman – well then I will be nesting. I have however washed and folded all of the baby clothes and put them away.

baby clothes out to dry
But the ‘to do’ list is long including cleaning up the pram, having the capsule installed, making up the basinette and organising the baby’s room, putting security gates on the stairs and making those dinners (thank you for your comments, I’m full of ideas). Even my knitting is on go slow as I run out of energy after 8.30 each night.
slow knitting progress
I’m making a sweet little pair of baby pants from MillaMia using 2 colours of baby cashmerino (the teal colour came from stash and is looking amazing). I’m sure I’ll get there……………so long as baby doesn’t come early! 

hit me with your best freezer meal

One thing I know about new babies is this – they do not like late afternoon and evening before bathtime and bed. They want to be cuddled, fed, cuddled and they like to cry for no reason. I know this because I’ve experienced it before with all my little lovelies. In fact elodie still doesn’t love this time of day and loves to sit in the kitchen while I cook dinner – and she’s not always the happiest of campers.

keeping elodie entertained
Elodie always needs a little snack to tide her over till dinnertime!
For me the first 6 weeks with a baby are the most challenging (until I had twins and realised it took a lot longer than 6 weeks for things to settle down). And I’m sure some of you are living it right now while I’m just contemplating it. And so with every pregnancy I say I will stock up my freezer with lots of healthy and delicious dinners………….and then I make about 2 and run out of time. But with 3 weeks up my sleeve, a spare fridge/freezer in the garage I think I can do more than a few meals to freeze.

meeeeeeeeeeeeemories! The twins were about 9 months old in this pic!

But all I can think of is my super quick and easy lasagne recipe here and cannelloni here and maybe a big batch of bolagnese made in the thermomix.  So help me out………….let me know your favourite meal to freeze and then reheat later that your family loves!!!!! And it might keep me from ringing Domino’s and the local chinese next month!

retro mummy’s night on the town

If there is one thing I don’t do,well it’s getting dressed up and going out for a night. So when my lovely friend Liss said let’s go to dinner and a movie in the city again I was there. It’s been 2 years since we all went out – me, liss, lorraine and chantelle. It was the first time I’d met lorraine and chantelle and let me tell you that they are even sweeter than their blogs. Yes, it’s true. We missed Chantelle last night!

36 Wks Pregnant And Ready For A Nite Out!

Keira gave me some tips to be the ‘prettiest girl at the movies’ – it involved lots and lots of makeup, my hair in ponytails with flowers and a very pretty dress with socks. I wore the only maternity dress that fits and teamed it up with my red Diana ferrari trench coat from my Westfield makeover. Donny would be proud as he believes a LBD and trench coat are the basics of any wardrobe and they really are.
The Coat Doesn't Do Up
Lorraine picked dinner and I can’t wait to share a couple of pics I took on my iphone when her review is up – I had to take a picture of her taking pictures of food. The food was amazing and very, very pretty. We then raced down George street (as fast as a pregnant lady can race) to watch ‘Jeff who lives at home’ (picked out by Liss) which is showing as part of the Sydney film festival. It’s a funny movie that is definitely great to bring your other half too……………………I’ve put the trailer here as I really had a good laugh and and want to take retro daddy to it!
And let’s hope it’s not another 2 years before I go out for a night on the town!!! Thank you ladies for such great company!

elodie’s knitted coat

Well it’s done. Nothing like a rainy saturday morning in your dressing gown to decide it’s time to finish off a little knit. And I love this little coat. Knit all in one piece starting from the hood down this pattern is a great one for making a little winter coat in no time.
modelled
The trickiest bit for me was actually doing the i-cord loops and buttons and getting them to sit evenly on the coat and I won’t win any awards for sewing them on. But for a first go I’m pretty happy with it and the buttons and loops (made in Bendigo cotton 8 ply scraps) are a perfect contrast.
ta da
The yarn came from Bendigo’s backroom and the whole coat comes in at $16 which I always like to brag to retro daddy about. Balances out all the other shopping I do for kids that isn’t so thrifty!
the back
Pattern is here, yarn from Bendigo’s backroom (stashed on ravelry here) and ravelry details on my project are all here.
finn makes her laugh
ear muffs
who needs music to have fun
cute hood
This is definitely one to add to your projects and I’ll be making it again. I’m so in love with it and it’s keeping little elodie warm so it’s win win.

lots of little baby knits

One of the nicer things I’ve been doing lately is pulling out all of my baby boy clothes and getting ready for baby. Even washing and drying them again is a cute job as it all starts to feel real that a new member of the family is arriving soon. And I’m not one to love washing and drying clothes. But baby clothes are special.

baby knits

Here are the little boy handknits I’ve pulled out so far. You can never have too many little knitted jumpers and cardigans and it means I can turn my attention to knitting a few little essentials like baby pants, socks and hats. Um, if I actually get my butt into gear and start them. My nana has knitted a lot of these for us which makes them so special.

a little cardigan knitted by nana
It’s now less than 4 weeks to go and my to do list is still long but we are all getting very excited! 

having a family fun day at home

Sponsored by Nuffnang and Yoplait

One of the great things about having a family of 6 is that there is always someone to play with at our house. We don’t have to go out to have our own fun. Which is lucky because I love days we spend at home. Even the day after Keira’s party was fun – we had leftovers, we had presents everywhere to play with and we also had some cleaning up to do. After church of course.

after the party


OK, cleaning up is not fun but my little ones are obsessed with brooms. Unfortunately they don’t share that love for the vacuum or picking up things but sweeping they love.

getting the kids working
So we pulled down decorations, we cleaned up outside, retro daddy got stuck into tidying the garage, mummy caught up on laundry, the kids swept an already clean driveway and we got busy….

twins in action

and we played lego
playing with lego outside
and elodie rode her little bike around
elodie on her little bike
and we ate some Yoplait yoghurt for morning tea
keira enjoys
tillie come and get some

and elodie found a leftover tub and decided to feed herself
elodie lets loose with yoghurt
and after all of that party food I was glad we were eating something healthy! Keira and Tillie’s favourite flavours are mixed berry and strawberry, Finn is in love with mango and has to show me the big chunks of mango in the tub and Elodie, well that girl just loves every flavour I give her.  
she loves yoghurt
For afternoon tea mummy made some muffins. Using yoghurt in baking is a great way to make a recipe healthy and there is no butter or margerine in these recipes thanks to the yoghurt. I’ve made a healthy version – Yoghurt and berry muffins and for a special treat and those of us who need a little bit of chocolate in our day – Yoghurt, white chocolate and berry muffins. The secret to these recipes is not to overmix or you’ll end up with rubbery muffins! So I’ve told you!
What you’ll need:
1 x 175g tub Yoplait vanilla yoghurt
2 eggs
2 Tbsp vegetable oil
1 cup milk
300g self raising flour
200g caster sugar
1 cup mixed berries, chopped
Combine all ingredients except the berries in your TM bowl. Process on speed 3 for 10 seconds until just combined. Scrape down sides of bowl. Add in berries and process 5 seconds on interval speed or gently combine with a spatula into your mixture. **Pour into lined muffin cases and bake for about 20 minutes in a 180 C/375 F oven. Cool on cooking rack. If you don’t have a Thermomix just combine the yoghurt, eggs, oil, sugar and milk in a bowl, sift in the flour and stir until just combined. Add in the berries and follow from **.

Yoghurt and berry muffins
yoghurt and berry muffins

For the white chocolate version just add in 1 cup of white chocolate melts with the ingredients, processing the mixture will break them up a little and add your berries and go. Now my berries were processed in my TM and a little overprocessed so chop them up yourself if you don’t want finely diced berries like mine.

yoghurt, berry and white chocolate muffins
yoghurt, white chocolate and berry muffins
I hope you enjoy these muffins and I hope you enjoy a little home time as well. Keep an eye out for the new look Yoplait yoghurt in the supermarket. we are loving it in our house

rainy day quilting

It’s a long weekend here and it’s another day of rain. Perfect excuse to stay home and unpack more boxes and get ready for baby. Except that I decided it was also perfect to start a little quilt for the new baby. Something that could over his capsule or pram as it is going to be very cold when he is born.

Rainy Day Quilting


I took one pack of Half Moon Modern charm squares and decided to do some half square triangles (HST) for the first time. I remember seeing that you could match up 2 charm squares, draw a line down the middle, sew on either side of your line and then using your rotary cutter you cut along the line and voila you have created 2 blocks. So easy. I found this very simple youtube example of how I did it!
And my 1/4 inch foot has a perfect guide which lined up with my pencil line making sewing a breeze. I really loved making these and think I could do a bigger quilt in no time too.
Making Baby's First Quilt

I plan to bake some cookies today (for energy of course) and then hope to get this quilt top finished today and sandwiched and take photos to help me  finish my How to make a Charm Square quilt tutorial….before I have this baby. I promise.

time to pack the hospital bag

Now I don’t want to brag but I like to think I’m a bit of an expert with packing the hospital bag when it’s time to have another baby. Today I’m 35 weeks and I’m usually more organised and have my bag ready but here it is done and ready to go!

my hospital bag is ready to go!

pyjamas 

I always love a new pair or four. Yes I have 4 new pairs packed in my bag – heh it’s my last baby and I’m going to look lovely in hospital. I never pack nighties because after my c/section I have to wear support stockings and trust me it is not a look I love walking down the corridor in a nightie, slippers and stockings. Some of you are thinking who cares but to me it’s a bit too much like socks and birkenstocks. I don’t go there. I love grandpa tops (button down tops) for pj tops as they are a little bit fitted and great for feeding.

love a good grandpa top

dressing gown

As an adult I didn’t have a dressing gown until I was pregnant with Keira and I was proud to say that I still wore that dressing gown. But retro daddy suggested recently that  it was looking a little ratty so I got another one. I love Sussans for their sleepwear so I stocked up there.

big pack of undies

I love a good big pack of undies in dark colours, nice and comfy (by this I mean big) and the great thing is that you can chuck them out if you need to. Because I’m in for 5 days I don’t like to give washing back to retro daddy to take home. Firstly he will have enough to do looking after 4 kids but also because we still have some ‘issues’ around separating whites and colours! Take plenty more than you need and just keep a laundry bag/plastic bag in your suitcase

maternity pads

I tend to go a bit overboard as it’s better to have more than you need and spare your hubby going out to buy some. I usually have 3  packs in my bag which more than lasts me the 5 day hospital stay

slippers

If you’re having a c/section and have to wear the support hose then remember this when packing your slippers. For some reason when I had the twins I forgot about this and bought very cute fluffy thong slippers. They looked amazing but I had to roll the support hose back off my toes to wear them and wish I had a slip on that covered my toes. Just a little thing but I learnt my lesson. Some people don’t care but I do!

maternity bras and singlets

I love love love the Bonds maternity singlets rather than maternity bras in hospital as they are soft and comfy and I much prefer  them over a bra. They cover up my huge deflated tummy and just feel nicer on and also give a bit of cover up when you’re feeding a baby. I’ll never forget though learning to feed twins the nurses would tell me to take my top off completely. I’d be sitting there without a top of any sort and visitors would come in and there I was……..exposed! I can’t imagine doing that now but anyway love the Bonds singlets and have 4 packed ready to go. They are also great to wear while pregnant so I’ve got 2 bigger sizes and 2 a smaller size (not in the cup just in the size) post baby. Totally recommend them. I buy mine at Big W and Myers.

love love love my milkbar feeding cushionn
breastfeeding cushion

I didn’t have a cushion with keira but really needed one with the twins and then got a single one for elodie. They really are great for me because I’m only a shortie and find that the height of the cushion is just perfect for me to feed and lie baby on. I love ‘milk bar’ cushions which are australian made and have a removable cover. They have a handle so you can carry it around and it’s just the perfect size for me. I kept the packaging for my twin cushion and sold it on to another twin mum when I was finished with it for a great price. I consider it an essential and much more comfortable than sitting with a few cushions under the baby.


breast pads

When I’m at home I love washable breast pads which are lacy on one side and padded and just lovely and soft (I like the Avent ones which you can pick up at Target or any baby store). But for hospital I take in disposable pads. You need them if you are staying in till your milk comes in – oh boy doesn’t that come as a shock when you wake up to 2 huge watermelons!

toiletry bag

I love my pink bag which hangs off a door and is clear inside so I can see everything. I keep everything pretty simple, my favourite shampoo and conditioner, nice body wash (nothing is as good as that first post birth shower!), tinted moisturiser, lip gloss, my Chanel Allure, hairbrush, morroccan oil and toothpaste and toothbrush. I once stood next to a new mummy with so much makeup on during a baby bathing class in the nursery and I couldn’t get over it. I don’t do makeup in the hospital but I love my tinted moisturiser (huge Garnier BB cream fan by the way) and find that is plenty. I’ve heard of people taking hair straighteners and hair dryers but I leave all that at home!

lollies

once upon a time lollies were in my bag for me but these days they are there for hairy moments when the kids get sick of being in the room!

knitting/craft/book/magazine

I like to do a bit of craft when baby is napping, I can’t sleep during quiet time in the hospital when no visitors are allowed or when I get a spare minute or two. Remember 5 days in hospital and no kids means I’m not used to it! For the knitters out there I only pack circular needles now since I had to ask my very highly regarded OB to please pick up my knitting needle off the floor as I couldn’t get out of bed yet. That was embarrassing.

camera, phone and chargers
being the one who takes photos I need to give retro daddy a quick lesson in how to use my camera each birth but he always does great. Don’t forget to have plenty of room on your camera and have your charger packed. Ditto for the phone. I also take in my laptop for a bit of blogging, reading and entertainment too when baby is sleeping and I don’t have any visitors.

hospital bag packed and ready to go

And that’s it….. my bag is packed and ready to go! And that is the wallpaper in my bedroom. Yes, really! And you were wondering why I haven’t shown you any pictures of my bedroom yet. Well that would be the reason why!

And if you have any advice to expectant mummies out there on what to pack or want to share what goes in your bag then please share………………………..like Becci reminding me to pack a going home outfit! YES! I need one for myself and something special for the little man.!

Simply Color by V&Co – a little giveaway

Ok, well the last 2 giveaway prizes are ready to post and sitting at my front door so it’s time for another little giveaway. This time a junior jelly roll from one of the latest ranges from Moda – ‘Simply Color’. This range is designed by the very talented V&Co….if you’re not familiar with her blog then you need to be. Just go here.

I ordered these junior jelly rolls because I just had to make the Bloom Quilt. So up for grabs is this sweet little junior jelly roll (it’s called Simply Color Ombre Junior Jelly Roll to be exact) and I’ll throw in the Bloom Quilt PDF pattern for the winner too. Anyone around the world can enter and just tell me why you’d like to win. Entries close this time next week (or around that time because you all know how awesome I am at drawing giveaway winners on time!).  

the easiest quiche…..ever!

So it was recently brought to my attention…..by the little people in this family…..that they are over the  frittata for dinner! They don’t want it anymore. Time for a change. So yesterday in the car when they poo poo’d the idea of frittata I said what do you want and they all wanted quiche. Oh. I didn’t really want to make pastry and I didn’t think I had everything I needed. So I decided to wing it with what I did have and got a great result. So good in fact that Keira wanted a slice for her lunch today.
You can adapt the filling as I just used what I had in the fridge but it is really delicious, really easy and makes for a perfect midweek dinner. No fancy photos for this post because I wasn’t intending to share this recipe and my camera battery was flat
easiest quiche you'll ever make
before the oven!
What you’ll need:
1-2 sheets puff pastry
3 eggs
300-400ml cream (I just used light pouring cream)
6-7 slices of ham finely sliced
handful of parsley, chopped
some frozen peas (but like I said play around with the filling)
1/2 cup grated cheese
Preheat your oven to 180 C/350F. Defrost your pastry sheets and grease a pie dish with butter. You want to grease it well so that your pastry lifts out easily when the quiche is done. Lay a sheet of puff pastry down to cover the bottom and sides of your pie dish. My dish is too big so I need an extra sheet of pastry to fill the whole dish and if you break your pastry it’s great to have extra to cover up the cracks. Fold your pastry edges in – nothing fancy is required.
hot out of the oven!
Whisk your eggs and cream together. Add in the rest of the ingredients, season well and pour over your pastry. Bake in the oven for about 30-40 minutes or until it’s golden on top and just has a teensy bit of wobble to it. Remove and leave to cool for about 5-10 minutes to make it easier to slice. Slice and serve. We just covered up the leftovers (retro daddy was away!) and packed it up in Keira’s lunchbox.

pre-baby nerves

I’d be lying if I told you all I didn’t have any nerves before the birth of our next little one. In fact I’ve been grinding my teeth at night which is always a sign that something is bothering me. The thing is that I’m not nervous about another c/section, or going into labour before my c/section like miss elodie decided she would have it. I’m not nervous about breastfeeding or recovering.
Keira on her first trip to the mall!
I’m nervous about leaving behind my little elodie – the little one who is attached to me and with me 24/7. She sleeps next to me almost every night, I carry her everywhere outside, I change all her nappies, give her every meal and am going to miss her so much. I’m worried she’ll fall down the stairs when I’m not watching her all the time or swallow a piece of lego or something else crazy that has never happened in this house before.

newborn twinnies at home

I’m a little scared about the logistics of 5 little people and the school run and day to day routine. I’m nervous about having a new nanny here once a week because our beloved nanny is going back to Brazil the very month I have the baby.

most of my twin photos were of them in their cot either awake or asleep!

But at the end of the day these are exactly the same nerves I’ve had with the birth of each baby and I survived. I did it. I fed a new baby. I threw myself straight into normal life and survived. There were hairy moments like being in David Jones trying to buy baby clothes and having little twins scream their lungs out at the same time, or one of them having a huge pooplosion when I only wanted to leave the house for a little while, or being stuck in the carpark at the mall and not being able to get the big pram back down because retro daddy had always done it and he was back at work.


those lips
Elodie at 3 days old!
So in some ways I might be having baby number 5 and seem like an expert…..but in other ways I’m a normal expectant mummy with nerves and worries just like everyone else! But I’m super excited and counting down the days until he is here……….

baked cheesecake

I’ve actually never made a baked cheesecake before. Cheesecake yes but baked no. This is a winner and I’d make it to feed a crowd or a large family because it makes so much. In fact I’m not sure we’re going to finish it all because retro daddy is on a health kick and won’t eat it (bad time to try eating healthy in this house!). If you have a thermomix AND a kitchen aid then you’ll love this recipe because you get to use both. But you don’t need either to make it and can go old school with beaters and so on.

This recipe comes from one of my favourite cookbooks, Monday Morning Cooking Club and is called South African Cheesecake. I’ve adapted it for the Thermomix!

What you’ll need:
250g packet of Marie biscuits
250g unsalted butter
6 eggs, separated
230g (1 cup) caster sugar
500g light cream cheese
250g cream cheese (the full fat stuff)
200ml cream (I use the lite version)

Now place the biscuits in your TM bowl and crush for 5 seconds on speed 9. Cube butter and place in microwave safe bowl and melt (takes me about 1- 1 1/2 minutes on high). Combine the butter and biscuits and press into a greased baking dish.

delicious base

Now you want a deep dish, the recipe calls for a 31cm x 28cm dish which I didn’t have so my cheesecake was right up to the top of the dish. See what you have in your cupboards but go big!

cream cheese and egg mixture

Now place the egg yolks in your TM bowl and process for 1 minute on speed 3 until light and creamy. Add in sugar and process for 10 seconds on speed 3. Now add the cream cheese in 250g lots and process for 10 seconds on speed 4 after each addition to make sure there are no lumps in the mixture. Slowly add in cream while processing on speed 3 for about 10 seconds.

ready to pour over the base

Now place egg whites in your kitchen aid or with beaters you want to beat until stiff peaks form. I love using my kitchen aid for this job as it just does such a good job, gets the air into the egg whites. You can do egg whites in the thermomix but I just prefer the kitchen aid for doing it and getting really stiff peaks

egg whites in the kitchen aid

Now you are going to fold in your egg whites in a few batches. You can just add it into your TM bowl but I prefer to get a big bowl, pour in my cream cheese mixture and fold in my egg whites to the big bowl in a few batches. That way you make sure you are getting the egg whites right to the bottom of your bowl.

ready for the oven

Pour this delicious mixture all over your biscuit base and bake in a 180 degree oven ( I did 350 degree F) for about 50 minutes until it’s golden brown and will still be wobbly. Don’t worry about this. Leave to cool then slice and serve at room temperature.

A few words of warning. Don’t be a little oink oink like me and cut your first piece straight out of the oven because the mixture then fills that space and you get a bit of sinking in the centre of your cheesecake. Next, don’t put foil or plastic over your dish until it has completely cooled and make sure it doesn’t touch because it will take the lovely top layer of your cheesecake off with your covering – I tried both alfoil and cling wrap to put it in the fridge till dessert and ended up putting it in uncovered for the afternoon. We’ll be having it with some passionfruit puree after dinner…..

my little helper

my helper now likes to be closer to the action!

Definitely give this one a go. It’s so easy and perfect for a family dessert or something a bit more special.

rainy day pj’s

Here are a few of my favourite things to do – go shopping for myself, get into my sewing room to actually sew and spend an afternoon in the kitchen.
cute pj's made by mummy
Today I got to do all of them on a very rainy day here in Sydney. But I should point out that shopping with all 4 children on a rainy day at the mall is not necessarily one of my favourite things to do. There were tears, whining, carry on, non stop asking for things and retro daddy asked why I didn’t just go to the shops during the week – oh so I can experience this on my own? I assured him they don’t just put it on for him! Anyway at least I came away with a few pairs of new pj’s and a dressing gown for the hospital bag! Sussans is always my go-to place when it’s time to pack the hospital bag!
sewing, moda
keira’s pj pants
Meanwhile, on the sewing front I had cut out 3 pairs of pj’s yesterday afternoon (with Elodie circling around me and drawing all over my pattern). And somehow I managed to get one pair all sewn up and finished before school pick up. This morning I finished all pairs and applique tees to match. They looked so sweet all lined up ready for little ones to wear and what I love about pj pants is how quick and satisfying they are but also how practical and affordable they are!
sewing
I couldn’t find the same pattern I used at the old house for pj’s so I used the Snug as a bug pj patterrn from Toni’s book Make it Perfect. I sew my pants slightly differently to the directions in the book (everyone has their own way to put pants together) but the pattern was great and such a good fit for the little ones. I made size 4 but just added an extra inch or two for keira so I could be lazy and just trace and cut 1 pattern.
little models
The tees are from here and are just lovely! Such good quality. Making the applique tee takes hardly any time at all and I used a cookie cutter for the girls tees and kind of made a rocket shape for Finn’s top. Not that daddy thought it looked like a rocket. The fabrics are from store stock that I am slowly listing here……. there are so many things to list but at least I have a lot of choice when it comes to my own sewing.

the pants
And a rainy day at home meant I had time to make my 3 hour meatballs. This recipe is so good and I will definitely be doing a batch to freeze before baby arrives. I had to laugh when retro daddy called from the supermarket to query 20 roma tomatoes. Yes, that’s right. 20 tomatoes please. 

HIP_360315808.381262
And after seeing Mel’s creations with her new Thermomix I thought I better try the pumpkin soup for the first time (delicious) and also the crunchie ice cream slice (which is still chilling in my freezer). A productive day on all fronts here!

And yes, you guessed it…… I’m tired now! Tomorrow I’ll probably come home from church and collapse on the couch. And that will be fine.

How to make a pink rainbow cake!

I’ve been getting a few emails and questions about the pink rainbow cake so decided to put all of of the tips and advice in the one place here. Now the first time I made the cake was here and the more improved version which I made for Keira’s birthday was here.

so proud of this cake

– use 2 butter cake packet mixes and you’ll need 5 bowls of about the same size for your mixture to be divided.

– I use Queen’s food colouring from the supermarket – Rose Pink flavour to be exact

– when colouring your cake mix leave the first bowl plain, add just a teensy bit of pink for a nice pale pink layer. I use a skewer to colour my cake mix to make sure I don’t overdo the pink colouring

– the last layer of pink cake does need quite a bit of colouring so don’t be scared of it! You want a really hot pink!

Making A Rainbow Cake

– make your cakes the night before to ice the next day and store with layers of baking paper in between. Cool the cakes when they come out of the oven on paper overyour cooling rack too to prevent lines on your cakes.

– use a smaller cake tin or a plate to trim your cakes down to the same size. It gives you nice thick edges and makes them more even in size to help with layering and icing. Each finished cake of mine was 16cm in diameter and around 2cm high.

– For my icing I use about 125g soft butter/margerine, 150g light cream cheese, 1kg-1.25kg icing sugar. In your mixer, whisk your butter and cream cheese until thick and creamy. Add in icing sugar gradually as well as a dash or two of milk as needed to get the right consistency. You want a nice thick consistency that stays on the beaters but not too thick that it takes your cake with it when you spread it. You might need to make more icing depending on how thick you are icing and using to sandwich layers.
the cake

– if you are making your icing sugar in the thermomix remember to do it in 200g batches
– place your first layer of cake (either lightest or darkest) smack bang in the centre of your cake board with a blob of icing in the centre of the cake and board to keep the bottom layer on the board.
– I don’t use anything like straws to keep my cake together and centred. I aim to spread icing at the same thickness and out to the sides to keep each level straight so that as the next layer is added it is centred on the layer before and I don’t have any toppling
– do a first ‘dirty’ layer of icing where crumbs can be seen and you aren’t too precious about it. Make sure every inch of cake is covered. Pop the cake in the fridge with this layer on and leave for at least 30 minutes until it feels hard. Now you can put your final layer of icing on and you won’t have any crumbs showing through – I learnt this thanks to my readers comments after the first cake I did.
– keep a glass of warm water and a knife handy to smooth over your icing as you go.
– Keep your cake in the fridge before you need it as it is easier to slice and get a neater finish on each slice. For a party I then divide each slice in half for the little ones to eat….if they have room!
pink rainbow cake
I hope that covers it! This is such a special cake to make and it’s really not that hard! If you still have questions just ask.

jaffa mousse

Now I won’t win Masterchef with my presentation of this mousse but if you’re after something different for family dessert then this is it. And I am a huge chocolate mousse fan and unfortunately most mousse recipes have raw eggs in them which rules them out when you’re pregnant. Including this one (which I totally forgot about) but I found an old weight watchers book which I thought I had lost years ago and this is one of my favourite recipes. It’s easy, it’s light and it tastes so good!
What you’ll need:
120g choc melts/cooking chocolate
1 can evaporated skim milk
3 eggs, separated
1 packet orange jelly (use diet jelly if you like)
Melt chocolate and half of the milk in a saucepan over a low heat until the chocolate is totally melted into the milk. Add in remaining milk, whisk and set aside.
melted chocolate and evap skim milk
chocolate melted into milk = heaven
Now whisk the chocolate and egg yolks together and put back on the stove to heat gently until the mixture thickens up and can coat the back of a spoon. Dissolve the jelly crystals into 1/3 cup of boiling water and add to the chocolate mixture. Refrigerate until it’s starting to set (this takes about 45 minutes depending on where you put it in the fridge). Now beat the egg whites until nice and stiff and fold into the chocolate jelly mixture in about 3 batches. Now you can pour it into a pretty mould if you like or just a big old regular bowl (like I did) . Whatever you’ve got going. Refrigerate until completely set, serve and enjoy! This is very popular with the little ones at our house.
jaffa mousse