I love vintage china

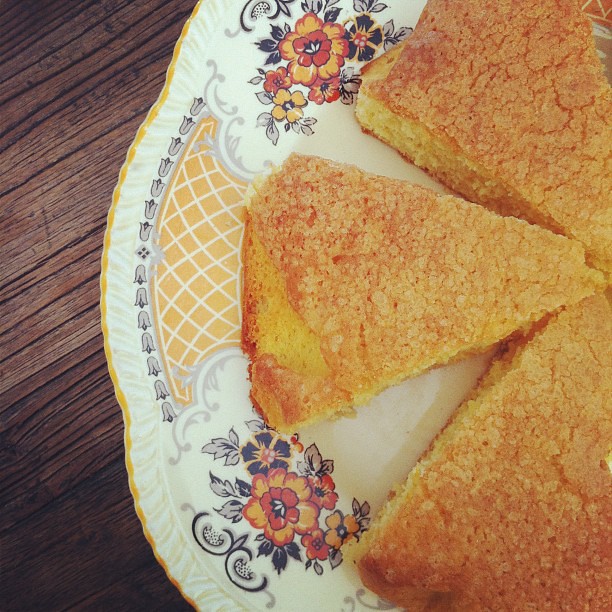
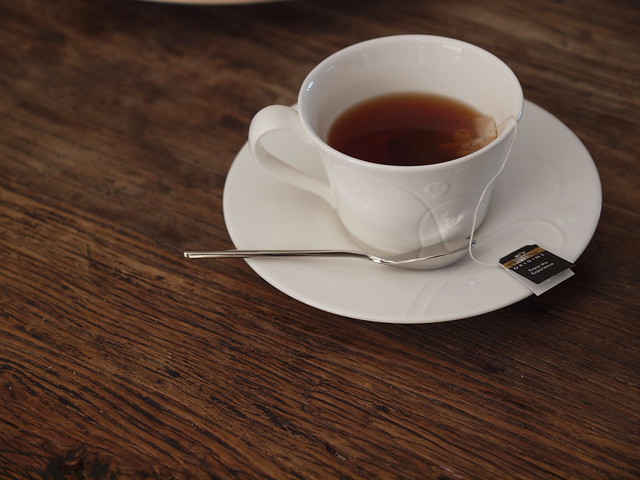
I don’t know why I love vintage plates so much. It all started after the twins were born and I was doing more baking. For my sanity and because I was always eating on the go.  I think that a cake or plate of warm cookies just looks that little bit prettier when it’s on a sweet floral plate.

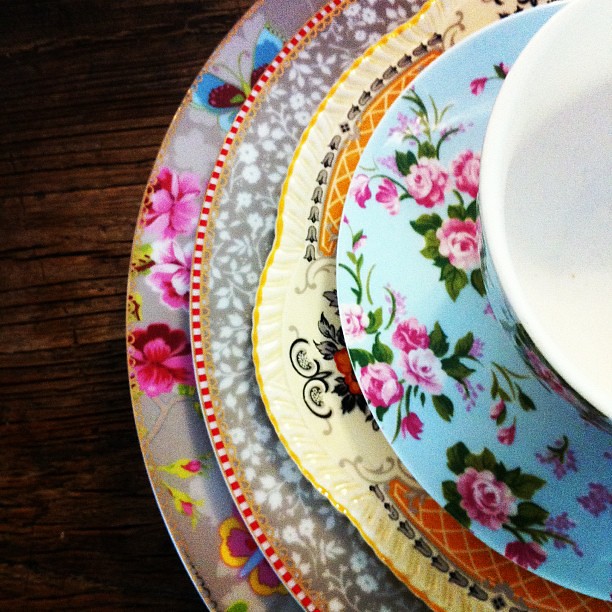
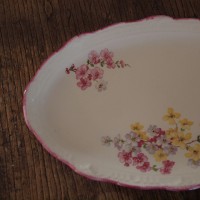
And one day while trawling the internet when the twins were babies, I discovered that there was a pottery company with my maiden name from Staffordshire. It’s no longer operating but there are lots of vintage plates for sale on the internet. So I could buy vintage plates with my name stamped on the back. I knew I’d love those plates even more. Unfortunately the quality really varies and a lot of the things for sale are showing their age with lots of crazing or cracks. But this one caught my eye.

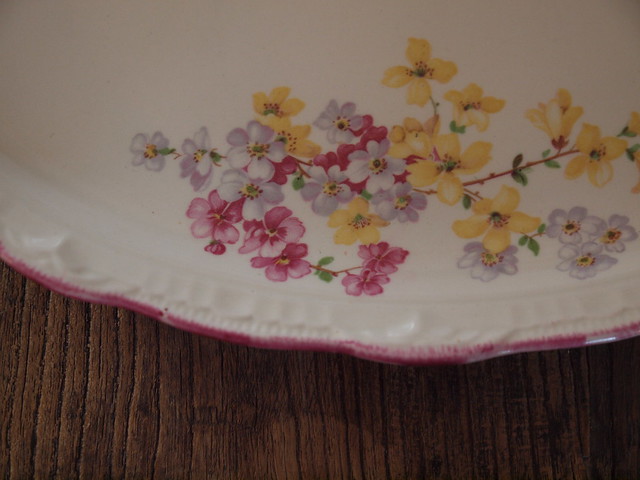
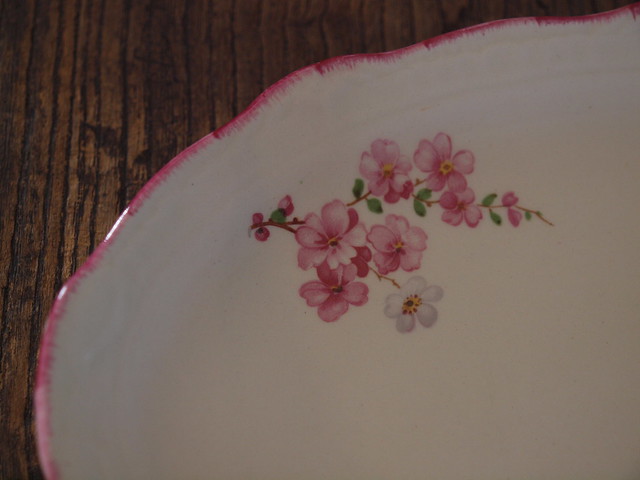
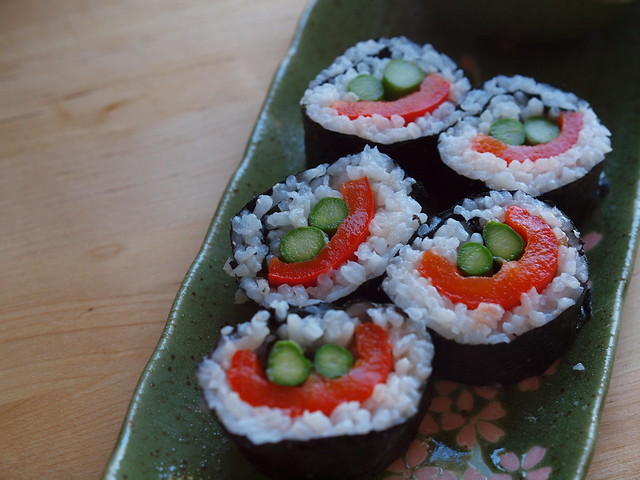
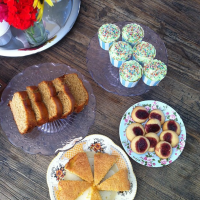
And so today my collection grew by one with the addition of this sweet plate. It’s so pretty and isn’t showing any cracks or signs of age. And since I’m going to be showing off some of my baking on it I guess I could classify it as work related? Just kidding. I do have a rule to curb my spending, I never spend more than $20 on a plate or piece of vintage china. It’s just a little rule because I have been seriously tempted by some pretty Royal Copenhagen. And I have enough expensive hobbies. But this pretty sandwich plate came in at $12. Pretty and on budget.

Tell me I’m not the only one who loves a bit of vintage china?

Pumpkin, orange and raisin loaf

I love to bake. It just makes me happy. And one of the memories I have of growing up is baking on Saturday and Sunday afternoons and taking it out to my dad who was usually in the garage or watching some sport on TV. My mum wasn’t as much of a fan of our baking because we’d make a mess. So she would always say, without fail,  just make sure you clean up. And we never really cleaned up enough but we always had fun. And it’s so nice to be starting the love of baking early in this house. This picture could have been of Keira as a little one who was always in the kitchen with me.

I have to admit that this was the first time I’ve cooked with canned pumpkin. It’s just not very Australian but I had 3 cans of the stuff in my pantry and knew I had to do something with them before they went out of date. I opened the can, took a look and a whiff and thought I’d made a huge mistake. No one is going to want to eat this recipe. And I found it hard to find a pumpkin baking recipe in all my aussie cookbooks but I’ve adapted a CWA recipe that called for 500g butter . Now trust me you won’t miss it. This is much easier and better for you and tastes delicious.

And although I was a bit scared off by the pumpkin,  once you mix in all the good stuff – butter, sugar, cinnamon, vanilla, eggs and more…… well it’s just delicious! I get it! I know why all those americans are pinning lots of pumpkin recipes.

Now I need to point out that I started this recipe in my Thermomix only to discover that it wasn’t all going to fit and moved it to my Kitchen Aid. Thermomix bowls are big but this is a huge recipe. So if you don’t have a big mixer or you want to do the whole lot in your Thermomix ,I have a few suggestions. Split the recipe in half and bake 1 loaf. Or start making the recipe with the ingredients as they are and then split the mixture in half after you’ve added the pumpkin and coconut. Continue in 2 batches before placing both in a large bowl together and mix in your raisins with a spatula. It’s up to you.


5.0 from 4 reviews
Pumpkin, orange and raisin loaf
 
Prep time
Cook time
Total time
 
A delicious treat that is great for lunchboxes or with a cuppa. This was a real hit with our family.
Author:
Recipe type: Baking
Serves: 20
What you'll need
  • 250g unsalted butter, room temperature
  • 1 cup caster sugar
  • 1 orange, rind and juice
  • a good dash of vanilla essence
  • 4 eggs
  • 425g can of pumpkin
  • 1 cup desiccated coconut
  • 1 cup raisins or sultanas
  • 1Tbsp cinnamon
  • 1 cup milk
  • 4 cups self raising flour, sifted
Instructions
  1. Place sugar and orange rind in TM bowl and process 10 seconds on speed 9. Alternatively do this in food processor or manually grate zest and add to sugar.
  2. Add in cubed butter and vanilla essence. Cream together in TM for 20-30 seconds on speed 4. You can do this in a Kitchen Aid, mixer or with a hand mixer.
  3. Add in eggs one at a time. I do this by taking out the measuring cup on my Thermomix with the machine running at speed 4.
  4. Mix well and add in the pumpkin, juice and the coconut. Process 20 seconds speed 4. At this point I moved my huge cake mixture to my Kitchen Aid.
  5. Now add in half the flour, all of the cinnamon and gently combine. I kept my Kitchen Aid on low speed.
  6. Add in the milk, combine again then add in the rest of the flour.
  7. Now you want to add your raisins and I take my bowl off the Kitchen Aid and using a spatula mix in the raisins. Dust them in flour to prevent them from sinking to the bottom.
  8. Line a loaf tin with baking paper and place half the mixture in. Spread the top over with a wet knife.
  9. Place into a preheated oven 170C/350F and bake for at least 50 minutes until a skewer or knife comes out clean. My first loaf took an hour and my 2nd 50 minutes.
  10. Increase your baking time if you are going to bake 2 loaves at the same time or put the whole mixture in one tin. It's a dense loaf so it's going to take time.
  11. Leave to cool before slicing. I couldn't wait that long so sliced off each end for myself and left it to cool on the rack.

So I knit another kina

OK, so I have this strange addiction thing and it goes like this. I buy a pattern, I knit it, I fall in love with it and make it again. And again. And before you know it I’ve just knitted the same pattern 6 or so times. Yes. That is the power of the Kina.  It’s such a sweet and easy pattern. You can do it while watching tv, it’s a no brainer and once the sleeves are done you can just sit and knit back and forth so it’s a great project to take with you when you don’t want a pattern with you too.

I made this one in Bendigo Spring Cotton. It’s knitted up beautifully and because the spring cotton has some lycra in it it keeps it’s shape beautifully and has a little spring to it. I’ve never thought about it like that – I wonder did they name it spring after the season or the springiness.

All I know is that this one was a little slower to knit because I’ve been busy getting the blog design right but I’m happy it’s done. I found some buttons in the stash, just weaved in a couple of ends and I was done. I won’t block this as it’s cute as it is and once it’s been washed for the first time I just lay out and stretch a little to shape.

pattern: Baby Kina

size: 18-24 months

yarn: Spring Cotton by Bendigo Woollen Mills 

needles: 4mm

ravelry link: here

when a tv crew comes to your house

Edited to let you know you can watch the segment here and no I’m not the hoarder guy. I’m the blonde afterwards. Just in case there was any confusion.

I like to keep it real here! Sometimes you might come here and think wow, she’s so organised or her house looks so tidy in the background. That’s because I have spots where I like to take my photos. And there is nothing wrong with shoving things away to instantly declutter a background shot.  And so yesterday afternoon I was asked would I mind if a tv crew came over to shoot a segment at our house. I said sure just give me a day. They wanted to come 9.30am. That was ok but I knew it meant some serious cleaning was in order because the cleaning lady comes in at lunchtime. And as any mummy knows, little people would conspire against me and mess up any clean area. Where is the crime scene tape when you need it to close off areas! But I got there in the end. One clean house. However in the process I totally forgot that it was my wedding anniversary today! But thankfully retro daddy totally forgot too. We’ve been talking about it up until last night and then just totally forgot this morning. Oops.

But my house looked tidy – here is my super tidy entrance which had until midnight had my mountain buggy, running shoes, bags, mail and more shoes but now looks like this……………..welcoming.

And yes the carpet still drives me crazy. My vision for this area is polished floorboards, pale grey walls with white trims, a white staircase with dark trims and a grey carpet running up the stairs.

And this is what it looked like mid filming. We had so much fun. I had to fan some money around and grin at the camera – but it made me laugh so hard that I couldn’t stop and got all teary from laughing so hard. Or when one of the  guys picked up a mannequin and was supposed to be showing me while the camera was rolling but couldn’t pick up and kept trying and I was just giggling away – thankfully out of camera – but had to compose myself to talk back to him. We even talked about that prime time tv show – animal hoarders!

Anyway, everything going to plan I should be on tonight’s edition of Today Tonight. I’ll keep you posted on my Facebook page and will be sure to share a recording of it online for those who won’t be able to watch it.

welcome to the new blog

Well hi and welcome to my new blog! To say that I love this new space is an understatement. You hope for the best when you sign up with a designer, you hope they get your style even though they’ve just ‘met’ you online. You spend hours thinking about colours and font and layout and what you want and what you don’t want. There are late nights too. And you’re not the one actually designing it. But you want to get it just right.

But it is so worth it in the end. My new blog is everything I wanted and more. It’s fresh and modern while still being a little bit retro and vintage. It’s not too fussy while still being a little bit crafty and creative. I wanted an easy layout that wasn’t too tricky for my regulars. And if you’ve come to this blog and are a little confused by the new design then just click ‘blog’ up there in the top tabs and you’ll be able to read the blog the old way. Easy.

I still have a few things to tweak here and there but I just want to start blogging again now that all of my content is here! All 5 years of it! And over 33,000 comments! A huge thank you to Courtney who made all of this possible. And was so patient. I’m not the brightest blogger on the block when it comes to wordpress, self hosting or any of that stuff but no question was too stupid. And I had some questions. Thank you! And Courtney will be back designing blogs next year……after she’s had her baby.

So I hope you like it………………..

fun asparagus sushi

this recipe was supposed to have a fancy name like asparagus and roast capsicum nori rolls. Sounds fancy, right? But as soon as I cut into the first sushi roll I realised I had made a little face in my sushi! Well that looked cute so then I added some rice under the asparagus and it really did have a little face. Cute.

sushi

Woolworths sent me a big box all wrapped up with a bow on it! The kids were jumping around like monkeys and getting so excited about what was in the box – a present for them perhaps? So you can just imagine their faces when I showed them some asparagus and hollandaise sauce in a cooler bag! Oh the disappointment! Not for me. I was going to make up a recipe using some delicious fresh asparagus that is now in season.

fresh asparagus

I put my vegetarian thinking cap on – you might not know this but I actually have a Diploma in Vegetarian cooking from the Cordon Vert cookery school in the UK. Yes. I’m one of those people that either does something 100% or doesn’t do it. So when I started attending cooking classes at the school when I lived in London I knew I had to go for the diploma. Sadly they don’t offer it anymore but it was so great to learn lots of great skills and not have to cook meat or fish which I didn’t eat at the time.

asparagus for the steamer

So you’ve probably noticed asparagus in the shops at the moment. It’s in season and is great for you as it is high in folate, Vitamin C and Vitamin B group too. I’ve included that info for the health nuts out there. OK, so my challenge was to create a recipe using asparagus and Birch & Waite’s new chilled Hollandaise sauce. And I decided that asparagus would look great in sushi and that it would be a filling and healthy meal for everyone in the family. And a meal that they would eat! We enjoy a lot of sushi here at retro mummy and it’s so easy to make yourself. In fact the hardest thing is just making the rice and leaving it to cool. And anyone can cook rice!

Here’s what you’ll need
1 bunch asparagus
2 red capsicums
1 cup sushi/short grain rice
sushi seasoning (it’s basically a vinegar with sugar in it)
nori sheets
Birch & Waite hollandaise sauce (or mayonaise will do)
soy sauce/sushi dipping sauce

Rinse and pat dry your capsicums. Place on a baking tray lined with foil and pop in a preheated oven (say 180 degrees) for about 20 -30 minutes.

red capsicums ready to roast

Turn a couple of times. You want to burn the skins on all sides so they just peel off. When they’re done take out of the oven and place in a large bowl, cover with cling film and leave for at least 10 minutes.

roasted red capsicums

 Then peel the skins off and remove the stalk and seeds. Slice thickly and set aside. This makes the capsicums beautifully sweet and delicious. It might seem like a lot of steps but it’s so worth it in the end.


peeling and deseeding

Now while your capsicums are in the oven, you are going to cook the sushi rice according to the packet or your preferred method. If you have a thermomix place the rice in the basket, rinse under cold water until the water runs clear. Place basket in TM bowl, cover with about 1L of water and cook for 19 minutes, at varoma temperature and speed 3. Turn off machine and just leave it to finish cooking for 5 minutes. Transfer to a plate, spread out and leave to cool for at least 5 minutes. When the rice is cool you are going to sprinkle over a couple of Tablespoons of sushi seasoning and mix it through with a fork or spoon on the plate.

sushi rice in the thermomix

Break off the asparagus where it wants to break (you don’t want to eat the woody bit so get rid of that end), rinse and steam your asparagus. I was sent a gorgeous steamer for asparagus which is just a little bit fancy and did a beautiful job of steaming the asparagus in 2 minutes! With your Thermomix you could just pop it in the varoma and steam for a couple of minutes while your rice is cooking. Or if you’re short on time you can microwave the asparagus for just a couple of minutes but remember to always place asparagus in cold water straight after steaming to keep the lovely green colour. You want your asparagus to have a bit of bite and not too soft. Look at my lovely cooked asparagus.

steamed asparagus

Now lay out everything you need to assemble your sushi. This is when the kids can help roll their own rolls too. And make a mess.

everything ready to go

Now, take out a sheet of nori. Place it shiny side down on your sushi mat (I’d love to show you a sushi mat but little people have been playing with it and it’s gone walkies) or down on your workspace. Wet your hands as I find that makes it all easier to handle and using your hands or the back of a spoon spread out enough sushi rice to cover a sheet of nori. Lay 2 pieces of red capsicum down on the sushi with the skin side down on the rice. Now you have 2 options. Lay the asparagus over the top or if you want to create more of a face then lay a bit of rice over the capsicum and place two asparagus stalks on top. Then drizzle the lovely hollandaise sauce over the top.

padding out the roll a bit

Roll tightly starting with the edge that is closest to you, use a little rice pressed into the nori at the end of the roll to help seal the nori. If you’re not using a mat just roll your finished roll a little to get a round shape.  Then set your roll aside for a few minutes before cutting. This just helps the nori soften and makes it easier to cut and eat. Now I like to slice my rolls using a serrated bread knife and wipe it clean on a teatowel before cutting each piece.

presentation

Now for the version in the picture above don’t put rice between your capsicum and asparagus. And if you want to make this fancier and not for little ones lay 4 pieces of capsicum down on your rice ( 2×2) and the asparagus in between so that when you roll it the asparagus is enclosed in capscisum. Fancy. And  in case you were wondering how I find the time to cook during the day – well I have helpers. Here is the behind the scenes shot!

taste testers or mess makers

and a close up of one little girl who had so much fun with the rice and sushi that she needed a bath! Once that sushi rice gets stuck in hair there is nowhere else to go but the bathtub!

chief mess maker

Thank you to Woolworths for letting me create a recipe and sending me out the goodies. It was lots of fun and I’ll be making this again soon!

young love

Yesterday I went to one of the most beautiful and heartfelt weddings I’ve ever been to. One of my younger cousins, Matt, married the love of his life, Jade. They are a young married couple by today’s standards and the love that they have for each other is something to be seen. It was beautiful.

Everything was in place for a beautiful wedding. The setting in the Hunter Valley was beautiful.An outdoor wedding with the service said by their pastor, Pastor Dan. You’d never know it was his first wedding. And from the first words of the service I knew it was going to be full of reverence and reflecting their strong faith.

beautiful

And what a lovely surprise that I knew the photographer, the very gorgeous Fe Lumsdaine! I can’t wait to see all the stunning pictures of the day!

And although I totally missed the vows because tillie had managed to run through a big puddle of mud and was howling, I did get to enjoy most of the service. Retro daddy on the other hand sat right back here with most of the little ones.

still with the kids

Emerson has a bit of a comb over going on right now! It’s pretty cute, though!

chubba chops emerson

After the service it was champagne, photos and catching up with family before heading back to where we were staying for a quick freshen up – well I’m sure some people freshened up! I changed nappies, got little people into pj’s, fed them and got them ready to be good for their daddy for a night of pizza and Despicable Me on tv. Meanwhile, retro daddy did a quick run down to the Brokenwood cellar door and made sure we were leaving the Hunter Valley with a bit of wine. You can’t visit wine country without bringing some home with you.

totally forgot to take any home

cute touch

the cake

So I got back to the reception in time and as soon as I walked in I knew that Jade had been on pinterest! The reception venue was full of handmade touches, flowers in jars, buntings, a wooden handmade sign with their married name on it – all so beautiful in the old sandstone restaurant. Perfection.

the stunning venue

flowers in jars

We enjoyed a gorgeous meal, wonderful speeches, lots of laughs and lots of lemonade for me and nana who I was sitting opposite.  Emerson was my hot date who slept almost the entire reception on me. Good boy

the married couple

 cousin nick and nana shirley

my table

And Matt’s speech blew us all away. I’ve always known Matt was wiser beyond his years but the passion in his speech and the love for Jade was just something I’ve never seen before at a wedding. We were all in tears and we wish them nothing but love and joy and lots of babies (well apparently Jade wants lots of babies) in their new life together.

champagne

first dance

I loved getting together with family and celebrating and there is something just so special in that. The sense of belonging and being a part of an extended family. And Matt is the youngest of 4 but first to get married so there may or may not have been a little speculating on the next wedding in the family……..

p.s tomorrow I’ll be back with some of my instagram photos of the day!

caramel chip cookies

today is one of those crazy days! It’s raining and freezing which makes getting all 5 little ones in and out of the car just a little bit more difficult. I then reversed out of the preschool carpark instead of driving out and hit the gutter a little fast and damaged the bumper bar (wishing it was a black bumper bar not a shiny one), I had guests coming at 10 for a blog post and didn’t have any thing to offer them for morning tea. I just knew I had to whip something up…and fast.

So I grabbed a packet of those delicious new caramel chips, read the recipe on the back of the pack, chucked it all in the trusty thermomix and got baking! I rolled up half the dough and refrigerated it and baked the half. They were still a little warm when my guests arrived……ahhhhhh, phew.

What you’ll need
125g butter, softened
3/4 (165g) brown sugar
1 egg
1 3/4 cups self raising flour (I just used plain with 1tsp baking powder)
1/2 pack of caramel chips (or chocolate or raisins or whatever is going)

Cube the butter and place in Thermomix bowl with sugar and egg. Process on speed 4 for 20 seconds, scrape down bowl and process another 10 seconds on speed 4. Add in sifted flour and process for another 20 seconds on speed 4. Remove mixture to a large bowl and tip in caramel chips, fold through the mixture evenly. Roll into balls, flatten and bake 15-20 minutes in a 170 degree oven. Now I like to refrigerate my dough so roll it into 2 logs, wrap in cling wrap for at least 1/2 an hour. Slice and bake in a 180 degrees oven for at least 20 minutes. Yum.

banana choc chip bites

Recently when I posted this recipe a reader said she likes to substitute bananas for butter and eggs in recipes. And I had 3 brown bananas in my fruit bowl so decided to try putting them in a cookie. Then I decided choc chips and coconut would be amazing and before I knew it I had a huge big bowl of cookie dough. And now that school is back these make a perfect snack…..
 
So cute


What you’ll need
3 cups oats 
3/4 cup desiccated coconut
1 cup plain flour
1 cup sugar ( I love raw caster sugar)
3 bananas, mashed
1/2 cup choc chips (or raisins, sultanas, whatever you want to add)

Combine all of the ingredients in a large bowl. At first it doesn’t look like it all goes together but get your hands in there and combine it all. It’s pretty sticky so wash your hands and then dampen them to handle the cookie dough.

No butter or eggs in this cookie dough :)

Roll mixture into small balls, flatten and bake about 20 minutes in a 180 degrees oven.

Ready for oven

Leave to cool on a cooling rack if you can last that long ( I can’t) and enjoy. These are best eaten on the same day if you want a crispy cookie otherwise next day is still good.  These won’t last too long here.

upload

Oh and this recipe makes at least 40 cookies so it’s great for big families or families with big eaters!

quick banana bread in the thermomix

Well I’m enjoying another day of school holidays here. Turns out I’m not good with dates and missed the announcement that today was a pupil free day. Thankfully I checked on the school website late last night and didn’t get everyone up and keira off to school. Phew. But we’ve had a great break from routine and I’m informed that it’s just 10 weeks till the next school holidays so that is something to look forward to.

Here we are trying to take a power walk yesterday – retro daddy was recovering from his weekend in melbourne so I had to take everyone with me instead of a nice run on my own. So he’s promised I can get that run in tonight! I could write a whole blog post on how hard it is to exercise when you have so many little people. I’ve even tried exercise dvd’s but they freak elodie out and she cries and howls at me feet if I try to move to them.

 No run for me! Walk with 5 kids while daddy recovers from yesterday

Now on my mega baking weekend I made my melt & mix banana bread in the Thermomix for the first time. It was a piece of cake. Ha ha. I know, I’m so funny. If you want the original recipe just go here. Here is the recipe for your Thermomix. It’s lovely and light and super easy to make.

Melt + mix banana bread in the thermomix

What you’ll need

2 large bananas, roughly chopped
125g butter, cubed
1Tbsp vanilla essence/extract
2 Tbsp milk
2 eggs

1 cup caster sugar
1 1/2 cups plain flour (you can use SR flour and just leave out the baking powder)
2 tsp baking powder

Preheat oven to 180 degrees. Place butter into TM bowl and melt by processing for 2 minutes on 100 degrees and speed 2. Add in banana and process for 10 seconds on speed 4 to mash it all up. Add in vanilla, milk, eggs and sugar and process for 20 seconds on speed 4. Scrape down sides of bowl once inbetween mixing. Now add in sifted flour and baking powder and process for 15 seconds until combined. You don’t want to overdo it but you do want everything combined. Scrape down sides of bowl once inbetween too as flour tends to rise up the sides when you first add it in. Pour into a lined loaf tin and bake for about 40 minutes in a 180 degrees oven.

Banana bread

When a skewer comes out clean your cake is done. Remove the cake from the tin by lifting it out by the paper and leave on cooling rack. If you love your banana bread warm just use a long serrated knife to slice it! We love this recipe and it never fails me but now that I’ve done it in the Thermomix there is no turning back now.

old fashioned orange sponge

It’s been a bumper weekend of baking here at retro mummy. Retro daddy had to go to melbourne for work and a black tie function and that left me and the little ones here at home. I think I lost myself in the kitchen and loved it. I did have a purpose, it wasn’t just to take a break from my diet. We had wanted to do something for my dad’s birthday and he didn’t want a fuss so we did a little brunch.

Diet? What diet?
 I do wonder what I’d do without my lovely dining table for photos – it is worth evey cent.
Those of you who have a Thermomix know that there is a great orange sponge cake recipe in the everyday cooking book that comes with your machine. Only thing is that it has a whopping 250g butter in each cake. Great for special occasions but not so healthy for everyday baking. So I found an old fashioned recipe for orange cake and got it going in the Thermomix. The result is a delicious and light orange cake that uses just 50g butter. Which would you prefer – I know I’ll take the 50g version anyday.
 
Citrus colours
 
 
what you’ll need
1 orange – zest and juice
1/2 Cup sugar
50g unsalted butter
1Tbsp vanilla extract/essence
1 egg
1 Cup self raising flour
1tsp baking powder
extra sugar to sprinkle on top
 
Thermomix instructions
Slice rind from the orange and place rind in your TM bowl with the sugar (I use raw sugar) and process for 10 seconds on speed 9.  
 
Orange rind and caster sugar!
 
Add in softened butter and process for 20 seconds on speed 4. Scrape down the sides of the bowl and process for another 5 seconds on speed 4. If your mixture is not looking creamy just do another 5-10 seconds on speed 4. Add in egg and process for 20 seconds on speed 4 with a scrape down of the bowl in between. You do need to stop your machine to do this:). Add orange juice and process 10 seconds, speed 4
 
upload
 
Add in sifted flour and baking powder. Process for 20 seconds on speed 4.
 
Orange sponge with 1/4 of butter of the thermomix orange sponge:)
 
Pour into a lined round cake tin (something small about 20cm is good as this is not a huge cake mix) and sprinkle sugar (I used raw sugar) over the top. About 1 to 2 Tablespoons is good. Bake for about 25 minutes in a 180 degrees oven. Pop a skewer in the centre to test it’s cooked.
 
Old fashioned orange sponge cake!!!! Only 50g butter whole cake:) so u can eat more
 
Cool the cake on a cooling rack, slice and enjoy. This was really delicious and the sugar on top makes the top of the cake deliciously crispy so that you don’t need any icing. It was a hit with everyone and makes for a great morning or afternoon tea. If you prefer lemon cake just use a lemon instead of an orange.
 
Mmmmm
 
And the birthday boy got my coffee machine up and running. Wow, such a good coffee and froth with skim milk. I paid no attention to what he did but he has written me up a guide to using it so I think I’ll be having homemade cappuccinos more often.
 
Home made cappuccino
 
And that was my sunday morning! As soon as retro daddy gets home I’ll be going off for my little afternoon run………a few too many jam drops and pieces of cake.


sewing for my girls

I really know I’m getting over the newborn days when I get to switch on my sewing machine and do a spot of sewing. I just feel normal and like my old self again when I get the chance. For anyone new here, I love to sew. I love craft full stop but I love getting the time to sit at my machine.
 
Ready for action!!!!
 
I picked it up again when keira was a baby and haven’t stopped since…………well except each time I have a new baby. Summer is a great excuse to make up some simple dresses for my girls. They don’t cost a lot of money to make, they’re easy (I avoid any girls pattern with a zipper in it) and my girls love wearing them. I do find it hard to pay $60 for a cotton dress when I can make my own  in an afternoon.
 
Elodie has a new dress! There were lots of breaks to feed Emerson, make lunch, change nappies, keep elodie entertained!
 
First cab off the rank was Elodie. I decided to make her this dress (Simplicity 5695) and make it size 2. Only trouble was that I couldn’t find the ruffle piece for the pattern so I used a ruffle from another pattern that was bigger. Anyway the whole dress turned out to be a big size 3 so we moved it on to Tillie. She was pretty happy about that and that’s the great thing about having 5 kids! Something will always fit someone in the house.
 
Might make it as a tunic too to wear over leggings
 
Perfect
 
and like all girls, Tillie needed to test out it’s ‘twirlability’. Happy to report it passed the test. She wore this dress 2 days in a row and wanted to wear it to bed. We’ve agreed to make another one in a different colour and I got it in the washing machine as fast as I could! By the way and because I know you’ll ask the fabric is Lecien Colour Basics.
 
She loves it
 
I then pulled out a modkid pattern that I had been selling at markets. Keira picked out some crazy fruit fabric and I then put it back and picked out a few fabrics I thought would work a bit better. I have to say that modkid patterns are fabulous.
 
I'm happy:)
 
Super easy to follow instructions, she leaves nothing to chance and you don’t have to wing your way through the pattern the way I often find I have to when instructions aren’t clear or the designer has used a round about way of doing something.

Pink pink and more pink

The dress came together easily and fairly quickly – except that when you have a baby on you or near you it’s not as quick. I got a little bit unstuck with my overlocker. I always use my overlocker for seams and especially when you’ve ruffled/gathered something, you have threads going everywhere and the overlocker trims them all away and you get a nice neat edge. I love using it when I do my gathered skirts. Only thing is that this is a curved skirt and I was moving too fast – I finished up with the overlocker, inspected my work only to discover I’d sewn over some of the skirt at the back. I very carefully unpicked the stitches but my worst fears came true – the cutting knife had cut right through the back and left a big hole. Bummer. That was not the word I used but you get the picture.

When your overlocker cuts the dress :( I've got a solution!

Thankfully I made my boo boo on the back piece of the apron. So I simply cut off that back piece and when I assembled the dress I just sandwiched the front apron piece inbetween my skirt front and back pieces and sewed the seams together. Ta da. You’d never know. And next time I’ll flick back the cutting knife!

Ta da!

Now this is not a pretty stylised photo of her wearing the dress because I was interrupting her playtime!!! This is the size 6 in the pattern and fits her perfectly. She loves the dress, she’d prefer it not to be in pink, but she loves it. The spotty fabric is Lecien Colour Basics and the cherry blossom fabric is Kate Spain Good Fortune. The stripy fabric was from the quilting section at Spotlight, a few years back.

upload
 
Now to make a dress for Miss elodie and I’ll be happy.

guilt free oat bites

School holidays are almost over and we’ve had such a great time. Although I’ve been trying to stick to my diet and it’s been tough. One of the hardest things has been giving up my baking. Even if I make something low fat I have a tendency to eat way too much. You know how it goes……hot out of the oven, smells so good, better test that they’re done, just one more, the best diets always start tomorrow. They are all my excuses and I have plenty more up my sleeve.
 
Love my ikea chopping trolley
this is my new ikea trolley that retro daddy put together for me. Yes, there were swear words uttered during it’s construction.
 
But I love to bake and I also need to bake. Yes, need. My little people are eating me out of house and home. They can demolish a packet of biscuits faster than I can make a cup of coffee. And I’ve been finding that the healthier muesli bars are too sweet or just don’t fill me up. So I searched the internet for how to make a cookie low fat and the answer was apple sauce.
So I got out some basics and was a little nervous about how these would turn out but the results were great. Give them a go especially if you need a little guilt free snacking. Now I know that these won’t be guilt free enough for some people because they have sugar in them, but to me these have no butter or added fats and that’s guilt free enough for me. 

Guilt free baking! Taste so good!

What you’ll need
3 cups rolled oats
1 cup plain flour
1 cup sugar (I used raw caster sugar and you could use less if you prefer)
1-2 tsp cinnamon
1 cup raisins or dried fruit ( we used craisins)
1 cup apple sauce (I used a 250g jar but you could make your own)
some chopped nuts (optional, don’t add nuts if these are for lunchboxes but we’re home and added a handful of chopped walnuts in)

 
Trying to make healthy cookies this afternoon! Own recipe creation ....

Preheat your oven to 180 degrees (I do everything on 375/400F these days because my oven is circa 1972!) Combine all of the dry ingredients first and then add in your apple sauce. Mix well. The mixture will appear too wet but you are going to pop the whole mixing bowl in the fridge for about 20-30 minutes. This makes it easier to handle.
 
No egg or butter! Fingers crossed for baking success
 
Now remove from the fridge and roll into small balls (about a tablespoonful) and flatten on a lined cookie tray.
 
Ready for oven
 
Bake for about 15 -20 minutes until golden. Cool on tray and enjoy. These are actually best eaten hot but we had a few the next day and they tasted great. They won’t taste like your best buttery cookie but they make me feel healthy!

today I join The Remarkables

Picture this……over 6 years ago I was sitting on my couch, feet up to rest my poor fat pregnant ankles, laptop on my lap and 40 weeks pregnant with my first baby. I had been reading some knitting blogs and saw on blogger a button to create your own blog. Oh, OK I might create my own blog. Name of blog. Um. Knitter and new mum (what a mouthful). And that was the start of my blogging career. A split second decision to start a blog and share my new life as a stay at home mum.
 
bunny ears
1 week old keira
 
We had just bought our first house, we had gone from two good incomes to one, I only knew one other mum in the area but was so excited and nervous about the life ahead. All I knew was that I wasn’t returning to banking and that my dreams of being a stay at home mummy were about to come true.
 
keira's first wedding!
a mummy of one
 
Fast forward 6 years and that little family has grown to a family of 7! I still can’t quite believe that has happened (but yes, I do know how it’s happened!) and my traffic of about 3 readers per post has grown to thousands. And I’ve had over 3.5 million page views here on my retro mummy blog. Wow. That statistic is just crazy! I went from having a little knitting stash to becoming a full blown craft addict. And I receive the most beautiful emails and messages from my readers telling me how much they love my blog and then sharing their stories with me.
 
quick family portrait
the family has grown!
 
I don’t know many stay at home mummies in my area with lots of children or who love craft as much as I do or who love to bake and just be at home. But I do through my blog. I love what I have created here and it’s become a huge part of my life. I blog everyday because I love it. No one makes me do it, it’s a love of blogging and sharing.
 
mummy + her camera
I am always taking photos!
 
About 2 years ago I started working with brands and now bring in an income that makes a real difference in our household. And I love it. I never imagined that I could be doing this. When Keira was born I sold Avon, I sold Tupperware, I set up my retro mummy store selling fabric. All the while running my blog on the side and never imagining that I would be working through my blog in a few years time.

And these days I’m so busy with just raising a family and running a household that I can’t answer every email or business request that comes in. And boy do I get  a lot of requests. I need to flick it over to someone else who is more savvy and more assertive than I am. And I don’t have the time to do every request that comes in.

 
a mummy of 4
 
But gosh I’ve had some amazing opportunities come my way. I’ve been on the Today Show (sadly I didn’t get to meet Karl), I’ve been in magazines and newspapers, I’ve had a makeover and film crew follow me around Westfield for the day with the gorgeous Donny Galella and worked with some really amazing big brands.
 
behind the scenes
 
And I have to say thank you to YOU my lovely readers, some of you are old timers and some of you have just found me. Some of you have met me (aren’t you lucky) and some of you live on the other side of the world. Whoever you are and wherever you live, the only reason I get to make this announcement is because you keep coming back to read this blog and enjoy it. So, thank you. And that’s why you are the first to hear this exciting news which has been kept under wraps.
 
I first met Lorraine of The Remarkables when Emerson was about 3 weeks old and I was lucky just to get out of the house with some lip gloss and deodorant on that day and make it to our meeting on time. I was so impresed with Lorraine’s business and how it could help me going forward and also I just fell in love with Lorraine. She’s one smart lady. And so I said yes! And she then said ‘OK, well wait I still need to tell you a few more details’…….I was just a little bit too excited.
 
I’m a mummy of 5! And I wish I looked this great every day!
 
Like so many of you, my number one priority in life is my family. And I’m so happy that I now have someone like Lorraine who will help me with the business side of things and let me do what I love to do. Raise a family, do my craft, bake some cookies, take photos and blog about it. Life is good. And I pinch myself.
 
I’m so excited to announce this to you today and also so excited to be joining a group of amazing bloggers in Australia. You can find all the Remarkables here. And my only worry about joining the Remarkables? I hope I don’t get photographed standing next to another Remarkable like Hair Romance or Styling You – you know those bloggers who blog about beauty and hair and look immaculate. I still have to remember just to check my shoulder for Emerson’s throw up or call out to my girls and ask who has taken the lipgloss from mummy’s handbag the nappy bag.

And if you’re reading this and have always wanted to work with me, well you just speak to Lorraine!

Twinings Assam Bold

Sponsored by Nuffnang

Last week I held a little morning tea at my house for Twinings so that I could taste their latest tea, Assam Bold. And I think that there are a few essential ingredients for hosting a good morning (or afternoon) tea. A clean and tidy house. Check. This involved removing all clutter from the top of my dining table, piano and any other dumping grounds in the house.

 
modelling the tea box
 
Sweet treats. I sent retro daddy up to our nearest patisserie for some goodies – little petit fours and macarons. Mmmmmm so good.
 
petit fours from the patisserie
 
And I made some lemonade scones. I had never made them before and they turned out a little flat so next time I’m going to make them smaller and thicker and kiss them good luck before the go in the oven. But they tasted great and if you don’t like rubbing butter into flour then you will LOVE the recipe because it’s not messy. I also made some smoked salmon and cream cheese sandwiches on super soft white bread. Again so good.
 
 smoked salmon sandwiches, macarons, scones with the works
 
Now you’ll also need to get out your china. I love mixing things around, floral plates with my wedding china and I love having a little assortment of plates. A bit of expensive Pip studio with a vintage yellow plate that cost me $5 at a garage sale a few years ago. And a brand new white teapot purchased that morning when I realised I didn’t have one.
 
China mix n match
 
Now you’ll also need some guests. I invited my lovely neighbour Penny over who I always wave to and text and facebook but never get to really chat to. And two of my lovely friends Antonette and Belinda who I still call my kindy mums as our little ones started school together. I might have changed schools but I love that we’re all still friends. We had 12 children in total but thankfully I had retro daddy on the job in the childcare department.
 
first day of the holidays
 
And the last thing you need for a good morning or afternoon tea is some tea. And thank you to the lovely people at Twinings I’m now the envy of many with a lovely wooden tea box. It’s so lovely to look at and feel and fits lots of tea bags. 
 
loving my tea box
 
The only teas I drink are fruit teas and the only brand I drink is Twinings (and no they didn’t ask me to say that) but I find it’s the best peppermint tea around. I always need black tea on hand though for Grandma Betty. The biggest tea lover I know. I lose count of how many cups a day I make when she’s visiting. Retro daddy likes to try new flavours and actually thinks he is taking this box to work. I don’t think so.
 
a cup of tea
 
And so why was I sent this lovely box? To taste Twining’s newest tea, Assam Bold. And the good news was that all of my guests were tea lovers. Assam Bold is Twining’s strongest tea ever and you can read more about Twining’s tea strengths here. The Assam Bold is great if you need a pick me up and love your tea strong. And while it’s recommended you leave the tea bag in for at least 3-5 minutes if you don’t like your tea too strong just leave it in for a bit less. My guests enjoyed the tea and agreed it’s strong but not bitter! The strongest tea they’ve tasted. And you can still add your milk or sugar to it as well.
 
upload
 
If you’d like to win a beautiful wooden box like mine with Assam Bold just tell me your favourite tea flavour and why. I’ll pick a winner at the end of the week.  And in the meantime be sure to check out the Twinings website here as there is loads of info on their teas, picking the right one for you and you can even buy your own wooden tea chest here in their gift shop.

Competition is open to my Australian readers only and full T&C are here.