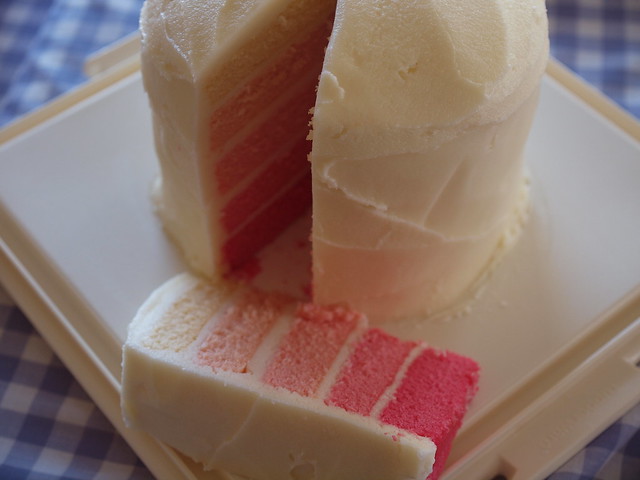
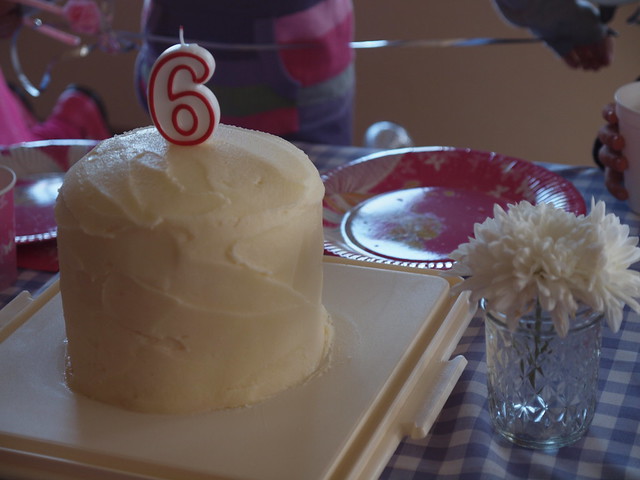
I’ve been getting a few emails and questions about the pink rainbow cake so decided to put all of of the tips and advice in the one place here. Now the first time I made the cake was here and the more improved version which I made for Keira’s birthday was here.
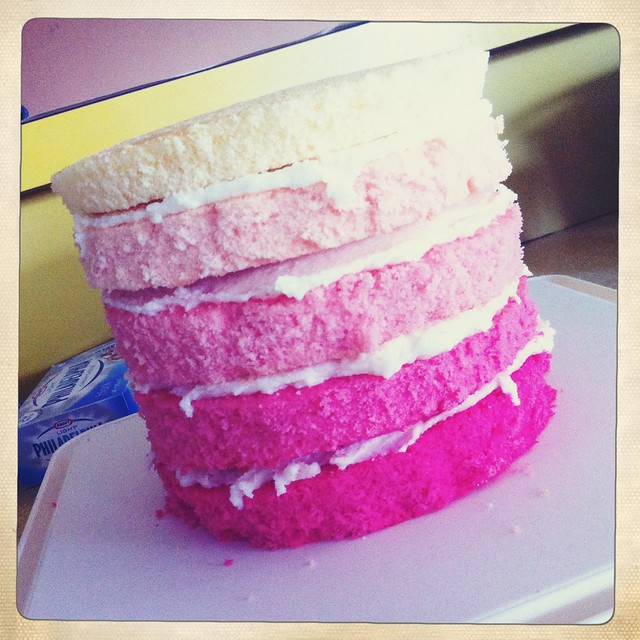
– use 2 butter cake packet mixes and you’ll need 5 bowls of about the same size for your mixture to be divided.
– I use Queen’s food colouring from the supermarket – Rose Pink flavour to be exact
– when colouring your cake mix leave the first bowl plain, add just a teensy bit of pink for a nice pale pink layer. I use a skewer to colour my cake mix to make sure I don’t overdo the pink colouring
– the last layer of pink cake does need quite a bit of colouring so don’t be scared of it! You want a really hot pink!
– make your cakes the night before to ice the next day and store with layers of baking paper in between. Cool the cakes when they come out of the oven on paper overyour cooling rack too to prevent lines on your cakes.
– use a smaller cake tin or a plate to trim your cakes down to the same size. It gives you nice thick edges and makes them more even in size to help with layering and icing. Each finished cake of mine was 16cm in diameter and around 2cm high.
– For my icing I use about 125g soft butter/margerine, 150g light cream cheese, 1kg-1.25kg icing sugar. In your mixer, whisk your butter and cream cheese until thick and creamy. Add in icing sugar gradually as well as a dash or two of milk as needed to get the right consistency. You want a nice thick consistency that stays on the beaters but not too thick that it takes your cake with it when you spread it. You might need to make more icing depending on how thick you are icing and using to sandwich layers.
– if you are making your icing sugar in the thermomix remember to do it in 200g batches
– place your first layer of cake (either lightest or darkest) smack bang in the centre of your cake board with a blob of icing in the centre of the cake and board to keep the bottom layer on the board.
– I don’t use anything like straws to keep my cake together and centred. I aim to spread icing at the same thickness and out to the sides to keep each level straight so that as the next layer is added it is centred on the layer before and I don’t have any toppling
– do a first ‘dirty’ layer of icing where crumbs can be seen and you aren’t too precious about it. Make sure every inch of cake is covered. Pop the cake in the fridge with this layer on and leave for at least 30 minutes until it feels hard. Now you can put your final layer of icing on and you won’t have any crumbs showing through – I learnt this thanks to my readers comments after the first cake I did.
– keep a glass of warm water and a knife handy to smooth over your icing as you go.
– Keep your cake in the fridge before you need it as it is easier to slice and get a neater finish on each slice. For a party I then divide each slice in half for the little ones to eat….if they have room!
I hope that covers it! This is such a special cake to make and it’s really not that hard! If you still have questions just ask.


I made a similar cake last year. I always ice my birthday cakes frozen. I freeze the cake layers first. That way you don’t get any crumbs coming off in the icing and can do it in one go. Yours looks great. I love the bright pink colour you got at the bottom. Cx
Very cool! I will have to experiment with maybe a green or blue one for my boys. Thank you for the idea and the great tips! familyfoodtravel.blogspot.ca
Love this…might have to try it one day. I’m starting a cake decorating course on Monday, so excited!
Hi Corrie, I’ve seen this idea but wasn’t keen to try, now that I’ve got all your tips I think I might – thanks!
Wow, it must be supersweet. Looks great. A good idea and I’m gonna try this in chocolate colours for my Emma’s birthday.
WOW! this looks super beautiful and yummy, great work, you’ve inspired me to try one for my little girls 2nd birthday! xxx
http://honeysmummy.blogspot.co.uk
what an awesome cake idea, its adorable, and I love the color change.
Just beautiful, will have to make for my daughters birthdays…. you must be getting close to the big day, J xx
Thank Corrie! I have decided to do it in blue for my son’s christening on Sunday so this is very timely.
Oh Corrie, that cake looks like perfection. So perfectly smooth and exactly the right shades of colour. I love it! I really need to try my hand at one of these layer cakes… instead of drooling over everybody else’s! xo
Such great tips! I would never have thought to ice the cake twice to avoid seeing the crumbs. Thank you for sharing. My 13yo daughter will love this cake so I will show her this page.
Oh wow! What a wonderful job!!!! I want to make one just for sake of making one, it looks delicious!!! I bet all the party people thought it was amazing too. You’re so clever : ))
Beautiful and yummy! My daughter and I have been inspired to make this cake ourselves. It’s really pretty! Thank you for sharing. *!*
Hi Corrie, I just made this cake for my daughters fifth birthay – inspired by this one. Thanks for sharing these tips – especially the two coats of icing – made it so much easier
What a great party, you did a fabulous job! Was all the party food pink/white, too?
So clever! Mind if I ask what was on the menu? 😉
x
I’m having trouble with a bitter taste using Rose Pink colouring – did you have any issues??
Just made this cake for my niece’s baptism on the weekend , big hit !
oh my gosh it’s wonderful and the flowers around are so perfect!!!!!!! well done!!!!!!!!!!!!!!! thank you for sharing with me, made my dayxxx