


After a busy but fun 3 days at Better Homes & Gardens Live it’s nice to be home and resting. I thought I’d share the fun bags we made in the class at the show. It was a bit of fun the first day because I thought we’d have irons and instructions so we winged it, we did the easy option for both friday and saturday and with a nice small class on sunday we did this option which I love. It’s super easy to put together. A few steps to add the contrast trim but so easy. You don’t even have to cut the fabric down if you don’t want to. Just use a fat quarter and a strip of fabric the same width and perhaps 3 inches high.
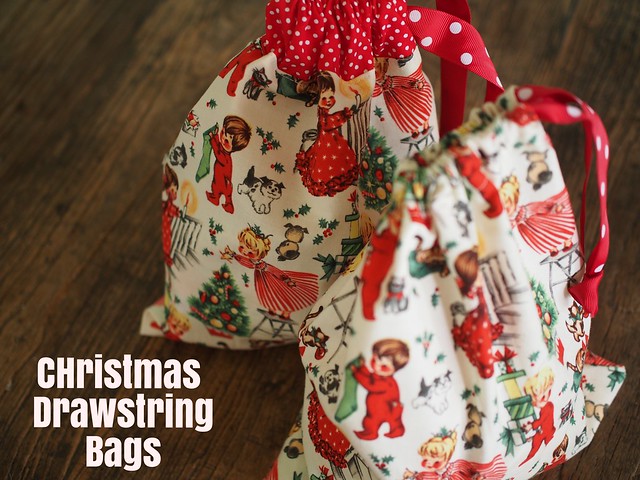
So today I’m sharing the instructions for this bag and tomorrow I’ll be sharing with you the instructions for the bag without the trim.
What you’ll need
1 fat quarter/50x55cm fabric
3 or 4 inch x 20 inch strip of fabric for contrast trim
Tape, ribbon or bias binding for ties
Scissors, pins, ruler (or rotary cutter and mat), safety pin or bodkin to thread ties
What to do
Cut one rectangle (18 inches across x 10 inch high) for the body of the bag
Cut one strip 3 or 4 inches high x 19 inches across
Sew bag seams by folding the larger rectangle right sides together and sewing side and bottom seam together. Zig zag or overlock the edges on your machine. Turn bag right side out and set aside.
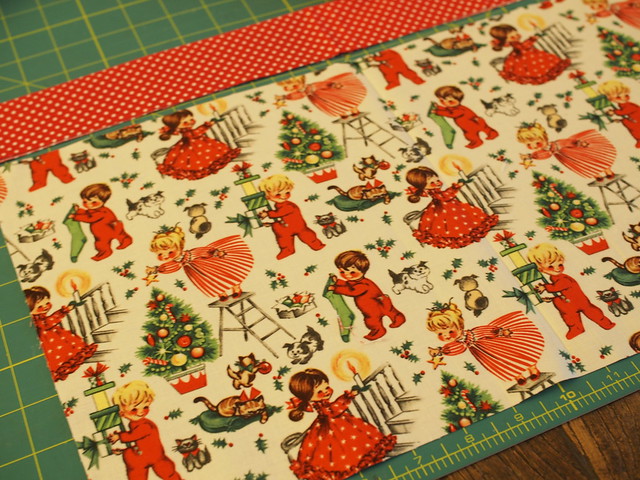
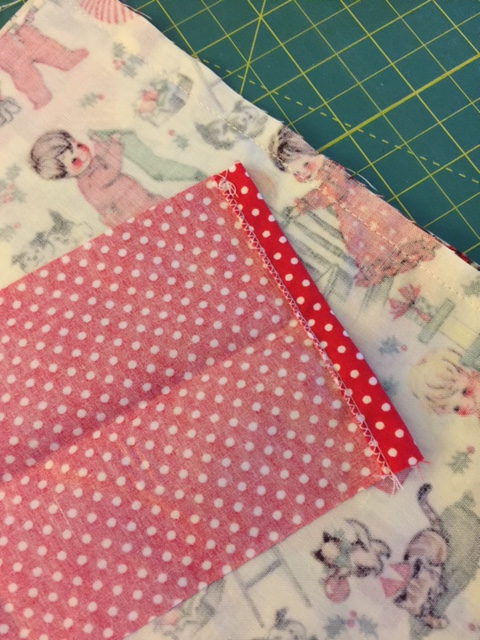
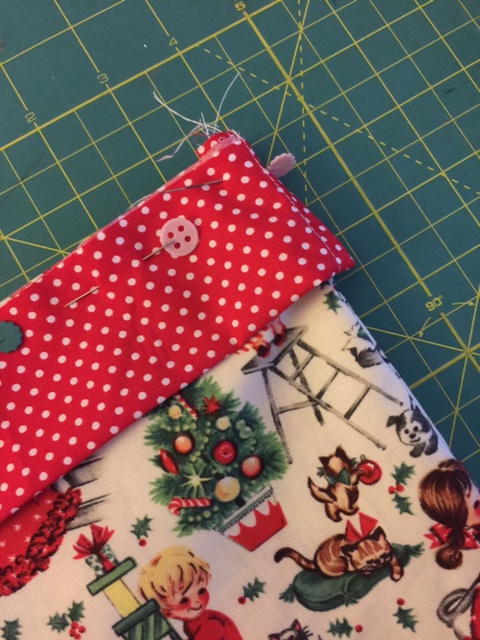
Now let’s prepare the contrasting trim. Zig zag each short end of the strip. Fold each end back until just a mm bigger than the bag. Pin each short end hem in place and take to your machine and sew a seam on each short end. Put a crease (lengthwise) in your strip of fabric as shown in the photo.
Now with raw edges of your strip and bag matching and right sides together you are going to pin around the top of the bag so that your strip is folded (wrong sides together) resting on the bag (right side out) and raw edges are matching.
Take to your machine and sew around the top of the bag making sure that you are sewing through 3 layers (2 for the trim and 1 for the bag). The seam allowance is up to you. You might do a wider seam and then overlock/zigzag your edges or a narrower seam. We will be topstitching later on.
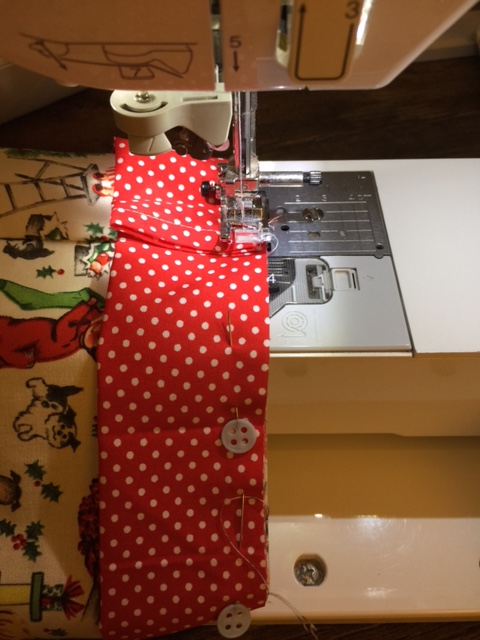
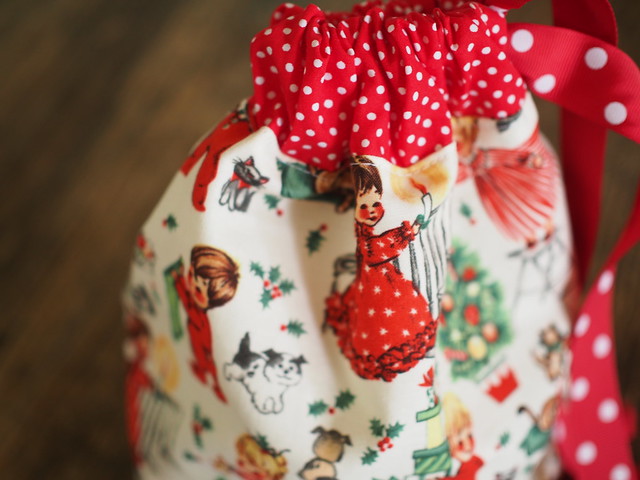
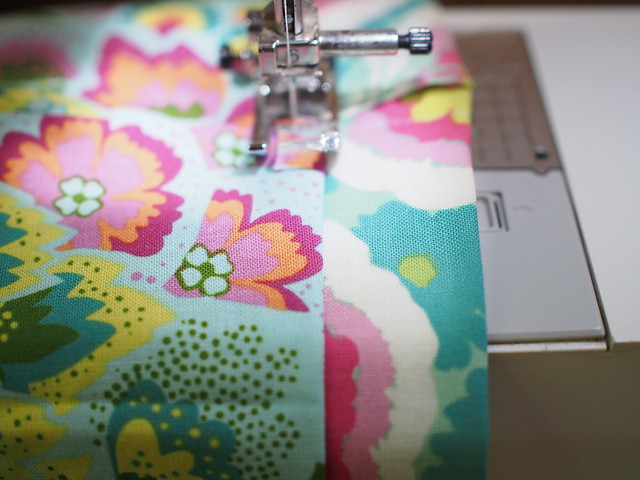
Turn your bag right sides out and press the seam into the bag. I like to topstitch on the bag (not the trim) which keeps my seams down towards the bag. Here is an example on a different bag I made but you can see what I’m doing. I line up the edge of the bag/contrast trim with the inside of the foot and sew around with a nice straight stitch. It’s a little added touch that makes the bag look nicer.
Thread your ribbon/ties through the contrast trim/casing. Tie knots at the end of your ribbon/ties and trim the excess and you are done. 1 super easy drawstring bag with trim.
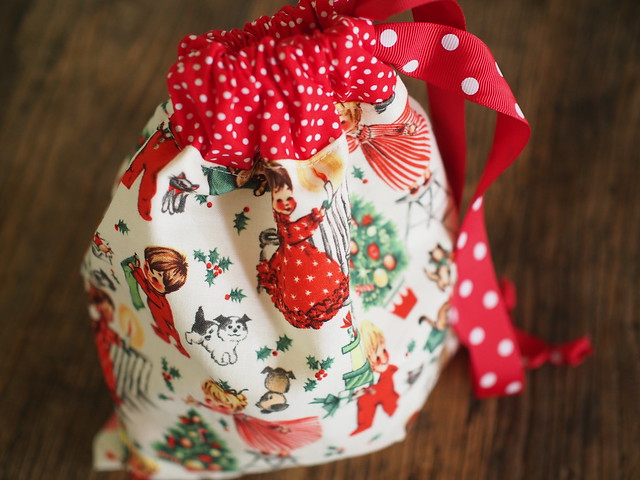
I hope you enjoyed that tutorial. I loved putting this one together because I wanted to add something special to the drawstring bags that I’ve been making and thought this would be an easy way.

Thank you for a great and simple idea. My husband’s work party is including children this year and there is a secret santa for the kids. The limit to spend is only $5 so I am pleased that I dont have to scourer through millions of things on Pinterest and simply whip up a few of these sweet little bad boys and presto I am done!
yay so glad you can use it:)
These would be really nice teachers gifts. My daughter is also doing Kris Kringle and I don’t want to spend $10 on an awful toy. I saw you at the BHG show but was too shy to say that I followed your blog. You asked if the girls had made Christmas Cards and I said Yes they already did. You looked so relaxed and I took a few pics of you helping this lady sew up an ornament. Well done and I hope you have a blessed Christmas.
I just love these